Sony PCV-MXS20 System Reference Manual - Page 57
holes on each side of the drive holder screws are provided with
 |
View all Sony PCV-MXS20 manuals
Add to My Manuals
Save this manual to your list of manuals |
Page 57 highlights
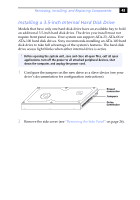
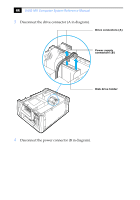
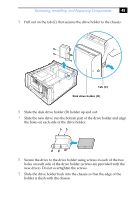
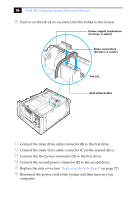
Removing, Installing, and Replacing Components 45 5 Pull out on the tab (C) that secures the drive holder to the chassis. Tab (C) Disk drive holder (D) 6 Slide the disk drive holder (D) holder up and out. 7 Slide the new drive into the bottom part of the drive holder and align the holes on each side of the drive holder. 8 Secure the drive to the drive holder using screws in each of the two holes on each side of the drive holder (screws are provided with the new drive). Do not overtighten the screws. 9 Slide the drive holder back into the chassis so that the edge of the holder is flush with the chassis.
-
 1
1 -
2
-
3
-
4
-
5
-
6
-
7
-
8
-
9
-
10
-
11
-
12
-
13
-
14
-
15
-
16
-
17
-
18
-
19
-
20
-
21
-
22
-
23
-
24
-
25
-
26
-
27
-
28
-
29
-
30
-
31
-
32
-
33
-
34
-
35
-
36
-
37
-
38
-
39
-
40
-
41
-
42
-
43
-
44
-
45
-
46
-
47
-
48
-
49
-
50
-
51
-
 52
52 -
 53
53 -
 54
54 -
 55
55 -
 56
56 -
 57
57 -
 58
58 -
 59
59 -
 60
60 -
 61
61 -
 62
62 -
63
-
64
-
65
-
66
-
67
-
68
-
69
-
70
-
71
-
72
-
73
-
74
-
75
-
76
-
77
-
78
-
79
-
80
-
81
-
82
-
83
-
84
-
85
-
86
-
87
-
88
-
89
-
90
-
91
-
92
-
93
-
94
-
95
-
96
-
97
-
98
-
99
-
100
 |
 |
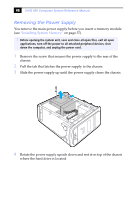
Removing, Installing, and Replacing Components
45
5
Pull out on the tab (C) that secures the drive holder to the chassis.
6
Slide the disk drive holder (D) holder up and out.
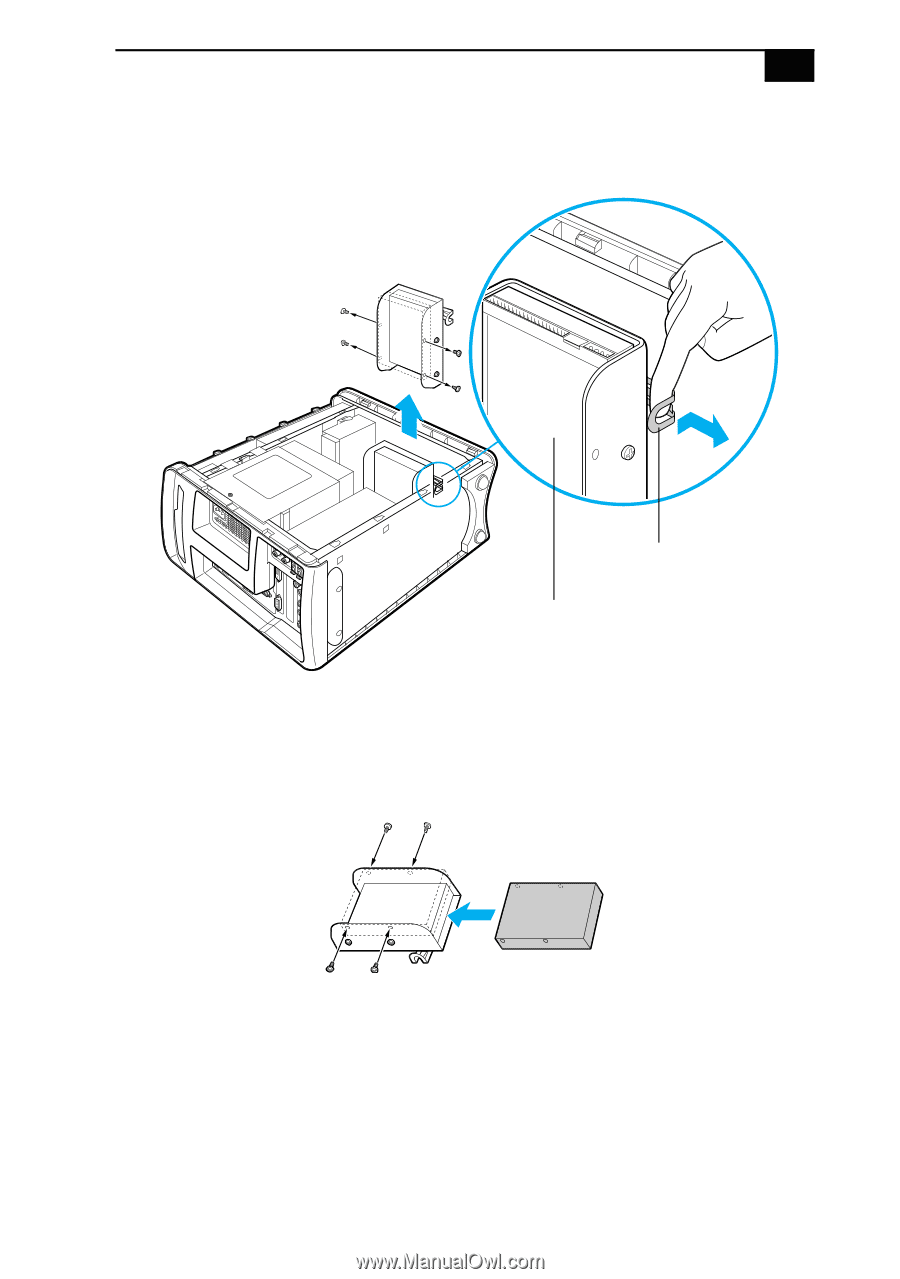
7
Slide the new drive into the bottom part of the drive holder and align
the holes on each side of the drive holder.
8
Secure the drive to the drive holder using screws in each of the two
holes on each side of the drive holder (screws are provided with the
new drive). Do not overtighten the screws.
9
Slide the drive holder back into the chassis so that the edge of the
holder is flush with the chassis.
Disk drive holder (D)
Tab (C)