Sony PCV-MXS20 System Reference Manual - Page 58
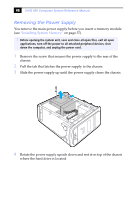
on Reconnect the power cord to the system and then turn on your
 |
View all Sony PCV-MXS20 manuals
Add to My Manuals
Save this manual to your list of manuals |
Page 58 highlights
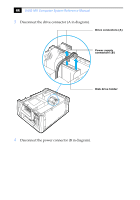
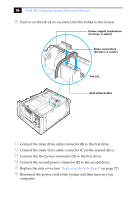
46 VAIO MX Computer System Reference Manual 10 Push in on the tab (A) to securely latch the holder to the chassis. Power supply connectors (D-inner, E-outer) Drive connectors (B-inner, C-outer) Tab (A) Disk drive holder 11 Connect the inner drive cable connector (B) to the first drive. 12 Connect the outer drive cable connector (C) to the second drive. 13 Connect the first power connector (D) to the first drive. 14 Connect the second power connector (E) to the second drive. 15 Replace the side cover (see "Replacing the Side Panel" on page 27). 16 Reconnect the power cord to the system and then turn on your computer.
-
 1
1 -
2
-
3
-
4
-
5
-
6
-
7
-
8
-
9
-
10
-
11
-
12
-
13
-
14
-
15
-
16
-
17
-
18
-
19
-
20
-
21
-
22
-
23
-
24
-
25
-
26
-
27
-
28
-
29
-
30
-
31
-
32
-
33
-
34
-
35
-
36
-
37
-
38
-
39
-
40
-
41
-
42
-
43
-
44
-
45
-
46
-
47
-
48
-
49
-
50
-
51
-
52
-
 53
53 -
 54
54 -
 55
55 -
 56
56 -
 57
57 -
 58
58 -
 59
59 -
 60
60 -
 61
61 -
 62
62 -
 63
63 -
64
-
65
-
66
-
67
-
68
-
69
-
70
-
71
-
72
-
73
-
74
-
75
-
76
-
77
-
78
-
79
-
80
-
81
-
82
-
83
-
84
-
85
-
86
-
87
-
88
-
89
-
90
-
91
-
92
-
93
-
94
-
95
-
96
-
97
-
98
-
99
-
100
 |
 |
VAIO MX Computer System Reference Manual
46
10
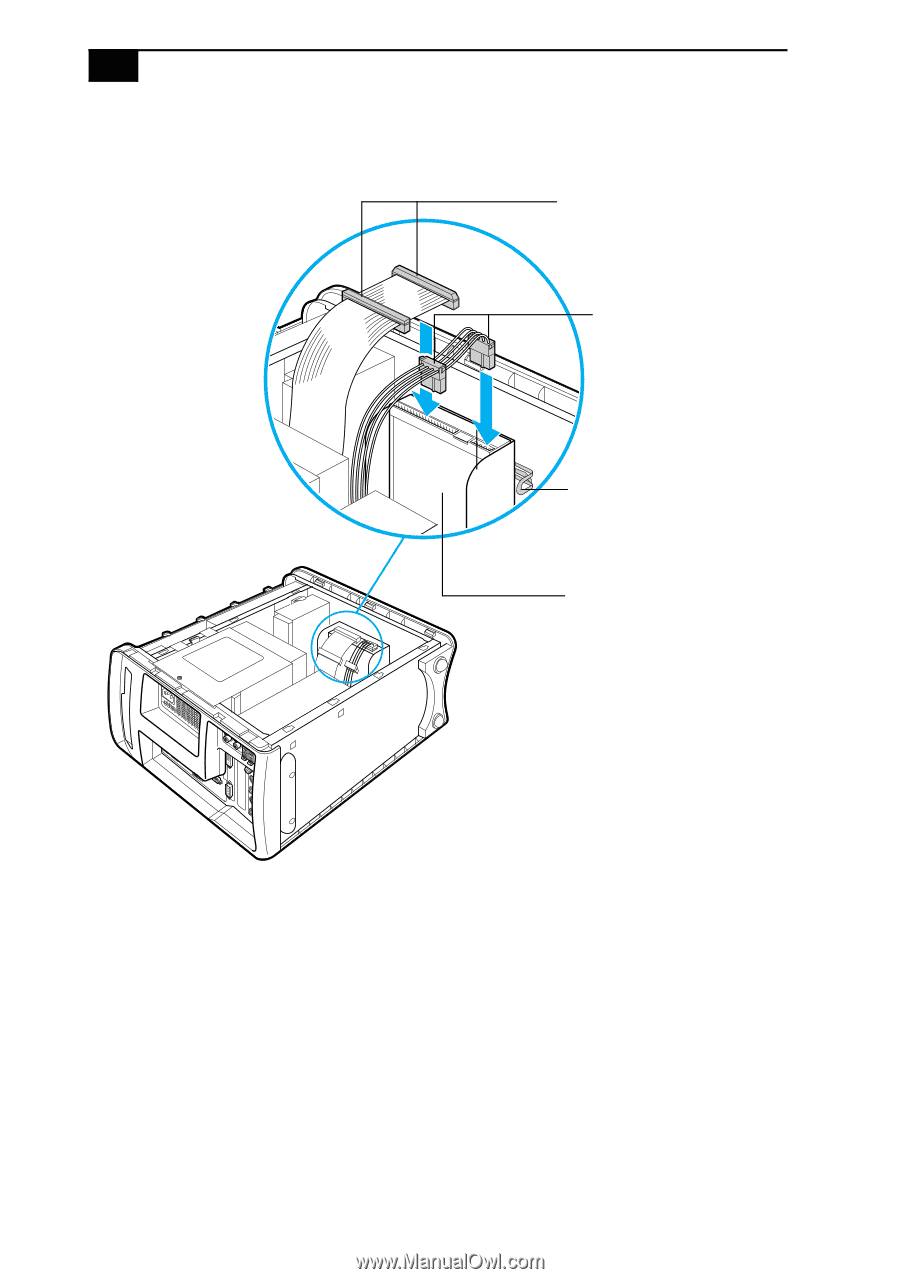
Push in on the tab (A) to securely latch the holder to the chassis.
11
Connect the inner drive cable connector (B) to the first drive.
12
Connect the outer drive cable connector (C) to the second drive.
13
Connect the first power connector (D) to the first drive.
14
Connect the second power connector (E) to the second drive.
15
Replace the side cover (see
“Replacing the Side Panel”
on page 27).
16
Reconnect the power cord to the system and then turn on your
computer.
Drive connectors
Power supply connectors
Tab (A)
Disk drive holder
(D-inner, E-outer)
(B-inner, C-outer)