Sony PEG-TG50 Read This First Operating Instructions - Page 36
Press the HotSync, Start, Programs, All Programs, handheld, Palm Desktop for, CLIÉ
 |
UPC - 027242623408
View all Sony PEG-TG50 manuals
Add to My Manuals
Save this manual to your list of manuals |
Page 36 highlights
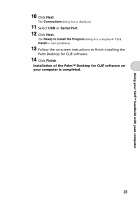
4 Press the HotSync button on the cradle. The HotSync operation between your CLIÉ handheld and computer starts. Press the HotSync button When the HotSync® operation is complete, the following screen is displayed. 5 Double-click the "Palm™ Desktop for CLIÉ" icon on the Windows desktop. You can also click Start, select Programs (All Programs in Windows XP), Sony handheld, and click Palm Desktop for CLIÉ to start the application. The Palm™ Desktop for CLIÉ software starts and the Date Book window is displayed. If you select the same date you entered the schedule for in step 2, you will see the entered schedule. Click the other icons to change to the other information screens. Click each icon at the left of the screen. 36
-
 1
1 -
2
-
3
-
4
-
5
-
6
-
7
-
8
-
9
-
10
-
11
-
12
-
13
-
14
-
15
-
16
-
17
-
18
-
19
-
20
-
21
-
22
-
23
-
24
-
25
-
26
-
27
-
28
-
29
-
30
-
 31
31 -
 32
32 -
 33
33 -
 34
34 -
 35
35 -
 36
36 -
 37
37 -
 38
38 -
 39
39 -
 40
40 -
 41
41 -
42
-
43
-
44
-
45
-
46
-
47
-
48
-
49
-
50
-
51
-
52
-
53
-
54
-
55
-
56
-
57
-
58
-
59
-
60
-
61
-
62
-
63
-
64
-
65
-
66
-
67
-
68
-
69
-
70
-
71
-
72
-
73
-
74
-
75
-
76
-
77
-
78
-
79
-
80
-
81
-
82
-
83
-
84
-
85
-
86
-
87
-
88
-
89
-
90
-
91
-
92
-
93
-
94
-
95
-
96
-
97
-
98
-
99
-
100
-
101
-
102
-
103
-
104
 |
 |

36
4
Press the HotSync
button on the cradle.
The HotSync operation between your CLIÉ handheld and computer starts.
When the HotSync
®
operation is complete,
the following screen is displayed.
5
Double-click the “Palm™ Desktop for CLIÉ” icon on the
Windows desktop.
You can also click
Start
, select
Programs
(
All Programs
in Windows XP),
Sony
handheld
, and click
Palm Desktop for
CLIÉ
to start the application. The Palm™
Desktop for CLIÉ software starts and the Date
Book window is displayed. If you select the
same date you entered the schedule for in step 2,
you will see the entered schedule.
Click the other icons to change to the other information
screens.
Click each icon at the left of the screen.
Press the HotSync
button