Sony PMWF3K Supplement - Page 6
Operating via the REMOTE Connector, Operating the Menus of the Camcorder, Camcorder
 |
View all Sony PMWF3K manuals
Add to My Manuals
Save this manual to your list of manuals |
Page 6 highlights
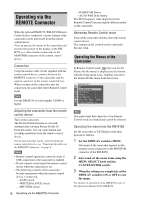
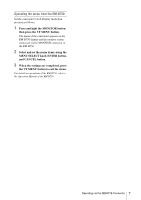
Operating via the REMOTE Connector When the optional RM-B750 / RM-B150 Remote Control Unit is connected, various settings of the camcorder can be performed from the remote control device. You can operate the menus of the camcorder and monitor the picture on the display of the RMB750 or a video monitor connected via the MONITOR connector of the remote control device. Connection Using the remote cable (10 m) supplied with the remote control device, connect between the REMOTE connector of the camcorder and the camera connector of the remote control device. When you turn on the camcorder after the connection, the camcorder enters Remote Control mode. Note Use the RM-B750 of serial number 120000 or higher. Adjusting the camcorder from the remote control device Turn on the camcorder. The Picture Profile function is activated, automatically selecting Picture Profile 10. From this status, you can control menu and recording operations from the remote control device. For the functions that can be controlled from the remote control devices, see "Functions Operable via the REMOTE Connector" on page 8. Notes • Remote control operations cannot be made if USB connection to the camcorder is enabled. • Do not connect or disconnect the remote control device when the camcorder is on. • The following controls of the camcorder become inoperative when the remote control device is connected. -GAIN switch -WHITE BALANCE switch -SHUTTER switch 6 Operating via the REMOTE Connector -BARS/CAM button -AUTO WHT BAL button The ECS frequency value displayed on the Remote Control Unit may slightly differ from that on the camcorder. Releasing Remote Control mode Turn off the camcorder and disconnect the remote control device. The settings on the controls on the camcorder become valid. Operating the Menus of the Camcorder In Remote Control mode, PP (the icon for the Picture Profile menu) is displayed at the bottom with the Setup menu icons, enabling you select the Picture Profile menu from this screen. CAMERA SET Auto Black Bal. Gain Setup Shu t t e r 00:00 S l ow Shu t t e r Color Bar Type F l i c ker Reduce PP B B B : Mul t i B B Note The menu items that cannot be set in Remote Control mode are shaded and cannot be selected. Operating the menu from the RM-B150 Set the camcorder to E-E Display mode then proceed as follows. 1 Set the DISPLAY switch to MENU. The menu of the camcorder appears on the monitor screen connected via the MONITOR connector of the RM-B150. 2 Select and set the menu items using the MENU SELECT knob and the CANCEL/ENTER switch. 3 When the settings are completed, set the DISPLAY switch to ON or OFF to exit the menu. For details on operations of the RM-B150, refer to the Operation Manual of the RM-B150.
-
 1
1 -
 2
2 -
 3
3 -
 4
4 -
 5
5 -
 6
6 -
 7
7 -
 8
8 -
 9
9 -
 10
10 -
 11
11 -
 12
12 -
13
-
14
-
15
-
16
-
17
-
18
-
19
-
20
-
21
-
22
 |
 |
