Sony RDR-HX730 Operating Instructions
Sony RDR-HX730 Manual
 |
View all Sony RDR-HX730 manuals
Add to My Manuals
Save this manual to your list of manuals |
Sony RDR-HX730 manual content summary:
- Sony RDR-HX730 | Operating Instructions - Page 1
2-679-364-11(1) DVD Recorder Operating Instructions RDR-HX730 © 2006 Sony Corporation - Sony RDR-HX730 | Operating Instructions - Page 2
in this DVD recorder is harmful to eyes, do not attempt to disassemble the cabinet. Refer servicing to instructions in the literature accompanying the appliance. Precaution Install this system so that the AC power cord can be unplugged from the wall socket immediately in the event of trouble - Sony RDR-HX730 | Operating Instructions - Page 3
you risk permanent damage to your television screen. Plasma display panels and projection televisions are especially susceptible to this. If you have any questions or problems concerning your recorder, please consult your nearest Sony dealer. ,continued 3 - Sony RDR-HX730 | Operating Instructions - Page 4
Refer all servicing to qualified service personnel. Servicing is DVD , listed at the top of each explanation indicate what kind of media can be used with the function being explained. • Instructions in this manual describe the controls on the remote. You can also use the controls on the recorder - Sony RDR-HX730 | Operating Instructions - Page 5
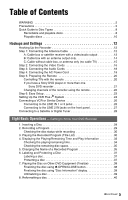
2 Quick Guide to Disc Types 8 Recordable and playable discs 8 Playable discs 10 Hookups and Settings 12 Hooking Up the Recorder 12 Step the remote 20 If you have a Sony DVD player or more than one Sony DVD recorder 21 Changing channels of the recorder using the remote 22 Step 6: Easy Setup - Sony RDR-HX730 | Operating Instructions - Page 6
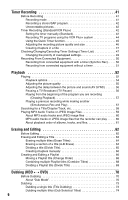
Recording (Standard/VCR Plus 42 Setting the timer manually (Standard 42 Recording TV programs using the VCR Plus+ system 44 Using the Quick Timer function 45 Adjusting the recording a Playlist title (Divide Title 69 Dubbing (HDD y DVD 70 Before Dubbing 70 About "Dub Mode 70 Dubbing 73 - Sony RDR-HX730 | Operating Instructions - Page 7
DVD 88 Remote Control Settings/Factory Settings (Others 90 Easy Setup (Resetting the Recorder 91 Additional Information 92 Troubleshooting 92 Self-diagnosis Function (When letters/numbers appear in the display) . . . . 98 Notes About This Recorder 99 Specifications 100 About i.LINK 101 Guide - Sony RDR-HX730 | Operating Instructions - Page 8
Quick Guide to Disc Types Recordable and playable discs Type Disc Logo Icon used in Formatting this manual (new discs) Compatibility with other DVD players (finalizing) Hard disk drive (internal) HDD Formatting unnecessary Dub HDD contents to a DVD to play on other DVD players DVD+RW DVDRW - Sony RDR-HX730 | Operating Instructions - Page 9
• 16x-speed or slower DVD+Rs • 16x-speed or slower DVD-Rs (Ver.2.0, Ver.2.1 with CPRM*2) • 8x-speed or slower DVD+R DL (Double Layer) discs "DVD+RW," "DVD-RW," "DVD+R," "DVD+R DL," and "DVD-R" are trademarks. *1 When an unformatted DVD-R is inserted into this recorder, it is automatically formatted - Sony RDR-HX730 | Operating Instructions - Page 10
VIDEO CD Disc Logo Icon used in this manual Characteristics DVD Discs such as movies that can be purchased or rented This recorder also recognizes DVDRAMs and DVD-R Dual Layer (Video mode) discs as DVD Video compatible discs. If the DVD-RAM has a removable cartridge, remove the cartridge before - Sony RDR-HX730 | Operating Instructions - Page 11
. The disc will not play if it has not been correctly finalized. For more information, see the operating instructions for the recording device. • You cannot mix VR mode and Video mode on the same DVD-RW. To change the disc's format, reformat the disc (page 40). Note that the disc's contents will be - Sony RDR-HX730 | Operating Instructions - Page 12
AC Power Cord" on page 19. b Notes • See "Specifications" (page 100) for a list of supplied accessories. • Plug in cords securely to prevent unwanted noise. • Refer to the instructions supplied with the components to be connected. • You cannot connect this recorder to a TV that does not have a video - Sony RDR-HX730 | Operating Instructions - Page 13
/satellite receiver Antenna cable (supplied) Audio/video cord (not supplied) S-video cord (not supplied) to antenna input TV to LINE IN 1 or 3 DVD recorder : Signal flow z Hints • If your cable box or satellite receiver has an S-video jack, you can use an S-video cord (not supplied) instead - Sony RDR-HX730 | Operating Instructions - Page 14
antenna output channel on the cable box (2ch, 3ch, or 4ch). Wall Antenna cable (supplied) Cable box ANT IN TO TV to VHF/UHF IN DVD recorder to VHF/UHF OUT TV to antenna input : Signal flow b Note When using this connection, set "Antenna / Cable" of the "Tuner Preset" to "Antenna" in - Sony RDR-HX730 | Operating Instructions - Page 15
box. Also use this hookup if you are using a VHF/UHF antenna or separate VHF and UHF antennas. With this hookup, you can record any channel by selecting the channel on the recorder. Wall to VHF/UHF IN to VHF/UHF OUT TV to antenna input Antenna cable (supplied) : Signal flow DVD recorder 15 - Sony RDR-HX730 | Operating Instructions - Page 16
) TV, projector, or AV amplifier (receiver) TV, projector, or AV amplifier (receiver) to LINE OUT 1 or 2 (S VIDEO) to LINE OUT 1 or 2 (VIDEO) DVD recorder to COMPONENT VIDEO OUT (red) (blue) (green) C COMPONENT VIDEO IN Y (green) PB (blue) PR (red) TV, projector, or AV amplifier (receiver - Sony RDR-HX730 | Operating Instructions - Page 17
Hookups and Settings When playing "wide screen" images Some recorded images may not fit your TV screen. To change the picture size, see page 83. If you are connecting to a VCR Connect your VCR to the LINE IN jack on the recorder (page 26). b Note Do not connect more than one type of - Sony RDR-HX730 | Operating Instructions - Page 18
to optical digital input Coaxial digital cord (not supplied) or Optical digital cord (not supplied) to DIGITAL OUT (COAXIAL or OPTICAL) DVD recorder to LINE OUT (R-AUDIO-L) 1 or 2 (white) Audio/video cord (supplied) (yellow) INPUT B VIDEO (red) (yellow)* : Signal flow * The yellow plug - Sony RDR-HX730 | Operating Instructions - Page 19
z Hint For correct speaker location, see the operating instructions supplied with the connected components. b Notes • Do Power Cord Connect the supplied AC power cord to the AC IN terminal of the recorder. Then plug the recorder and TV power cords into the AC outlet. After you connect the AC power - Sony RDR-HX730 | Operating Instructions - Page 20
. Set the appropriate code number again. Number buttons b Notes • If the supplied remote interferes your other Sony DVD recorder or player, change the command mode number for this recorder (page 21). • Use the batteries correctly to avoid possible leakage and corrosion. Should leakage occur, do - Sony RDR-HX730 | Operating Instructions - Page 21
your TV TV/VIDEO Switches your TV's input source If you have a Sony DVD player or more than one Sony DVD recorder If the supplied remote interferes with your other Sony DVD recorder or player, set the command mode number for this recorder and the supplied remote to one that differs from the other - Sony RDR-HX730 | Operating Instructions - Page 22
. 6 Select a Command Mode (DVD1, DVD2, or DVD3), and press ENTER. 7 Set the Command Mode for the remote so it matches the Command Mode for the recorder you set above. Follow the steps below to set the Command Mode on the remote. 1 Hold down ENTER. 2 While holding down ENTER, enter the Command - Sony RDR-HX730 | Operating Instructions - Page 23
instructions to make the following settings. Easy Setup - OSD Select a language for the on-screen displays. Easy Setup - Clock Select "Manual" select "Auto." The recorder will automatically search for a channel that carries a time signal when you turn off the recorder after finishing Easy Setup. - Sony RDR-HX730 | Operating Instructions - Page 24
"Basic," and press ENTER. 4 Select "Set VCR Plus+ Channels," and press ENTER. Setting up your recorder involves coordinating the TV channel number (the number you turn to on your TV or recorder to watch a program) with the guide channel (the number that's assigned to that channel in your TV program - Sony RDR-HX730 | Operating Instructions - Page 25
Hookups and Settings 8 Repeat steps 5 to 7 for each guide channel number that does not match the TV channel number. 9 Press SYSTEM MENU repeatedly to and repeat steps 6 and 7. Note that the display only lists the channels for which the guide channel number does not match the TV channel number. 25 - Sony RDR-HX730 | Operating Instructions - Page 26
panel if the equipment has a DV output jack (i.LINK jack) (page 75). For details, refer to the instruction manual supplied with the connected equipment. To record on this recorder, see "Recording from connected equipment without a timer" on page 51. Connecting to the LINE IN 1 or 3 jacks Connect - Sony RDR-HX730 | Operating Instructions - Page 27
the order shown below. To watch video tapes, watch the tapes through a second line input on your TV. Line input 1 VCR DVD recorder TV Line input 2 • If you disconnect the recorder's AC power cord, you will not be able to view the signals from the connected VCR. Connecting to the LINE 2 IN jacks - Sony RDR-HX730 | Operating Instructions - Page 28
Audio/video cord (supplied) INPUT VIDEO L AUDIO R to LINE OUT DVD recorder to LINE IN 1 : Signal flow Audio/video cord (not supplied) Notes • Synchro-Recording does not work with some tuners. For details, see the tuner's operating instructions. • If you disconnect the recorder's AC power - Sony RDR-HX730 | Operating Instructions - Page 29
(page 40) before you make a recording. If the disc is recordable on this recorder, you can manually re-format the disc to make a blank disc (page 40). z REC x REC STOP REC MODE TV/VIDEO 1 Press HDD or DVD. If you want to record to a DVD, insert a recordable DVD. 2 Press CH +/- to select the - Sony RDR-HX730 | Operating Instructions - Page 30
(Title List) HDD +RW -RWVR -RWVideo +R -RVR -RVideo To play a recorded title, select the title from the Title List. HDD DVD TITLE LIST / mc - Sony RDR-HX730 | Operating Instructions - Page 31
the selected item. The displayed options differ depending upon the model, situation, and disc type. Eight Basic Operations - Getting to Know Your DVD Recorder m Extended Title List Sub-menu 4 Select "Play," and press ENTER. Playback starts from the selected title. A Disc type: Displays the media - Sony RDR-HX730 | Operating Instructions - Page 32
set as the thumbnail picture. • You can select "TITLE LIST" from the System Menu. b Notes • The title names may not appear for DVDs created on other DVD recorders. • It may take a few seconds for the thumbnail pictures to be displayed. • After editing, the title thumbnail picture may change to the - Sony RDR-HX730 | Operating Instructions - Page 33
You can check the playing time and remaining time of the current title, chapter, track, or disc. Also, you can check the disc name recorded on the DVD/CD. DISPLAY ENTER OPTIONS TIME/TEXT Press DISPLAY. The displays differ depending on the disc type or playing status. A Title number/name (Shows - Sony RDR-HX730 | Operating Instructions - Page 34
depending on the disc type or playing status. Example: When playing a DVD Playing time and number of the current title Example: When playing a current album m Current album number and total number of albums b Notes • The recorder can only display the first level of a CD's text, such as the disc - Sony RDR-HX730 | Operating Instructions - Page 35
Eight Basic Operations - Getting to Know Your DVD Recorder Checking the remaining disc space You can check the remaining disc space using the "Disc Information" display. 1 Insert a disc. See "1. Inserting a Disc" on page 29. 2 - Sony RDR-HX730 | Operating Instructions - Page 36
5 Press - Sony RDR-HX730 | Operating Instructions - Page 37
Eight Basic Operations - Getting to Know Your DVD Recorder 6. Labeling and Protecting a Disc b Note You can enter up to 64 characters for a DVD's disc name. The disc name may not appear when the disc is played on other DVD equipment. You can execute options effective for the entire disc using the - Sony RDR-HX730 | Operating Instructions - Page 38
contents will be erased. -RVR Finalizing is necessary. The disc can be played only on equipment that supports DVD-R in VR mode. After finalizing you cannot edit or record on the disc using this recorder. Z OPEN/ CLOSE - Sony RDR-HX730 | Operating Instructions - Page 39
Eight Basic Operations - Getting to Know Your DVD Recorder Finalizing the disc using "Disc Information" display 1 Insert a disc. See "1. Inserting a Disc" on page 29. 2 Press OPTIONS to select "Disc Information," and press ENTER. The " - Sony RDR-HX730 | Operating Instructions - Page 40
a disc +RW -RWVR -RWVideo New discs are automatically formatted when inserted. If necessary, you can manually reformat a DVD+RW or DVD-RW disc to make a blank disc. For DVD-RWs, you can select a recording format (VR mode or Video mode) according to your needs (page 62). z Hint By reformatting - Sony RDR-HX730 | Operating Instructions - Page 41
quality than HQ on the HDD. Note that HQ+ appears as HQ in the front panel display and the on-screen displays. Recording mode Approx. recording time (hours) HDD DVD* HQ+ (High quality) 20 - HQ R 32 1 HSP R 46 1 hr. 30 min. SP (Standard mode) 61 2 LSP r 77 2 hr. 30 min. ESP - Sony RDR-HX730 | Operating Instructions - Page 42
Do not operate your cable box or satellite receiver just before or during a timer recording. This may prevent the accurate recording of a program. Setting the timer manually (Standard) Copy control Recordable discs signals Copy-Free Copy-Once HDD +RW -RWVideo +R -RVideo -RWVR -RVR HDD -RWVR - Sony RDR-HX730 | Operating Instructions - Page 43
(page 41). "Media": Selects the media, HDD or DVD. "Extend Time": Sets the duration in increments of 10 minutes, for a maximum of 60 minutes when a timer recording is in progress. If the program set to be recorded daily or weekly is extended, the manually extended time set here will be added to the - Sony RDR-HX730 | Operating Instructions - Page 44
that program are set automatically. Before you start, check that the TV and guide channels are correctly set in "Set VCR Plus+ Channels" in the " Select "OK" and press ENTER. z Hint If you are recording to the HDD or a DVD-RW (VR mode) at a recording mode that is SP or lower and is a 2x speed or - Sony RDR-HX730 | Operating Instructions - Page 45
• If you make a mistake before pressing ENTER, press - Sony RDR-HX730 | Operating Instructions - Page 46
regardless of the setting. For example, if a 16:9 size picture is received, the disc records the picture as 16:9 even if "DVD Rec. Picture Size" is set to "4:3." For DVD+RWs/DVD+Rs, the screen size is fixed at "4:3." "Rec NR" (noise reduction): Reduces noise contained in the video signal. 2 Select - Sony RDR-HX730 | Operating Instructions - Page 47
. To disable this function, set "Auto Chapter" in the "Recording" setup to "Off" (page 87). When recording to the HDD, a DVD-R (VR mode) or a DVD-RW (VR mode), you can insert and erase chapter marks manually (page 66). b Note When dubbing (page 70), the chapter marks in the dubbing source are - Sony RDR-HX730 | Operating Instructions - Page 48
to the HDD. : Indicates the setting is being recorded to a DVD. When all of the timer settings do not fit on the list, the scroll bar appears. To view the hidden timer settings, press M/m. 2 Select the - Sony RDR-HX730 | Operating Instructions - Page 49
Changing the priority of overlapped settings If the timer settings overlap, the program that was set last has priority and will be recorded. A timer recording of lower priority may be canceled, start from the middle or stop midway through the program. You can change the priority of a program - Sony RDR-HX730 | Operating Instructions - Page 50
from the LINE IN 1 jacks. 1 Before recording, select HDD or DVD. If you select DVD, insert a recordable DVD (see "1. Inserting a Disc" on page 29). 2 Set "Synchro Rec" to "Record to HDD" or "Record to DVD" in the "Recording" setup (page 87). To stop recording Press x REC STOP or c z SYNCHRO REC - Sony RDR-HX730 | Operating Instructions - Page 51
on page 26. Use the DV IN jack on the front panel if the equipment has a DV output jack (i.LINK jack). 1 Press HDD or DVD. If you select DVD, insert a recordable DVD (see "1. Inserting a Disc" on page 29). 2 Press INPUT SELECT to select an input source according to the connection you made. The front - Sony RDR-HX730 | Operating Instructions - Page 52
TITLE LIST. For details about the Title List, see "3. Playing the Recorded Program (Title List)" on page 30. Example: DVD+RW To use the DVD's Menu When you play a DVD VIDEO, or a finalized DVD+RW, DVD-RW (Video mode), DVD+R, or DVD-R (Video mode), you can display the disc's menu by pressing TOP - Sony RDR-HX730 | Operating Instructions - Page 53
only). - you edit the title after stopping playback. - you change the settings on the recorder. - you turn off the recorder (VIDEO CD/CD/ DATA DVD/DATA CD only). - you make a recording (except for HDD/ DVD-RWs/DVD-Rs in VR mode). - you disconnect the AC power cord. b Note You cannot resume playback - Sony RDR-HX730 | Operating Instructions - Page 54
/NEXT > (fast reverse/fast forward) (slow, freeze frame) HDD +RW -RWVideo +R -RVideo DVD -RWVR -RVR VCD * Operations Selects one of the audio tracks recorded on the disc when pressed repeatedly in normal playback mode. DVD : Selects the language. HDD -RWVR -RVR : Selects the main or sub sound - Sony RDR-HX730 | Operating Instructions - Page 55
, an external DTS decoder must be connected to the DIGITAL OUT jack of the recorder. • Set the sound to "Stereo" using the AUDIO button when you play DTS sound tracks on a CD (page 54). Notes on playing DVDs with a DTS sound track DTS audio signals are output only through the DIGITAL OUT - Sony RDR-HX730 | Operating Instructions - Page 56
function is canceled when: - x STOP is pressed. - CH +/- is pressed. - DVD is pressed. - Z OPEN/CLOSE is pressed. - TITLE LIST is pressed. - INPUT SELECT is pressed. - the recorder is turned off. - a timer recording or Synchro-Recording is started. - DV/Digital8 dubbing or regular dubbing is started - Sony RDR-HX730 | Operating Instructions - Page 57
the sub-menu, and press ENTER. Playback starts from the selected title. Example: Play a DVD while recording to the HDD. 1 While recording, press DVD and insert the DVD into the recorder. 2 Press TITLE LIST to display the DVD Title List. 3 Select the title you want to play, and press ENTER. 4 Select - Sony RDR-HX730 | Operating Instructions - Page 58
Example: Title Search HDD +RW -RWVR -RWVideo +R -RVR -RVideo DVD VCD CD DATA DVD DATA CD You can search a disc by title, chapter, scene or you make a mistake, select another number. 3 Press ENTER or SET. The recorder starts playback from the selected number. ENTER OPTIONS b Note "Title Search" is - Sony RDR-HX730 | Operating Instructions - Page 59
/CD-RWs) or JPEG image files on DATA DVDs (DVD-ROMs/DVD+RWs/DVD+Rs/ DVD-RWs/DVD-Rs). AUDIO DISPLAY / . PREV m H Beginning," and press ENTER. To fast forward or review a track Press m/M during playback. To go to the play conditions, appears but the recorder cannot play the file. To stop playback - Sony RDR-HX730 | Operating Instructions - Page 60
JPEG image files on DATA DVDs (DVDROMs/DVD+RWs/DVD+Rs/DVD-RWs/ DVD-Rs). DATA CDs must be recorded according to ISO9660 Level 1, Level 2 or Joliet format for the recorder to recognize the MP3 tracks. You can also play discs recorded in MultiSession/Border. See the instructions supplied with the disc - Sony RDR-HX730 | Operating Instructions - Page 61
Tree 5 ROOT b Notes • Depending on the software you use to create the DATA DVD/DATA CD, the playback order may differ from the above illustration. • No more the next or another album may take some time. • This recorder supports MP3 audio bit rates up to 320 kbps. Playback Album MP3 audio track/ - Sony RDR-HX730 | Operating Instructions - Page 62
types. b Notes • You may lose the edited contents if you remove the disc or a timer recording starts while editing. • DVD discs created by DVD video cameras cannot be edited on this recorder. • If a message appears and indicates that the disc's control information is full, erase or edit unnecessary - Sony RDR-HX730 | Operating Instructions - Page 63
. Note that editing is irreversible. To edit the HDD or DVD-RWs/DVD-Rs (VR mode) without changing the original recordings, create a Playlist title (page 66). For the HDD and DVD-RWs (VR mode), you can erase any title. For DVD-Rs and DVD+Rs, the available disc space does not increase even if you - Sony RDR-HX730 | Operating Instructions - Page 64
+R -RVR -RVideo You can select and erase more than one title at one time using the OPTIONS menu. 1 Press TITLE LIST. For HDD titles or DVD-RWs/DVD-Rs in VR mode, press - Sony RDR-HX730 | Operating Instructions - Page 65
picture quality, divide the title into two shorter titles. Note that dividing a title cannot be undone. * Only playlist titles can be divided for DVD-RWs/ DVD-Rs (VR mode). 1 Press TITLE LIST. Press - Sony RDR-HX730 | Operating Instructions - Page 66
erased. • To insert a chapter mark manually during recording, set "Auto Chapter" to "Off" in the "Recording" setup. Creating and Editing a Playlist HDD recordings. You can create up to 97 Playlist titles. Example: You have recorded the final few matches of a football tournament on a DVDRW/DVD-R - Sony RDR-HX730 | Operating Instructions - Page 67
Erasing and Editing 3 Select "Select," and press ENTER. 9 When you finish adding scenes, press m. 4 Select the title you want to include in the Playlist title, and press ENTER. The display for setting the start point (IN) appears. The title starts to play. • To return to the beginning of the - Sony RDR-HX730 | Operating Instructions - Page 68
To add the entire title to the Playlist title as one scene (Make a Playlist) 1 Press TITLE LIST. If the Title List (Playlist) appears, press ,. 2 Select the title and press ENTER. The sub-menu appears. 3 Select "Make a Playlist," and press ENTER. The selected title is added to the Title List ( - Sony RDR-HX730 | Operating Instructions - Page 69
Erasing and Editing z Hint After titles are combined, the title name is the title name of the first title prior to combination. b Note When the number of chapters in the title to be combined exceeds the limit, the chapters at the end are combined into a single chapter. Dividing a Playlist title ( - Sony RDR-HX730 | Operating Instructions - Page 70
Allows you to dub what you have stored in the HDD to a high-speed DVD (8x-speed DVD+RWs/6x-speed DVD-RWs/16x-speed DVD+Rs/16x-speed DVD-Rs, or slower versions of each disc type), without changing the recording mode. Set "Dub Mode" to "Fast" in the steps of "Dubbing a single title (Title - Sony RDR-HX730 | Operating Instructions - Page 71
to HDD - Dubbing 16:9 size title from HDD to DVD+RW/DVD+R - When dubbing a title with a picture size of 16:9 recorded in LP, EP, or SLP mode to a DVD-RW or DVD-R in Video mode. • When dubbed to a DVD-RW (Video mode)/ DVD+RW/DVD+R/DVD-R (Video mode), the "seams" that are left over from editing may - Sony RDR-HX730 | Operating Instructions - Page 72
Rec Mode Conversion Dubbing HDD n +RW / -RWVR / -RWVideo / / / +R -RVR -RVideo Allows you to dub from the HDD to a DVD or vice versa, in a dubbing mode that differs from the original recordings. For example, when you dub an HQ title (data size is large) in SP mode, you can reduce the data - Sony RDR-HX730 | Operating Instructions - Page 73
that remains after dubbing (approximate) Select "OK" and go to step 8. To manually select another dubbing mode, select "Cancel," and go to step 7. To stop disc space for DVD+Rs/ DVD-Rs. z Hint You can turn off the recorder during dubbing. The recorder completes dubbing even after being turned off. - Sony RDR-HX730 | Operating Instructions - Page 74
," select "OK." F Order of dubbing Select "OK" and go to step 9. To manually select another dubbing mode, select "Cancel," and go to step 8. To stop dubbing Press for DVD+Rs/ DVD-Rs. z Hint You can turn off the recorder during dubbing. The recorder completes dubbing even after being turned off. - Sony RDR-HX730 | Operating Instructions - Page 75
. See the instruction manual supplied with the digital video camera as well before connecting. z Hint If you plan to do additional editing on a disc after the initial dub, use the DV IN jack and record on a DVD-RW/DVD-R (VR mode) or HDD. to DV IN i.LINK cable (not supplied) DV output Digital - Sony RDR-HX730 | Operating Instructions - Page 76
"DV." The front panel display changes as follows: channel 4 Press REC MODE on the remote repeatedly to select the recording mode. The recording mode changes as follows: For details about the recording mode, see page 41. 5 Press OPTIONS on the remote to select "DV / D8 Audio Input," and press ENTER - Sony RDR-HX730 | Operating Instructions - Page 77
• If you set "Finalize Disc" of "One Touch Dubbing" to "Auto" in the "DVD" setup (page 89), the recorded disc (except DVD-RW (VR mode)) will automatically be finalized after recording is finished. • You can play back a previously recorded title on the HDD while One Touch Dubbing is in progress. 77 - Sony RDR-HX730 | Operating Instructions - Page 78
. m Dub the selected scenes After you have selected the scenes, the recorder will fast forward and rewind the tape automatically and record the scenes to the HDD or a DVD. How chapters are created The contents dubbed to the HDD or DVD become a single title. When "Auto Chapter" is set to "On" in - Sony RDR-HX730 | Operating Instructions - Page 79
display appears after step 12. 11 Select "OK," and press ENTER. The title name is fixed, and the display asks if you want to start recording. To change the disc media, select "Media" and press M/m. To change the dubbing mode, select "Dub Mode" and press M/ m. Select "OK" and go to step - Sony RDR-HX730 | Operating Instructions - Page 80
satellite receiver. Auto Preset Automatically presets the receivable channels. The recorder can receive VHF channels 2 to 13, UHF channels 14 All receivable channels are preset in numerical sequence. Manual Channel Setup Presets or disables channels manually. If some channels could not be set using - Sony RDR-HX730 | Operating Instructions - Page 81
Tuning function. Normally, select this. Off Allows you to adjust the picture manually. 9 Select "On" to turn on AFT, and press ENTER. • If + Channels Sets up the guide channel number assigned to each channel. You need to set this correctly to make timer recordings with the VCR Plus+ function - Sony RDR-HX730 | Operating Instructions - Page 82
Time (if applicable). No Allows you to adjust your time zone and Daylight Saving Time manually, without turning off the Auto Clock Set function. 4 Select "Yes," and press ENTER. The recorder automatically sets the clock by searching for a channel that carries a time signal and sets your - Sony RDR-HX730 | Operating Instructions - Page 83
such as size and color. Choose the settings according to the type of TV, tuner, or decoder connected to the DVD recorder. 4:3 Letter Box 1 Press SYSTEM MENU while the recorder is in stop mode. 2 Select "SETUP," and press ENTER. 3 Select "Video," and press ENTER. The "Video" setup appears with the - Sony RDR-HX730 | Operating Instructions - Page 84
from film and displays images at 24 frames per second. Some DVD software contains both Video and Film. In order for these images inputting video signals for the LINE IN 1 jack on the rear panel of the recorder. Video Inputs video signals. S Video Inputs S video signals. Line3 Input Selects - Sony RDR-HX730 | Operating Instructions - Page 85
Settings (Audio) The "Audio" setup allows you to adjust the sound according to the playback and connection conditions. 1 Press SYSTEM MENU while the recorder is in stop mode. 2 Select "SETUP," and press ENTER. 3 Select "Audio," and press ENTER. The "Audio" setup appears with the following options - Sony RDR-HX730 | Operating Instructions - Page 86
is connected to an audio component with a built-in DTS decoder. Off Select this when the recorder is connected to an audio component without a built-in DTS decoder. • 48kHz/96kHz PCM (DVD VIDEOs only) Selects the sampling frequency of the audio signal. 48kHz/ 16bit The audio signals of - Sony RDR-HX730 | Operating Instructions - Page 87
function. Synchro Rec Selects the recording destination used for Synchro-Recording (page 50). Record to Records to the HDD. HDD Record to Records to DVDs. DVD HDD Rec. Settings HQ Setting Selects the HQ mode used for recording on the HDD (page 41). HQ+ Records in higher quality (approximate 15 - Sony RDR-HX730 | Operating Instructions - Page 88
" setup allows you to adjust parental control, language and other DVD related settings. 1 Press SYSTEM MENU while the recorder is in stop mode. 2 Select "SETUP," and press ENTER. 3 Select "DVD," and press ENTER. The "DVD" setup appears with the following options. The default settings are underlined - Sony RDR-HX730 | Operating Instructions - Page 89
limited on this recorder. • Depending DVD VIDEO only) DVD Menu Switches the language for the DVD DVD Menu," "Subtitle," or "Audio" that is not recorded on the DVD VIDEO, one of the recorded languages will be automatically selected. Format DVD-RW (DVD-RW only) The recorder recordable discs except DVD - Sony RDR-HX730 | Operating Instructions - Page 90
of the front panel display. Command Mode Changes the Command Mode of the recorder if other DVD equipment is assigned the same Command Mode. For details, see "If you have a Sony DVD player or more than one Sony DVD recorder" on page 21. Factory Setup Allows you to select the setup settings by - Sony RDR-HX730 | Operating Instructions - Page 91
and Adjustments Easy Setup (Resetting the Recorder) Select this to run the "Easy Setup" program. 1 Press SYSTEM MENU while the recorder is in stop mode. 2 Select "SETUP," and press ENTER. 3 Select "Easy Setup," and press ENTER. 4 Select "Start." 5 Follow the instructions for "Easy Setup" (page 23 - Sony RDR-HX730 | Operating Instructions - Page 92
recorder, use this troubleshooting guide to help remedy the problem before requesting repairs. Should any problem persist, consult your nearest Sony from the recorder appears on the TV screen. , When playing a double-layer DVD, the see the TV's instruction manual). , Place the recorder and TV farther - Sony RDR-HX730 | Operating Instructions - Page 93
(page 84). The playback picture or TV program from the equipment connected through the recorder is distorted. , If the playback picture output from a DVD player, VCR, or tuner goes through your recorder before reaching your TV, the copyprotection signal applied to some programs could affect picture - Sony RDR-HX730 | Operating Instructions - Page 94
be able to do some of the operations above. See the instruction manual supplied with the disc. The subtitle language cannot be changed or turned off. , Multilingual subtitles are not recorded on the DVD VIDEO. , The DVD VIDEO prohibits changing of the subtitles. , Try changing the subtitle using - Sony RDR-HX730 | Operating Instructions - Page 95
continue for more than 1 hour, reset the clock (page 81). , Disc space was not enough. Contents previously recorded were erased. , Data that is not playable on this recorder but was recorded on a DVD with a PC will be erased from the disc when the disc is inserted. , "Auto Title Erase" of the - Sony RDR-HX730 | Operating Instructions - Page 96
REC indicator is flashing. , The disc does not have enough space. , Insert a recordable disc inside the recorder. , The inserted DVD is protected (page 37). The recording mode indication is incorrect. , When the recording or dubbing is less than ten minutes, or if a picture with little movement is - Sony RDR-HX730 | Operating Instructions - Page 97
. , Contact your Sony dealer or local authorized Sony service facility. The disc tray recorder for more than ten seconds until "FORMAT" appears in the front panel display. Note that all the contents recorded on the HDD will be erased. If this does not fix the problem, contact your nearest Sony - Sony RDR-HX730 | Operating Instructions - Page 98
is a problem in the HDD. , Contact your nearest Sony dealer or local authorized service facility. The DVD is dirty. , Clean the disc with a soft cloth. C 31 The DVD/CD is not inserted correctly. , Re-insert the disc correctly. E XX To prevent a malfunction, the (xx is a number) recorder has - Sony RDR-HX730 | Operating Instructions - Page 99
benzine. On cleaning discs, disc/lens cleaners Do not use cleaning discs or disc/lens cleaners (including wet or spray types). These may cause the recorder to malfunction. Notes about the discs • To keep the disc clean, handle the disc by its edge. Do not touch the surface. Dust, fingerprints, or - Sony RDR-HX730 | Operating Instructions - Page 100
-hour cycle (digital)/ Power back-up duration: 1 hour Video recording format: MPEG-2, MPEG-1 Audio recording format/applicable bit rate: Dolby Digital 2 ch 256 kbps/128 kbps Remote commander (remote) (1) Size AA (R6) batteries (2) Specifications and design are subject to change without notice. 100 - Sony RDR-HX730 | Operating Instructions - Page 101
S400 (approx. 400 Mbps) The baud rate is listed under "Specifications" in the instruction manual of each equipment. It is also indicated near the i.LINK jack on connecting this recorder, also see the instruction manuals for the equipment to be connected. Required i.LINK cable Use the Sony i.LINK 4- - Sony RDR-HX730 | Operating Instructions - Page 102
Guide to Parts and Controls For more information, see the pages in parentheses. Remote 123 456 789 0 A HDD button (29) DVD button (29) B [/1 (on/standby) button (23) C Z OPEN/CLOSE button (29) D CH (channel) +/- buttons button (20) * Use the tactile dot as a reference when operating the recorder. - Sony RDR-HX730 | Operating Instructions - Page 103
(remote sensor) (20) I z REC button (29) J x REC STOP button (29) K HDD button/indicator (29) DVD button/indicator (29) L DV IN jack (75) M ONE-TOUCH DUB button (77) N CHANNEL +/- buttons (29) The Use the tactile dot as a reference when operating the recorder. Additional Information ,continued 103 - Sony RDR-HX730 | Operating Instructions - Page 104
panel display HDD DVD DVD VCD SAP A HDD/DVD indicators Displays the selected media and the playing/recording status. B Dubbing direction indicator C Displays the following (34): • Playing time/remaining time • Current title/chapter/track/index number • Recording time/recording mode • Clock - Sony RDR-HX730 | Operating Instructions - Page 105
Language Code List For details, see page 89. The language spellings conform to the ISO 639: 1988 (E/F) standard. Code Language 1027 Afar 1028 Abkhazian 1032 Afrikaans 1039 Amharic 1044 Arabic 1045 Assamese 1051 Aymara 1052 Azerbaijani 1053 Bashkir 1057 Byelorussian 1059 Bulgarian 1060 Bihari 1061 - Sony RDR-HX730 | Operating Instructions - Page 106
Erase" 64 AC Power Cord 19 Adjusting playback picture 55 playback sound 56 recording picture 46 "AFT" 81 Album 33, 61 Album number 33 "Album Search" 89 Program Edit 78 "DVD" 88 "DVD Menu" 89 "DVD Rec. Picture Size" 46 DVD VIDEO 10 DVD+R 8, 62 DVD+RW 8, 62 DVD-R 8, 62 DVD-RAM 10 DVD-RW 8, 62 E Easy - Sony RDR-HX730 | Operating Instructions - Page 107
Make a Playlist" 68 "Manual Channel Setup" 80 Manual Clock Set 82 MENU 52 Menu DVD's Menu 52 Top menu 63 Protection disc 37 title 63 Q Quick guide to disc types 8 Quick Timer 45 R Recordable discs 8 "Recording" 87 Recording 41 picture adjustment 46 recording format 8 recording mode 30, 41 recording - Sony RDR-HX730 | Operating Instructions - Page 108
VIDEO CD 10 Synchro Rec 50 T Thumbnail picture 32 "Time Search" 58 TIME/TEXT 34 TIMER 43 Timer List 47 Timer recording "Auto Title Erase" 43 check/change/cancel 47 manual setting 42 "Rec Mode Adjust" 43 Synchro Rec 50 VCR Plus+ 44 "Timer Settings" 87 Title 33 TITLE LIST 52 Title
-
 1
1 -
 2
2 -
 3
3 -
 4
4 -
 5
5 -
 6
6 -
 7
7 -
8
-
9
-
10
-
11
-
12
-
13
-
14
-
15
-
16
-
17
-
18
-
19
-
20
-
21
-
22
-
23
-
24
-
25
-
26
-
27
-
28
-
29
-
30
-
31
-
32
-
33
-
34
-
35
-
36
-
37
-
38
-
39
-
40
-
41
-
42
-
43
-
44
-
45
-
46
-
47
-
48
-
49
-
50
-
51
-
52
-
53
-
54
-
55
-
56
-
57
-
58
-
59
-
60
-
61
-
62
-
63
-
64
-
65
-
66
-
67
-
68
-
69
-
70
-
71
-
72
-
73
-
74
-
75
-
76
-
77
-
78
-
79
-
80
-
81
-
82
-
83
-
84
-
85
-
86
-
87
-
88
-
89
-
90
-
91
-
92
-
93
-
94
-
95
-
96
-
97
-
98
-
99
-
100
-
101
-
102
-
103
-
104
-
105
-
106
-
107
-
108
 |
 |
2-679-364-
11
(1)
© 2006 Sony Corporation
RDR-HX730
DVD Recorder
Operating Instructions