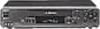
Sony SLV-N70 Operating Instructions
Sony SLV-N70 - Video Cassette Recorder Manual
 |
View all Sony SLV-N70 manuals
Add to My Manuals
Save this manual to your list of manuals |
Sony SLV-N70 manual content summary:
- Sony SLV-N70 | Operating Instructions - Page 1
Serial No Declaration of Conformity Trade Name: SONY Model No.: SLV-N80/N70 Responsible Party: Sony Electronics Inc. Address: 1 Sony Drive, Park Ridge, NJ.07656 USA Telephone No.: 201-930-6970 This device complies with Part 15 of the FCC Rules. Operation is subject to the following two - Sony SLV-N70 | Operating Instructions - Page 2
operating and maintenance (servicing) instructions your Sony dealer. condense inside the VCR and cause damage manual could void your authority to operate this equipment. NOTE: This equipment has been tested and found to comply with the limits for a Class B digital device, pursuant to Part - Sony SLV-N70 | Operating Instructions - Page 3
up the remote commander 8 Step 3 : Hookups 30 Selecting a language 31 Setting the clock 38 Setting up the cable box control (SLV-N80 only) 44 Presetting channels 51 Setting up the VCR Plus+ GOLD system (SLV-N80 only) 58 Setting up the VCR Plus+ system (SLV-N70 only) Basic Operations 62 Playing - Sony SLV-N70 | Operating Instructions - Page 4
with F-type connectors Check your model name The instructions in this manual are for the 2 models: SLV-N80 and N70. Check your model number by looking at the rear panel of your VCR. SLV-N80 is the model used for illustration purposes. Any difference in operation is clearly indicated in the text - Sony SLV-N70 | Operating Instructions - Page 5
commander marked with a dot (•) can be used to operate your Sony TV. The RECEIVER VOL +/- and MUTING buttons can be used to operate your Sony AV receiver. Remote sensor [TV] / [VIDEO] 123 456 789 0 RECEIVER VOL +/- MUTING To operate the VCR a Sony TV Set [TV] / [VIDEO] to [VIDEO] and point at - Sony SLV-N70 | Operating Instructions - Page 6
. • Some Sony AV receivers may not operate with this remote commander. Controlling other TVs and/or AV receivers with the remote commander The remote commander is preprogrammed to control non-Sony TVs and/or AV receivers. If your TV and/or AV receiver is listed in the following table, set the - Sony SLV-N70 | Operating Instructions - Page 7
Sony VCR, you cannot control your TV and/or AV receiver with the remote commander. • When you replace the batteries of the remote commander, the code number may change. Set the appropriate code number every time you replace the batteries. • When you press the AUDIO MONITOR button, your TV's menu - Sony SLV-N70 | Operating Instructions - Page 8
on the following pages to set up your VCR. If your TV has audio/video inputs, refer to pages 9 and 10 for audio/video (A/V) hookup. Then follow one of the hookups below. For hookup 1 or 2, use the Sony RM-CM101 Cable Mouse (cable box controller) (not supplied). For SLV-N80 only If you have - Sony SLV-N70 | Operating Instructions - Page 9
bus control) function, hook up your VCR (SLVN80 only) using the connection shown on page 10. Your TV will automatically switch to the A/V inputs for your VCR when you play back a tape or operate the VCR. If you're not planning to use your VCR to record programs, you're finished setting up the VCR - Sony SLV-N70 | Operating Instructions - Page 10
SELECT : SET : OK QUIT : MENU ON OFF ON AUTO ON ON L H For details, see page 97. Caution Connections between the VCR's VHF/UHF connector and the antenna terminals of the TV receiver should be made only as shown in the following instructions. Failure to do so may result in operation that - Sony SLV-N70 | Operating Instructions - Page 11
Getting Started Hookup 1 (SLV-N80 only) Using the cable box control feature Recommended use You should use this hookup if you have a cable box, especially if your cable system scrambles all or most channels. This hookup allows the VCR's cable box control feature to control the channels on the cable - Sony SLV-N70 | Operating Instructions - Page 12
. 3 Press EASY SET UP on the VCR. EASY SET UP RF UNIT CH3 CH4 1 The LANGUAGE menu appears. Change the SET UP 2 The CLOCK SET menu appears. Select AUTO and press OK. For details, see page 32. SET UP CLOCK SET AUTO MANUAL SELECT : NEXT : OK CANCEL : EASY SET UP 3 The SMART CHANNEL MAPPING menu - Sony SLV-N70 | Operating Instructions - Page 13
The CABLE BOX CONTROL menu appears. Select ON. For details, see page 39. SET UP CABLE BOX CONTROL CABLE MOUSE BOX CODE NO. BOX OUTPUT CH ON OFF 5 Enter your cable box code number and press OK. For details, see page 39. SELECT : NEXT : OK CANCEL : EASY SET UP SET UP CABLE BOX CONTROL CABLE MOUSE - Sony SLV-N70 | Operating Instructions - Page 14
SLV-N80 only) Connecting to a digital satellite receiver Recommended use Use this hookup if you have a digital satellite receiver that is compatible with the Cable Mouse. It allows the VCR's cable box control feature to control remote sensor on the digital satellite receiver. Side view 14 Hookups - Sony SLV-N70 | Operating Instructions - Page 15
. 3 Press EASY SET UP on the VCR. EASY SET UP RF UNIT CH3 CH4 1 The LANGUAGE menu appears. Change the SET UP 2 The CLOCK SET menu appears. Select AUTO and press OK. For details, see page 32. SET UP CLOCK SET AUTO MANUAL SELECT : NEXT : OK CANCEL : EASY SET UP 3 The SMART CHANNEL MAPPING menu - Sony SLV-N70 | Operating Instructions - Page 16
CH) to LINE and press OK. SET UP CABLE BOX CONTROL CABLE MOUSE BOX CODE NO. BOX OUTPUT CH ON CH2 CH3 CH4 LINE SET UP SET UP IS DONE SELECT : NEXT : OK CANCEL : EASY SET UP Normal display Automatic clock setting Once you've set up the VCR, it automatically sets the clock the first time you turn - Sony SLV-N70 | Operating Instructions - Page 17
a few channels. What you can do with this hookup • Record any unscrambled channel by selecting the channel on the VCR What you can't do • Record scrambled channels that require a cable box Wall VCR VHF/UHF IN OUT Connect this cable directly to your TV if you don't have a cable box. Cable box - Sony SLV-N70 | Operating Instructions - Page 18
EASY SET UP on the VCR. EASY SET UP RF UNIT CH3 CH4 1 The LANGUAGE menu appears. SET UP 2 The CLOCK SET menu appears. Select AUTO and press OK. For details, see page 32. SET UP CLOCK SET AUTO MANUAL SELECT : NEXT : OK CANCEL : EASY SET UP 3 (For SLV-N80 only) The SMART CHANNEL MAPPING menu - Sony SLV-N70 | Operating Instructions - Page 19
system for recording, go to the page listed below. For SLV-N80: Go to page 51 for VCR Plus+ GOLD system channel set up. For SLV-N70: Go to page 58 for VCR Plus+ system channel set up. Automatic clock setting Once you've set up the VCR, it automatically sets the clock the first time you turn off the - Sony SLV-N70 | Operating Instructions - Page 20
only antenna (you get channels 14 and higher) • Separate VHF and UHF antennas VCR VHF/UHF IN OUT Rear of TV VHF/UHF A Match the type of this hookup if you're using a VHF-only antenna (you get channels 2-13 only) VCR VHF/UHF IN OUT Rear of TV VHF/UHF A Match the type of connector on your - Sony SLV-N70 | Operating Instructions - Page 21
EASY SET UP on the VCR. EASY SET UP RF UNIT CH3 CH4 1 The LANGUAGE menu appears. SET UP 2 The CLOCK SET menu appears. Select AUTO and press OK. For details, see page 32. SET UP CLOCK SET AUTO MANUAL SELECT : NEXT : OK CANCEL : EASY SET UP 3 (For SLV-N80 only) The SMART CHANNEL MAPPING menu - Sony SLV-N70 | Operating Instructions - Page 22
system for recording, go to the page listed below. For SLV-N80: Go to page 51 for VCR Plus+ GOLD system channel set up. For SLV-N70: Go to page 58 for VCR Plus+ system channel set up. Automatic clock setting Once you've set up the VCR, it automatically sets the clock the first time you turn off the - Sony SLV-N70 | Operating Instructions - Page 23
cable box What you can't do • Record with the cable box turned off • Record one channel while watching another channel Wall Cable box IN OUT VCR VHF/UHF IN OUT Rear of TV VHF/UHF A Match the type of connector on your or TV: A, B, or C. VHF For connector B types B and C, no - Sony SLV-N70 | Operating Instructions - Page 24
: EASY SET UP SET UP CLOCK SET AUTO MANUAL 3 (For SLV-N80 only) The SMART CHANNEL MAPPING menu appears. Press M/m/ - Sony SLV-N70 | Operating Instructions - Page 25
your program guide. For details, see page 51. Then enter all channels you want to record and the cable box output channel (usually 2, 3, or 4) as described on page 55. For SLV-N70: Go to page 58 for VCR Plus+ system channel set up. Automatic clock setting Once you've set up the VCR, it automatically - Sony SLV-N70 | Operating Instructions - Page 26
to B) What you can't do • Record one scrambled channel while watching another channel (the A/B switch is set to B) Wall Splitter Cable box IN OUT A/B switch A B VCR VHF/UHF IN OUT Rear of TV VHF/UHF A Match the type of connector or on your TV: A, VHF B, or C. B For connector types - Sony SLV-N70 | Operating Instructions - Page 27
: EASY SET UP SET UP CLOCK SET AUTO MANUAL 3 (For SLV-N80 only) The SMART CHANNEL MAPPING menu appears. Press M/m/ - Sony SLV-N70 | Operating Instructions - Page 28
TUNER PRESET and press OK. SETTINGS TUNER PRESET SET VCR Plus+ CHANNELS CABLE BOX CONTROL CLOCK SET LANGUAGE RETURN 3 Enter the cable box output channel. 4 Set MANUAL SET to ADD and press OK. 5 Press MENU to exit the menu. SELECT : SET : OK QUIT : MENU Cable box output channel TUNER PRESET - Sony SLV-N70 | Operating Instructions - Page 29
page 51 for automatic VCR Plus+ GOLD system channel set up. Go to page 55 for setting up scrambled channels. For SLV-N70: Set the A/B switch to A and go to page 58 for VCR Plus+ system channel set up. Automatic clock setting Once you've set up the VCR, it automatically sets the clock the first time - Sony SLV-N70 | Operating Instructions - Page 30
the VIDEO indicator in the VCR's display window. MENU M/m OK 1 MENU Press MENU, then press M/m to highlight SETTINGS and press OK. SETTINGS When using the EASY SET UP procedure, skip steps 1 and 2. TUNER PRESET SET VCR Plus+ CHANNELS CABLE BOX CONTROL CLOCK SET LANGUAGE RETURN PLAY OK - Sony SLV-N70 | Operating Instructions - Page 31
, skip steps 1 and 2. TUNER PRESET SET VCR Plus+ CHANNELS CABLE BOX CONTROL CLOCK SET LANGUAGE RETURN PLAY OK SELECT : SET : OK QUIT : MENU 2 Press M/m to highlight CLOCK SET, then press OK. PLAY OK CLOCK SET AUTO MANUAL SELECT : SET : OK QUIT : MENU continued Setting the clock 31 - Sony SLV-N70 | Operating Instructions - Page 32
YES NO RETURN SELECT : SET : OK QUIT : MENU 5 Press M/m to highlight YES, then press OK. PLAY OK 6 Press MENU to exit the menu. MENU 7 To activate the Auto Clock Set function, turn off the VCR. "ACS" will flash in the display window. The VCR automatically sets the clock by searching for - Sony SLV-N70 | Operating Instructions - Page 33
123 456 789 0 Number buttons MENU M/m OK 1 Follow steps 1 to 4 in "Using the Auto AUTO CLOCK SET Clock Set feature." The AUTO CLOCK SET menu is displayed. FULL AUTO CLOCK SET CH TIME ZONE DAYLIGHT SAVING RETURN YES NO SELECT : SET : OK QUIT : MENU continued Setting the clock 33 - Sony SLV-N70 | Operating Instructions - Page 34
time), or AUTO CLOCK SET AUTO to have the VCR automatically set FULL AUTO CLOCK SET CH NO 123 TIME ZONE the daylight saving time. DAYLIGHT SAVING AUTO ON RETURN OFF 4 Press MENU to exit the menu. MENU SELECT : SET : OK QUIT : MENU 5 To activate the Auto Clock Set function, turn off - Sony SLV-N70 | Operating Instructions - Page 35
Getting Started Tip • If you want to return to the previous menu, highlight RETURN and press OK. Note • (SLV-N80 only) If you use both the cable box control feature and the Auto Clock Set feature, the VCR automatically changes channels on the cable box until a channel that carries a time signal is - Sony SLV-N70 | Operating Instructions - Page 36
EASY SET UP procedure, skip steps 1 and 2. TUNER PRESET SET VCR Plus+ CHANNELS CABLE BOX CONTROL CLOCK SET LANGUAGE RETURN PLAY OK SELECT : SET : OK QUIT : MENU 2 Press M/m to highlight CLOCK SET, then press OK. PLAY OK CLOCK SET AUTO MANUAL SELECT : SET : OK QUIT : MENU 36 Setting - Sony SLV-N70 | Operating Instructions - Page 37
3 Press M/m to highlight MANUAL, then press OK. PLAY OK CLOCK SET 1 / 1 / 2 0 0 0 SAT 1 2 : 0 0 AM 4 Press M/m to set the month. PLAY OK SELECT : SET : END : OK QUIT : MENU CLOCK SET 9 / 1 / 2 0 0 0 FRI 1 2 : 0 0 AM SELECT : SET : END : OK QUIT : MENU 5 Press , to highlight - Sony SLV-N70 | Operating Instructions - Page 38
, then press M/m to highlight SETTINGS and press OK. SETTINGS When using the EASY SET UP procedure, skip steps 1 and 2. TUNER PRESET SET VCR Plus+ CHANNELS CABLE BOX CONTROL CLOCK SET LANGUAGE RETURN PLAY OK SELECT : SET : OK QUIT : MENU 38 Setting up the cable box control (SLV-N80 only) - Sony SLV-N70 | Operating Instructions - Page 39
BOX CONTROL 4 5 6 number, then press OK. CABLE MOUSE ON 789 BOX CODE NO. BOX OUTPUT CH 012 CH3 0 Find your cable box or digital satellite RETURN receiver code number from the following chart. SELECT : SET : OK QUIT : MENU PLAY OK continued Setting up the cable box control (SLV-N80 - Sony SLV-N70 | Operating Instructions - Page 40
CH4 LINE SELECT : SET : OK QUIT : MENU 8 If you want to control a cable box, press M/m to highlight the cable box output channel, then press OK. PLAY OK If you want to control a digital satellite receiver, select LINE, then press OK. 9 MENU Press MENU to exit the menu. Tip • If you - Sony SLV-N70 | Operating Instructions - Page 41
014 033, 050, 067, 088, 089, 164, 202, 218, 333 261 255 038, 071, 074, 122, 222, 269, 300 011, 065, 536 411 576 continued Setting up the cable box control (SLV-N80 only) 41 - Sony SLV-N70 | Operating Instructions - Page 42
satellite receiver on top of the VCR. • Position the cable box or digital satellite receiver away from the VCR. • Point the remote commander at the VCR, not at the cable box or digital satellite receiver. Side view : Signal flow 123 456 789 0 42 Setting up the cable box control (SLV-N80 only) - Sony SLV-N70 | Operating Instructions - Page 43
Getting Started To check the cable box control setting 1 Press CH +/- on the remote commander. Does the channel indicator on the cable box or digital satellite receiver change? (Point the remote commander at the VCR, not at the cable box or digital satellite receiver.) 2 Press all 10 number buttons - Sony SLV-N70 | Operating Instructions - Page 44
steps 1 and 2. TUNER PRESET SET VCR Plus+ CHANNELS CABLE BOX CONTROL CLOCK SET LANGUAGE RETURN PLAY OK SELECT : SET : OK QUIT : MENU 2 Press M/m to highlight TUNER PRESET, TUNER PRESET then press OK. CH 1 PLAY ANTENNA / CABLE CABLE OK AUTO PRESET MANUAL SET AFT FINE TUNING RETURN - Sony SLV-N70 | Operating Instructions - Page 45
VHF and UHF channels: OK Press M/m to set ANTENNA/CABLE to ANT, then press OK. SELECT : SET : OK QUIT : MENU TUNER PRESET ANTENNA / CABLE AUTO PRESET MANUAL SET AFT FINE TUNING RETURN CH 2 ANT ADD ON SELECT : SET : OK QUIT : MENU 5 Press M/m to highlight AUTO PRESET, TUNER PRESET - Sony SLV-N70 | Operating Instructions - Page 46
a VHF, UHF, or CATV channel, the display changes as follows each time you press DISPLAY. Channel number, program name, and station's call letters (for SLV-N80 only) Remaining tape length and time counter The bar indicator and pointer for searching for a specific place on a tape No display • If you - Sony SLV-N70 | Operating Instructions - Page 47
channels manually Getting Started 123 456 789 0 Number buttons, ENTER CH +/- MENU M/m OK 1 MENU Press MENU, then press M/m to highlight SETTINGS and press OK. SETTINGS TUNER PRESET SET VCR Plus+ CHANNELS CABLE BOX CONTROL CLOCK SET LANGUAGE RETURN PLAY OK SELECT : SET : OK QUIT : MENU - Sony SLV-N70 | Operating Instructions - Page 48
Press CH +/- to select the channel number. 2 Press OK. 3 Press M/m to set MANUAL SET to ERASE, then press OK. PLAY OK TUNER PRESET ANTENNA / CABLE AUTO PRESET MANUAL SET AFT FINE TUNING RETURN SELECT : SET : OK QUIT : MENU CH 1 CABLE ADD ON Channel to be preset TUNER PRESET ANTENNA / CABLE - Sony SLV-N70 | Operating Instructions - Page 49
the manual tuning function. 123 456 789 0 Number buttons, ENTER MENU M/m/ - Sony SLV-N70 | Operating Instructions - Page 50
picture, TUNER PRESET then press OK. PLAY ANTENNA / CABLE OK Note that the AFT setting switches to OFF. AUTO PRESET MANUAL SET AFT FINE TUNING RETURN SELECT : SET : OK QUIT : MENU 6 Press MENU to exit the menu. MENU CH 5 CABLE ADD CH 5 CABLE ADD OFF Tips • To select the channel in - Sony SLV-N70 | Operating Instructions - Page 51
Getting Started Setting up the VCR Plus+ GOLD system (SLV-N80 only) How the VCR Plus+ guide). The VCR can set the guide channels automatically (see page 52), but you may have to set the guide channels manually depending on your area or the way you hooked up your VCR (see page 55). To find the guide - Sony SLV-N70 | Operating Instructions - Page 52
. If you are having trouble setting the guide channels, or if you have many scrambled channels, go to page 56 for manual VCR Plus+ GOLD system set up. Note that the VCR Plus+ GOLD system does not work with a digital satellite receiver. 123 456 789 0 MENU M/m OK 1 Set up the VCR using the EASY - Sony SLV-N70 | Operating Instructions - Page 53
menu AUTO MANUAL appears. SELECT : SET : OK QUIT : MENU 4 Press M/m to highlight AUTO, then press OK. PLAY VCR WILL LOOK FOR OK The instruction : SET : OK QUIT : MENU 5 Press ?/1 to turn off the VCR. The VCR sets the program guide channels from 0:00 am to 5:00 am while the VCR is - Sony SLV-N70 | Operating Instructions - Page 54
are set. • The VCR cannot set the guide channels correctly unless you enter the ZIP/POSTAL CODE in your area. • When you move to a different area, you must set up the VCR again and enter your new ZIP/ POSTAL CODE in the EASY SET UP procedure. 54 Setting up the VCR Plus+ GOLD system (SLV-N80 - Sony SLV-N70 | Operating Instructions - Page 55
CONTROL CLOCK SET LANGUAGE RETURN PLAY OK SELECT : SET : OK QUIT : MENU 2 Press M/m to highlight SET VCR Plus+ CHANNELS, then press OK. PLAY OK SET VCR Plus+ CHANNELS SMART CHANNEL MAPPING AUTO MANUAL SELECT : SET : OK QUIT : MENU continued Setting up the VCR Plus+ GOLD system (SLV - Sony SLV-N70 | Operating Instructions - Page 56
3 Press M/m to highlight MANUAL, then press OK. PLAY OK SET VCR Plus+ CHANNELS GUIDE CH -- TV CH - -- SET GUIDE CH LIST QUIT : 0-9 : OK : MENU 4 Enter the guide channel number assigned in 123 the program guide and press ENTER. SET VCR Plus+ CHANNELS 456 V C R W IGL UL IDLEOCOHK F O RTV - Sony SLV-N70 | Operating Instructions - Page 57
8 After all settings are complete, press MENU to exit the menu. MENU Tip • If you want to return to the previous menu, highlight RETURN and press OK. Getting Started Setting up the VCR Plus+ GOLD system (SLV-N80 only) 57 - Sony SLV-N70 | Operating Instructions - Page 58
Setting up the VCR Plus+ system (SLV-N70 only) How the VCR Plus+ system works Whenever you want to record a TV program, all you need to do is look up the "PlusCode" number, a number assigned to each program published in the TV section of most newspapers, cable TV listings, and even TV GUIDE - Sony SLV-N70 | Operating Instructions - Page 59
buttons, ENTER MENU M/m/ - Sony SLV-N70 | Operating Instructions - Page 60
to the next page, press ,. GUIDE TV 2 - 73 5 - 25 17 - 5 25 - 58 34 - 115 39 - 68 43 - 7 48 - 12 52 - 55 59 - 36 PAGE : QUIT : MENU GUIDE 66 - 68 - 71 - 74 - 79 - 82 - 85 - 88 - 91 - 93 - TV 48 59 63 123 6 100 98 52 30 87 60 Setting up the VCR Plus+ system (SLV-N70 only) - Sony SLV-N70 | Operating Instructions - Page 61
7 After all settings are complete, press MENU to exit the menu. MENU Tip • If you want to return to the previous menu, highlight RETURN and press OK. Getting Started Setting up the VCR Plus+ system (SLV-N70 only) 61 - Sony SLV-N70 | Operating Instructions - Page 62
Basic Operations Playing a tape Z EJECT 123 456 789 0 CLEAR DISPLAY X PAUSE COMMERCIAL PASS H PLAY M FF x STOP m REW 1 Turn on your TV and set it to the video channel. 2 Insert a tape. The VCR turns on and starts playing automatically if you insert a tape with its safety tab removed. 62 - Sony SLV-N70 | Operating Instructions - Page 63
Basic Operations 3 Press H PLAY. PLAY When the tape reaches the end, it will few seconds, then resumes normal playback. If you press and hold COMMERCIAL PASS while the VCR is skip searching, the VCR will stop searching, and continue rewinding until you release COMMERCIAL PASS. To use the time - Sony SLV-N70 | Operating Instructions - Page 64
Notes • Tapes recorded in the LP mode on other VCRs can be played back on this VCR but the picture quality cannot be guaranteed. • While displaying a menu on the TV screen, you cannot use H PLAY, X PAUSE, M FF, m REW, or x STOP buttons. • The counter resets to "0:00:00" whenever a tape is reinserted - Sony SLV-N70 | Operating Instructions - Page 65
Recording TV programs 123 456 789 0 TV/VIDEO COUNTER/ REMAIN SP/EP DISPLAY CH +/- z REC x STOP Basic Operations 1 Turn on your TV and set it to the video channel. To record from a cable box, turn it on. 2 Insert a tape with its safety tab in place. continued Recording TV programs 65 - Sony SLV-N70 | Operating Instructions - Page 66
tape length with the indicator appear alternately in the VCR's display window. 1 :38 SP 0 : 0 0 : 2 2 Remaining tape length Time counter To check the remaining tape length of a T-140 or T-180 tape, set TAPE SELECT in the ADVANCED OPTIONS menu to 180. (For details, see page 97.) 66 Recording - Sony SLV-N70 | Operating Instructions - Page 67
If the TV is connected to the VCR's LINE OUT jacks, set the TV to TV input; if you can use the number buttons on the remote commander. Enter the channel number, then press ENTER VCR to calculate and display the remaining tape length after you press DISPLAY. Basic Operations Recording TV programs 67 - Sony SLV-N70 | Operating Instructions - Page 68
Recording TV programs using the Dial Timer The Dial Timer function allows you to make timer recordings of programs without turning on your TV. Set the recording timer to record up to eight programs that will be broadcast within a month using the DIAL TIMER. The recording start time and recording - Sony SLV-N70 | Operating Instructions - Page 69
Basic Operations 3 DIAL TIMER Press DIAL TIMER. "START" and the current time appear alternately in the display window. VIDEO APC EP VIDEO APC EP 4 DIAL TIMER Turn DIAL TIMER to set the recording start time. You can set the recording start time in 15 minute intervals or adjust the time in - Sony SLV-N70 | Operating Instructions - Page 70
BOX CONTROL setting is ON, you can change the channel number in units of 100 by pressing the CHANNEL +/- buttons (SLV-N80 VCR at the same time during any of the Dial Timer settings. To stop recording To stop the VCR while recording, press x STOP. To use the VCR after setting the timer To use the VCR - Sony SLV-N70 | Operating Instructions - Page 71
Basic Operations To lock the VCR after setting the timer (Child Lock) When the VCR is turned on, hold down ?/1 POWER on the VCR until the indicator appears in the display window. The VCR turns off and the - indicator remains lit. The VCR will not work except for timer recordings. To unlock the VCR, - Sony SLV-N70 | Operating Instructions - Page 72
only when you complete Smart Channel Mapping and the VCR receives the program information signal (SLV-N80 only) (see page 52). About the Demonstration canceled, the timer settings entered while using the Demonstration Mode will remain. Be sure to manually cancel the timer settings before you use - Sony SLV-N70 | Operating Instructions - Page 73
number listed in the TV program guide. The date, time and channel number of that program are set automatically. You can preset up to eight programs together with the DIAL TIMER and manual timer settings at one time. Before you start... • Check that the VCR clock is set to the correct time. • Turn on - Sony SLV-N70 | Operating Instructions - Page 74
time, channel number (or station ID for SLV-N80 only), and tape speed appear on the TV screen. If the information is not correct, press CLEAR to cancel the setting. 5 To enter another setting, repeat steps 1 to 4. 6 Press ?/1 to turn off the VCR. The indicator appears in the display window and - Sony SLV-N70 | Operating Instructions - Page 75
appear on the picture when the tape speed is changed. If you want to keep the tape speed, set AUTO TAPE SPEED to OFF in the ADVANCED OPTIONS menu (page 97). Notes • If the VCR does not accept the PlusCode number, this means that: - The PlusCode number is incorrect. - ONCE, DAILY, or WEEKLY - Sony SLV-N70 | Operating Instructions - Page 76
the timer manually If the VCR Plus+ or VCR Plus+ GOLD system is not available in your area, follow the instructions below to set the timer to record programs. Before you start... • Check that the VCR clock is set to the correct time. • Turn on your TV and set it to the video channel. When using - Sony SLV-N70 | Operating Instructions - Page 77
5 Press MENU to exit the menu. MENU 6 Press ?/1 to turn off the VCR. The indicator appears in the display window and the VCR stands by for recording. When using a cable box, leave it on. To stop recording To stop the VCR while recording, press x STOP. continued Setting the timer manually 77 - Sony SLV-N70 | Operating Instructions - Page 78
with other operations after setting the timer, press m to highlight RETURN, then press OK. The display returns to the MENU screen. If you are finished using the VCR, turn off the power before timer recording starts. Notes • If you are using a Cable Mouse, you cannot select "L1" or "L2." (SLV-N80 - Sony SLV-N70 | Operating Instructions - Page 79
Operations Playback options Operation View the picture during fastforward or rewind During fast-forward, hold down M FF. During rewind, hold down m REW. Play at high speed • During playback, press M FF or m REW on the remote or m REW on the remote commander. Hold down the - Sony SLV-N70 | Operating Instructions - Page 80
motion. - The picture shakes during pause. To set tracking to the center position, press both buttons (+/-) at the same time. Notes • The sound is muted during these operations. • Tapes recorded in the LP mode on other VCRs can be played back on this VCR but the picture quality cannot be guaranteed - Sony SLV-N70 | Operating Instructions - Page 81
in the normal way, you can have the VCR stop recording automatically after a specified duration. z REC Additional Operations 1 While recording, press z REC. The indicator appears in the display window. VIDEO APC SP 2 Press z REC repeatedly to set the duration time. Each press advances the time - Sony SLV-N70 | Operating Instructions - Page 82
OK 1 Press ?/1 to turn on the VCR. 2 Press MENU, then press M/m to highlight TIMER SET/CHECK and press OK. • If you want to change a setting, go on to the next step. • If you do not need to change the settings, press MENU, then turn off the VCR to return to recording standby. 82 Checking/changing - Sony SLV-N70 | Operating Instructions - Page 83
/-- - :-- - :-- -- -- RETURN SELECT : SET : OK CANCEL : C L E A R QUIT : MENU 4 Press OK. 5 Press MENU to exit the menu. If any timer settings remain, turn off the VCR to return to recording standby. When the timer settings overlap The program that starts first has priority and the second - Sony SLV-N70 | Operating Instructions - Page 84
For details, see page 97. Recording bilingual programs Normally, this VCR records only the main sound. When a SAP (Second Audio Program) is received, the SAP indicator lights up. To record only SAP sound, set TUNER AUDIO in the ADVANCED OPTIONS menu to SAP. For details, see page 97. Selecting the - Sony SLV-N70 | Operating Instructions - Page 85
How sound is recorded on a video tape The VCR records sound onto two separate tracks. Hi-fi audio is recorded onto the main you play a tape recorded in monaural, the sound is heard in monaural regardless of the AUDIO MONITOR setting. Additional Operations Recording stereo and bilingual programs 85 - Sony SLV-N70 | Operating Instructions - Page 86
YES in RECALL LATEST DATA in the TAPE GUIDE screen (see page 87). Before you start... • Turn on your TV and set it to the video channel. 123 456 789 0 ?/1 TAPE GUIDE M/m/ - Sony SLV-N70 | Operating Instructions - Page 87
4 Press OK. The VCR starts searching, and playback starts automatically from the beginning of the selected program. TAPE GUIDE TYPE 1 2 0 MIN SEARCHING S E Additional Operations To stop searching Press x STOP. To exit the TAPE GUIDE screen Press TAPE GUIDE. To record in a blank space Blank - Sony SLV-N70 | Operating Instructions - Page 88
program "B," the Tape Guide information for the cannot use this function unless the clock is set. • Depending on the tape, the total program information will appear in the TAPE GUIDE screen. • If you use the index is stored in the VCR's memory, NO DATA appears in the TAPE GUIDE screen. • The station - Sony SLV-N70 | Operating Instructions - Page 89
where each recording begins. Use these signals as references to find a specific recording. 123 456 789 0 ./> INDEX SEARCH Additional Operations 1 Insert an indexed tape into the VCR. 2 Press ./> INDEX SEARCH. • To search ahead, press > INDEX SEARCH. • To search backwards, press . INDEX SEARCH. The - Sony SLV-N70 | Operating Instructions - Page 90
Searching for a selected point on the tape You can easily find a specific point by moving the pointer on the TV screen. The VCR fast-forwards or rewinds to the point you indicate and starts playback automatically. 123 456 789 0 DISPLAY - Sony SLV-N70 | Operating Instructions - Page 91
, and m REW/ < buttons on the remote commander work only for moving the pointer (F), while the M FF and m REW buttons on the VCR are used for normal tape operation. Note, however, if you press these buttons on the VCR, searching is canceled. Additional Operations Searching for a selected point on - Sony SLV-N70 | Operating Instructions - Page 92
Locating a channel by Station ID (SLV-N80 only) You can select a TV program using the station's ID. Before you start... • Set FAVORITE CH to OFF in the ADVANCED OPTIONS menu (page 98). 123 456 789 0 1 Turn on your TV and set it to the video channel. 2 Press ENTER. The station ID appears on the - Sony SLV-N70 | Operating Instructions - Page 93
CH to ON in the ADVANCED OPTIONS menu (page 98). 0 ENTER CH +/- - Sony SLV-N70 | Operating Instructions - Page 94
as needed. 5 Press ENTER. Selecting a channel from your favorite channel list 1 Turn on your TV and set it to the video channel. To choose a channel from a cable box, turn the cable box on. 2 number appears on the TV screen. 94 Creating a favorite channel list with Station ID (SLV-N80 only) - Sony SLV-N70 | Operating Instructions - Page 95
VCR automatically adjusts the tracking when playing a tape (the indicator flashes in the display window, then turns off), distortion may occur if the recording is in poor condition. In this case, manually turns off in the display window. Additional Operations continued Adjusting the picture 95 - Sony SLV-N70 | Operating Instructions - Page 96
function The Adaptive Picture Control (APC) function automatically improves recording and playback quality by adjusting the VCR to the condition of the video heads and tape. To maintain better picture quality, we recommend that you set APC to ON in the ADVANCED OPTIONS menu (The APC indicator lights - Sony SLV-N70 | Operating Instructions - Page 97
Menu choices Initial settings are indicated in bold print. Menu option Set this option to AUTO ANT SELECT • ON if your TV is connected only to VHF/UHF OUT on the VCR. To play a tape, set the TV to the VCR Control) function operate AUTO TAPE SPEED, set TAPE SELECT correctly. • OFF to keep the - Sony SLV-N70 | Operating Instructions - Page 98
FAVORITE CH (SLV-N80 only) SHARPNESS Set this option to • ON when using favorite channel list. • OFF when using station ID list. For details, see pages 92 and 93. • L (Low) through H (High) to adjust the sharpness of the picture. Select L to turn off the sharpness control. 98 Changing menu options - Sony SLV-N70 | Operating Instructions - Page 99
on this VCR This VCR (Recorder) TV LINE-2 IN Additional Operations Other VCR (Player) LINE OUT VMC-810HG audio/video cable (not supplied) : Signal flow If the other VCR has a CONTROL S OUT jack for synchronized editing (SLV-N80 only) Connect to record on this VCR, then connect the VCRs via the - Sony SLV-N70 | Operating Instructions - Page 100
Operation (when recording on this VCR) Before you start editing • Turn on your TV and set it to the video channel. • Press INPUT SELECT or CHANNEL +/- to display "L2" (or "L1") in the display window. • Press SP/EP to select the - Sony SLV-N70 | Operating Instructions - Page 101
3 or 4). The channel you selected in step 4 appears on the TV screen. If the channels change when you press CHANNEL +/-, you have made the correct setting. Whenever you use the VCR, set the TV to the channel selected in step 1. Additional Information continued General setup information 101 - Sony SLV-N70 | Operating Instructions - Page 102
the EAC-32 antenna connector (not supplied) to connect the antenna to the VCR. 300-ohm twin lead cable EAC-32 antenna connector (not supplied) 1 Loosen UHF/VHF band separator/mixer (not supplied) to connect the antenna to the VCR. 300-ohm twin lead cable EAC-66 UHF/VHF band separator/ mixer (not - Sony SLV-N70 | Operating Instructions - Page 103
Troubleshooting If you have any questions or problems not covered below, please consult your nearest Sony dealer. Power Clock Playback Additional Information Symptom Remedy The ?/1 switch does not function. • Connect the AC power cord securely. • Make sure the VCR is not locked. To unlock, - Sony SLV-N70 | Operating Instructions - Page 104
the CABLE BOX CONTROL option is set to ON. • Turn the power off and unplug the AC power cord. • Check that a tape isn't already in the tape compartment. • Make sure you are pointing the remote commander at the remote sensor on the VCR. • Replace all the batteries in the remote commander with new - Sony SLV-N70 | Operating Instructions - Page 105
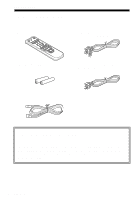
parts and controls Mass Approx. 4.1 kg (9 lb 1 oz) Supplied accessories Remote commander (1) Size AA (R6) batteries (2) 75-ohm coaxial cable with F-type connectors (1) Audio/video cable (3-phono, 1-mini to 3-phono, 1-mini) (1) (SLV-N80 only) Audio/video cable (3-phono to 3-phono) (1) (SLV-N70 - Sony SLV-N70 | Operating Instructions - Page 106
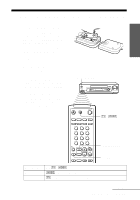
Index to parts and controls Refer to the pages indicated in parentheses ( ) for details. Front panel A ?/1 POWER switch (74) B Remote sensor (5) ) K DIAL TIMER control (68) L CHANNEL/TRACKING +/- buttons (66) (95) M INPUT SELECT button (67) N REALITY REGENERATOR button (95) O EASY SET UP button (12) - Sony SLV-N70 | Operating Instructions - Page 107
(84) D Tape speed indicator (66) E VIDEO indicator (67) (101) F APC (Adaptive Picture Control) indicator (96) G RR (Reality Regenerator) indicator (95) H Tracking indicator (95) I Child Lock (66) L Tape/recording indicator (66) Additional Information continued Index to parts and controls 107 - Sony SLV-N70 | Operating Instructions - Page 108
Rear panel SLV-N80 SLV-N70 A AC power cord (8) B S-LINK (CONTROL S IN) jack (10) (99) (SLV-N80 only) C CABLE BOX CONTROL (CONTROL S OUT) jack (11) (14) (SLV-N80 only) D LINE-1 IN AUDIO R/L/VIDEO jacks (14) (99) E RF (Radio Frequency) UNIT switch (101) F VHF/UHF IN connector (11) (14) (17) (20) (23 - Sony SLV-N70 | Operating Instructions - Page 109
(5) K ×2 button (79) L y SLOW button (79) M MENU button (30) (76) (82) N X PAUSE/M button (30) (63) x STOP/m button (30) (63) m REW (rewind)/ < button (63) (79) M FF (fast-forward)/ , button (63) (79) H PLAY/OK button (30) (63) Additional Information continued Index to parts and controls 109 - Sony SLV-N70 | Operating Instructions - Page 110
) Q AUDIO MONITOR button (84) R VCR Plus+ button (73) S CLEAR button (63) (74) (83) T Number buttons (74) U ENTER button (74) (92) (93) V CH (channel) +/- buttons (6) (66) W VOL (volume) +/- buttons (6) X . / > INDEX SEARCH buttons (89) Y COMMERCIAL PASS button (63) 110 Index to parts and controls - Sony SLV-N70 | Operating Instructions - Page 111
ID 92 Stereo 84 T Tape Guide 86 Timer setting 76 canceling 82 changing 82 checking 82 daily/weekly recording 78 using VCR Plus+ or VCR Plus+ GOLD 73 Tracking adjustment. see Adjusting Tuner presetting 44 V VCR Plus+ channel set up 58 recording 73 VCR Plus+ GOLD channel set up 51 recording 73 Index - Sony SLV-N70 | Operating Instructions - Page 112
Quick reference to using the VCR Hookup 1 (SLV-N80 only) To play a tape 1 Set the TV to channel 3 or 4 (or to video input, if you made A/V connections). 2 Insert a tape and press H PLAY. To record a program 1 Turn on the cable box. 2 Press VCR Plus+ on the remote commander. 3 Enter the PlusCode
-
 1
1 -
 2
2 -
 3
3 -
 4
4 -
 5
5 -
 6
6 -
 7
7 -
8
-
9
-
10
-
11
-
12
-
13
-
14
-
15
-
16
-
17
-
18
-
19
-
20
-
21
-
22
-
23
-
24
-
25
-
26
-
27
-
28
-
29
-
30
-
31
-
32
-
33
-
34
-
35
-
36
-
37
-
38
-
39
-
40
-
41
-
42
-
43
-
44
-
45
-
46
-
47
-
48
-
49
-
50
-
51
-
52
-
53
-
54
-
55
-
56
-
57
-
58
-
59
-
60
-
61
-
62
-
63
-
64
-
65
-
66
-
67
-
68
-
69
-
70
-
71
-
72
-
73
-
74
-
75
-
76
-
77
-
78
-
79
-
80
-
81
-
82
-
83
-
84
-
85
-
86
-
87
-
88
-
89
-
90
-
91
-
92
-
93
-
94
-
95
-
96
-
97
-
98
-
99
-
100
-
101
-
102
-
103
-
104
-
105
-
106
-
107
-
108
-
109
-
110
-
111
-
112
 |
 |
3-868-116-
12
(1)
Video Cassette
Recorder
Operating Instructions
Owner’s record
The model and serial numbers are located at the rear of the unit.
Record these numbers in the spaces provided below. Refer to them whenever
you call upon your Sony dealer regarding this product.
Model No._________________________
Serial No. _________________________
Declaration of Conformity
Trade Name:
SONY
Model No.:
SLV-N80/N70
Responsible Party: Sony Electronics Inc.
Address:
1 Sony Drive, Park Ridge, NJ.07656 USA
Telephone No.:
201-930-6970
This device complies with Part 15 of the FCC Rules. Operation is subject to
the following two conditions: (1) This device may not cause harmful
interference, and (2) this device must accept any interference received,
including interference that may cause undesired operation.
SLV-N80
SLV-N70
© 2000 Sony Corporation