TEAC CD-W540E User Manual - Page 7

List of s - manual

Page 7 highlights

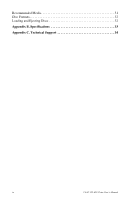
List of Figures Figure 1. CD-RW Drive Kit Package Contents 2 Figure 2. Front Panel of the CD-RW Drive 3 Figure 3. Rear Panel of the CD-RW Drive 5 Figure 4. Jumper Pins on Rear Panel 7 Figure 5. CSEL, Slave, and Master Jumper Pin Settings 7 Figure 6. Installing the CD-RW Drive in a Computer 8 Figure 7. Cable Connections 9 Figure 8. Windows XP Transfer Mode Setting 11 Figure 9. Windows 2000 Transfer Mode Setting 11 Figure 10. Checking the DMA Box 12 Figure 11. Connecting Analog Audio Speakers or Headphones 14 Figure 12. Close Program Panel 16 Figure 13. Auto Detect Panel 16 Figure 14. Choose Setup Language Panel 17 Figure 15. InstallShield Wizard Welcome Panel 17 Figure 16. Setup Type Panel 17 Figure 17. Ready to Install Panel 18 Figure 18. Installing Status Panel 18 Figure 19. InstallShield Wizard Completed Panel 19 Figure 20. Restart Panel 19 Figure 21. Easy CD Creator Select a Project Panel 21 Figure 22. Select a Project Panel: Help Button 22 Figure 23. Help Topics Panel 23 Figure 24. Select a Project Panel: Make Music CD 23 Figure 25. Untitled Music CD Project Panel 24 Figure 26. Select a Project Panel: Make a Data CD Button 25 Figure 27. DirectCD Format Utility Panel 25 Figure 28. Untitled Data CD Project Panel 26 Figure 29. Select a Project: CD Label Creator Button 27 Figure 30. Select a Project: CD Copier Button 28 Figure 31. CD Copier Welcome Panel 28 Figure 32. CD Copier Panel 28 Figure 33. Select a Project: Web-checkup Button 29 Figure 34. Select a Project: CD Label Creator Button 30 Figure 35. How to Handle Compact Discs (CD-R and CD-RW 31 Figure 36. Ejecting the Disc Tray 32 TEAC CD-RW Drive User's Manual v

  • 1
  • 2
  • 3
  • 4
  • 5
  • 6
  • 7
  • 8
  • 9
  • 10
  • 11
  • 12
  • 13
  • 14
  • 15
  • 16
  • 17
  • 18
  • 19
  • 20
  • 21
  • 22
  • 23
  • 24
  • 25
  • 26
  • 27
  • 28
  • 29
  • 30
  • 31
  • 32
  • 33
  • 34
  • 35
  • 36
  • 37
  • 38
  • 39
  • 40
  • 41
  • 42

TEAC CD-RW Drive User’s Manual
v
List of Figures
Figure 1. CD-RW Drive Kit Package Contents . . . . . . . . . . . . . . . . . . . . . . . . . . . . . . . . . 2
Figure 2. Front Panel of the CD-RW Drive . . . . . . . . . . . . . . . . . . . . . . . . . . . . . . . . . . . . 3
Figure 3. Rear Panel of the CD-RW Drive
. . . . . . . . . . . . . . . . . . . . . . . . . . . . . . . . . . . . 5
Figure 4. Jumper Pins on Rear Panel . . . . . . . . . . . . . . . . . . . . . . . . . . . . . . . . . . . . . . . . . 7
Figure 5. CSEL, Slave, and Master Jumper Pin Settings . . . . . . . . . . . . . . . . . . . . . . . . . . 7
Figure 6. Installing the CD-RW Drive in a Computer . . . . . . . . . . . . . . . . . . . . . . . . . . . . 8
Figure 7. Cable Connections
. . . . . . . . . . . . . . . . . . . . . . . . . . . . . . . . . . . . . . . . . . . . . . . 9
Figure 8. Windows XP Transfer Mode Setting . . . . . . . . . . . . . . . . . . . . . . . . . . . . . . . . 11
Figure 9. Windows 2000 Transfer Mode Setting . . . . . . . . . . . . . . . . . . . . . . . . . . . . . . . 11
Figure 10. Checking the DMA Box . . . . . . . . . . . . . . . . . . . . . . . . . . . . . . . . . . . . . . . . . 12
Figure 11. Connecting Analog Audio Speakers or Headphones . . . . . . . . . . . . . . . . . . . 14
Figure 12. Close Program Panel
. . . . . . . . . . . . . . . . . . . . . . . . . . . . . . . . . . . . . . . . . . . 16
Figure 13. Auto Detect Panel . . . . . . . . . . . . . . . . . . . . . . . . . . . . . . . . . . . . . . . . . . . . . . 16
Figure 14. Choose Setup Language Panel . . . . . . . . . . . . . . . . . . . . . . . . . . . . . . . . . . . . 17
Figure 15. InstallShield Wizard Welcome Panel . . . . . . . . . . . . . . . . . . . . . . . . . . . . . . . 17
Figure 16. Setup Type Panel
. . . . . . . . . . . . . . . . . . . . . . . . . . . . . . . . . . . . . . . . . . . . . . 17
Figure 17. Ready to Install Panel . . . . . . . . . . . . . . . . . . . . . . . . . . . . . . . . . . . . . . . . . . . 18
Figure 18. Installing Status Panel
. . . . . . . . . . . . . . . . . . . . . . . . . . . . . . . . . . . . . . . . . . 18
Figure 19. InstallShield Wizard Completed Panel . . . . . . . . . . . . . . . . . . . . . . . . . . . . . . 19
Figure 20. Restart Panel . . . . . . . . . . . . . . . . . . . . . . . . . . . . . . . . . . . . . . . . . . . . . . . . . . 19
Figure 21. Easy CD Creator Select a Project Panel . . . . . . . . . . . . . . . . . . . . . . . . . . . . . 21
Figure 22. Select a Project Panel: Help Button
. . . . . . . . . . . . . . . . . . . . . . . . . . . . . . . . 22
Figure 23. Help Topics Panel . . . . . . . . . . . . . . . . . . . . . . . . . . . . . . . . . . . . . . . . . . . . . . 23
Figure 24. Select a Project Panel: Make Music CD . . . . . . . . . . . . . . . . . . . . . . . . . . . . . 23
Figure 25. Untitled Music CD Project Panel . . . . . . . . . . . . . . . . . . . . . . . . . . . . . . . . . . 24
Figure 26. Select a Project Panel: Make a Data CD Button
. . . . . . . . . . . . . . . . . . . . . . 25
Figure 27. DirectCD Format Utility Panel . . . . . . . . . . . . . . . . . . . . . . . . . . . . . . . . . . . . 25
Figure 28. Untitled Data CD Project Panel
. . . . . . . . . . . . . . . . . . . . . . . . . . . . . . . . . . . 26
Figure 29. Select a Project: CD Label Creator Button . . . . . . . . . . . . . . . . . . . . . . . . . . . 27
Figure 30. Select a Project: CD Copier Button
. . . . . . . . . . . . . . . . . . . . . . . . . . . . . . . . 28
Figure 31. CD Copier Welcome Panel
. . . . . . . . . . . . . . . . . . . . . . . . . . . . . . . . . . . . . . 28
Figure 32. CD Copier Panel . . . . . . . . . . . . . . . . . . . . . . . . . . . . . . . . . . . . . . . . . . . . . . . 28
Figure 33. Select a Project: Web-checkup Button . . . . . . . . . . . . . . . . . . . . . . . . . . . . . . 29
Figure 34. Select a Project: CD Label Creator Button . . . . . . . . . . . . . . . . . . . . . . . . . . . 30
Figure 35. How to Handle Compact Discs (CD-R and CD-RW)
. . . . . . . . . . . . . . . . . . 31
Figure 36. Ejecting the Disc Tray
. . . . . . . . . . . . . . . . . . . . . . . . . . . . . . . . . . . . . . . . . . 32