Toro 20334 Owner's Manual - Page 15
Replacing, the Air Filter, Changing, the Engine
 |
UPC - 021038203348
View all Toro 20334 manuals
Add to My Manuals
Save this manual to your list of manuals |
Page 15 highlights
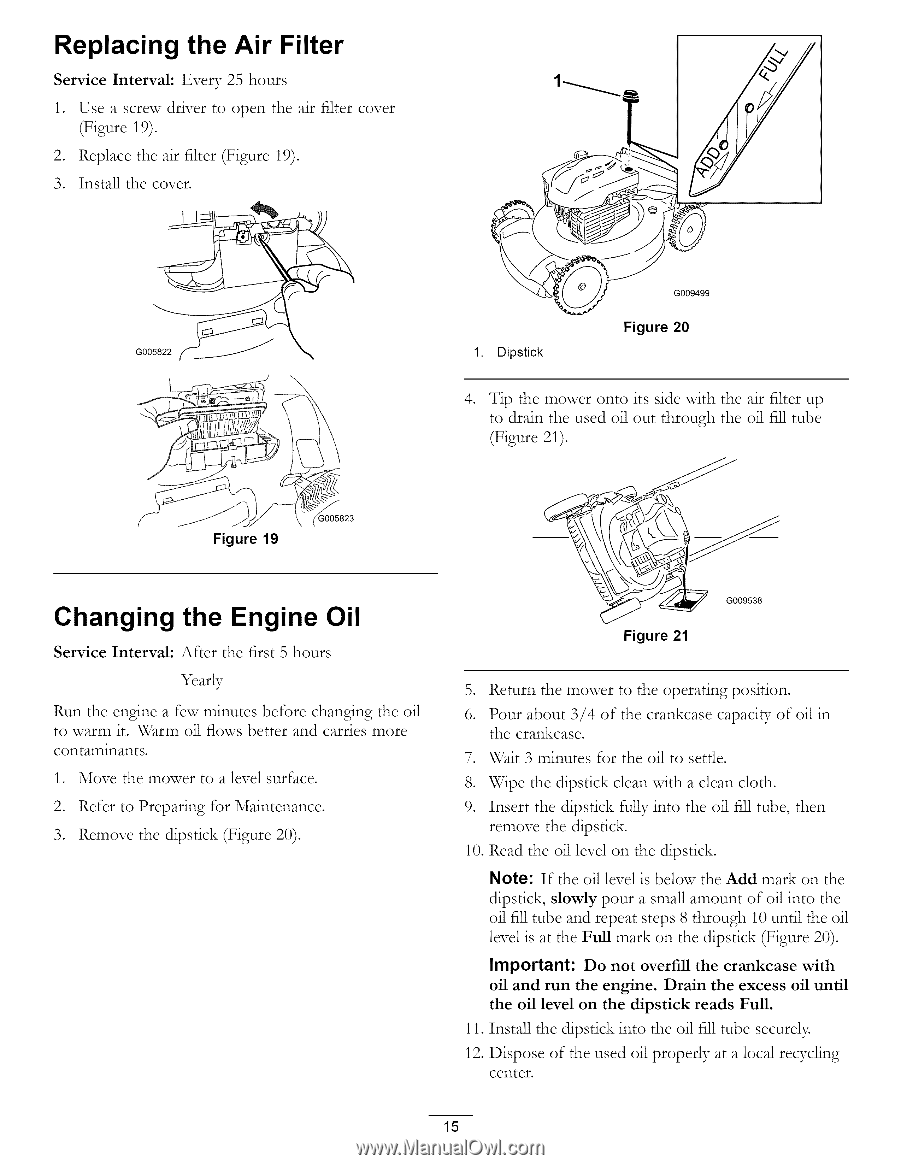
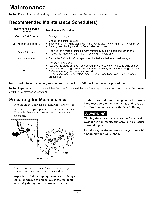
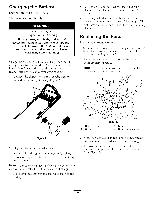
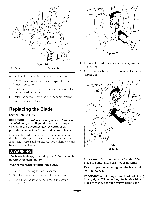
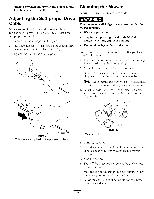
Replacing the Air Filter Service Interval: Every 25 hours 1. Use a screw driver to open the air filter cover (Figure 19). 2. Replace the air filter (Figure 19). 3. Install the cover. G005822 1. Dipstick Figure 20 , Tip the mower onto its side with the air filter up to drain the used oil out through the oil fill tube (Figure 21). Figure 19 Changing the Engine Oil Service Interval: After the first 5 hours Yearly Run the engine a few minutes before changing the oil to warm it. Warm oil flows better and carries more contaminants. 1. Move the mower to a level surface. 2. Refer to Preparing for Maintenance. 3. Remove the dipstick (Figure 20). Figure 21 ooo 5. Return the mower to the operating position. 6. Pour about 3/4 of the crankcase capacib7 of oil in the crankcase. , Wait 3 minutes for the oil to settle. 8. Wipe the dipstick clean with a clean cloth. 9. Insert the dipstick fury into the oil fill tube, then remove the dipstick. 10. Read the oil level on the dipstick. Note: If the oil level is below the Add mark on the dipstick, slowly pour a small amount of oil into the oil fill tube and repeat steps 8 through 10 until the oil level is at the Full mark on the dipstick (Figure 20). Important: Do not overfill the crankcase with oil and run the engine. Drain the excess oil until the oil level on the dipstick reads Full. 11. Install the dipstick into the oil fill tube secure1> 12. Dispose of the used oil properly at a local recycling center. 15
-
 1
1 -
2
-
3
-
4
-
5
-
6
-
7
-
8
-
9
-
 10
10 -
 11
11 -
 12
12 -
 13
13 -
 14
14 -
 15
15 -
 16
16 -
 17
17 -
 18
18 -
 19
19 -
 20
20
 |
 |