Toshiba PA3769A-1LCH LCD Monitor 23.6 inch HD LCD Monitor User Manual - Page 33
Adjusting monitor settings
 |
View all Toshiba PA3769A-1LCH LCD Monitor manuals
Add to My Manuals
Save this manual to your list of manuals |
Page 33 highlights
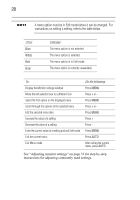
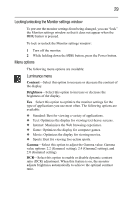
33 Adjusting monitor settings This section describes how to adjust commonly used settings step by step. Using the Auto Config utility Use the monitor's Auto Config utility to automatically configure your monitor in one easy step. Simply press the AUTO button on the front of the monitor, and the utility will adjust the aspect ratio, size, and resolution of the transmitted image to fit the display. The Auto Config option is available only when the monitor is connected to your computer via a D-SUB (VGA) cable. For precise control over individual settings, use the menus to customize the monitor properties. Adjusting the brightness of the display Follow these steps to adjust the brightness of the display: 1 Press MENU to display the Monitor settings window. 2 If necessary, press + to move the red selection box to the Luminance icon . The Luminance menu displays. 3 Press MENU once to highlight the Contrast control. 4 Press + once to navigate to the Brightness control. 5 Press MENU to edit the Brightness control. The control is highlighted in red. 6 Press + to increase the brightness setting, or press - to decrease the brightness setting. Press + or - repeatedly until the desired brightness setting is displayed. 7 Press MENU to enter the new setting and exit Edit mode. The control turns from red to white. 8 Press AUTO twice to exit the current menu and close the Monitor settings window.
-
 1
1 -
2
-
3
-
4
-
5
-
6
-
7
-
8
-
9
-
10
-
11
-
12
-
13
-
14
-
15
-
16
-
17
-
18
-
19
-
20
-
21
-
22
-
23
-
24
-
25
-
26
-
27
-
 28
28 -
 29
29 -
 30
30 -
 31
31 -
 32
32 -
 33
33 -
 34
34 -
 35
35 -
 36
36 -
 37
37 -
 38
38 -
39
-
40
-
41
-
42
-
43
-
44
-
45
-
46
-
47
-
48
-
49
-
50
-
51
-
52
-
53
-
54
-
55
-
56
-
57
-
58
-
59
-
60
-
61
-
62
-
63
-
64
-
65
-
66
-
67
-
68
-
69
-
70
-
71
-
72
-
73
-
74
-
75
-
76
-
77
-
78
-
79
-
80
-
81
-
82
-
83
-
84
-
85
-
86
-
87
-
88
 |
 |
