Toshiba Tecra A8 PTA83C-KF201F Users Manual Canada; English - Page 115
Disconnecting LAN cable, Cleaning the computer
 |
View all Toshiba Tecra A8 PTA83C-KF201F manuals
Add to My Manuals
Save this manual to your list of manuals |
Page 115 highlights
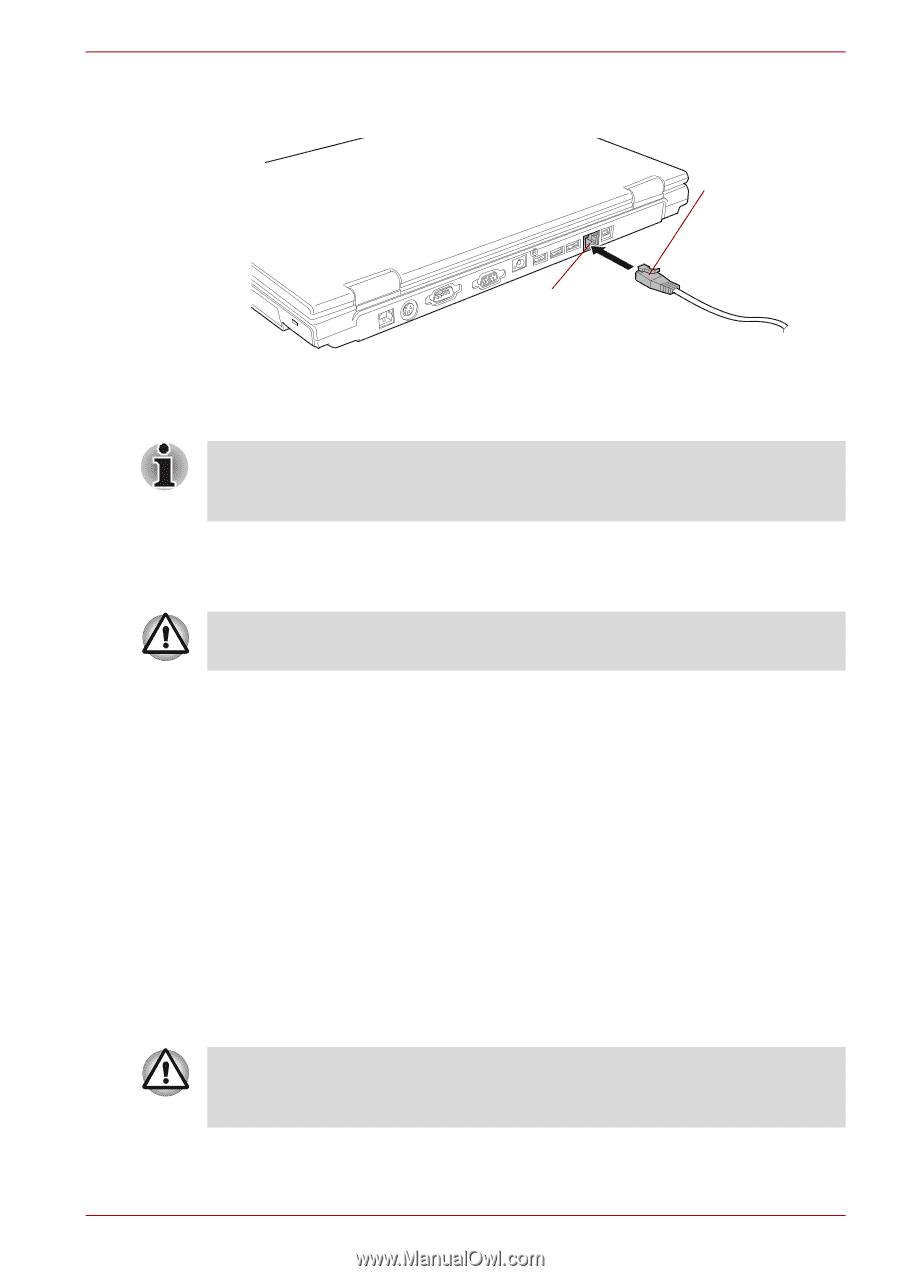
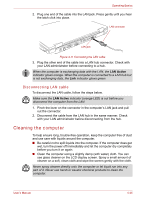
Operating Basics 2. Plug one end of the cable into the LAN jack. Press gently until you hear the latch click into place. LAN connector LAN jack Figure 4-11 Connecting the LAN cable 3. Plug the other end of the cable into a LAN hub connector. Check with your LAN administrator before connecting to a hub. When the computer is exchanging data with the LAN, the LAN Active indicator glows orange. When the computer is connected to a LAN hub but is not exchanging data, the Link indicator glows green. Disconnecting LAN cable To disconnect the LAN cable, follow the steps below. Make sure the LAN Active indicator (orange LED) is out before you disconnect the computer from the LAN. 1. Pinch the lever on the connector in the computer's LAN jack and pull out the connector. 2. Disconnect the cable from the LAN hub in the same manner. Check with your LAN administrator before disconnecting from the hub. Cleaning the computer To help ensure long, trouble-free operation, keep the computer free of dust and use care with liquids around the computer. ■ Be careful not to spill liquids into the computer. If the computer does get wet, turn the power off immediately and let the computer dry completely before you turn it on again. ■ Clean the computer using a slightly damp (with water) cloth. You can use glass cleaner on the LCD display screen. Spray a small amount of cleaner on a soft, clean cloth and wipe the screen gently with the cloth. Never spray cleaner directly onto the computer or let liquid run into any part of it. Never use harsh or caustic chemical products to clean the computer. User's Manual 4-35
-
 1
1 -
2
-
3
-
4
-
5
-
6
-
7
-
8
-
9
-
10
-
11
-
12
-
13
-
14
-
15
-
16
-
17
-
18
-
19
-
20
-
21
-
22
-
23
-
24
-
25
-
26
-
27
-
28
-
29
-
30
-
31
-
32
-
33
-
34
-
35
-
36
-
37
-
38
-
39
-
40
-
41
-
42
-
43
-
44
-
45
-
46
-
47
-
48
-
49
-
50
-
51
-
52
-
53
-
54
-
55
-
56
-
57
-
58
-
59
-
60
-
61
-
62
-
63
-
64
-
65
-
66
-
67
-
68
-
69
-
70
-
71
-
72
-
73
-
74
-
75
-
76
-
77
-
78
-
79
-
80
-
81
-
82
-
83
-
84
-
85
-
86
-
87
-
88
-
89
-
90
-
91
-
92
-
93
-
94
-
95
-
96
-
97
-
98
-
99
-
100
-
101
-
102
-
103
-
104
-
105
-
106
-
107
-
108
-
109
-
 110
110 -
 111
111 -
 112
112 -
 113
113 -
 114
114 -
 115
115 -
 116
116 -
 117
117 -
 118
118 -
 119
119 -
 120
120 -
121
-
122
-
123
-
124
-
125
-
126
-
127
-
128
-
129
-
130
-
131
-
132
-
133
-
134
-
135
-
136
-
137
-
138
-
139
-
140
-
141
-
142
-
143
-
144
-
145
-
146
-
147
-
148
-
149
-
150
-
151
-
152
-
153
-
154
-
155
-
156
-
157
-
158
-
159
-
160
-
161
-
162
-
163
-
164
-
165
-
166
-
167
-
168
-
169
-
170
-
171
-
172
-
173
-
174
-
175
-
176
-
177
-
178
-
179
-
180
-
181
-
182
-
183
-
184
-
185
-
186
-
187
-
188
-
189
-
190
-
191
-
192
-
193
-
194
-
195
-
196
-
197
-
198
-
199
-
200
-
201
-
202
-
203
-
204
-
205
-
206
-
207
-
208
-
209
-
210
-
211
-
212
-
213
-
214
-
215
-
216
-
217
-
218
-
219
-
220
-
221
-
222
-
223
-
224
-
225
-
226
-
227
-
228
-
229
-
230
-
231
-
232
-
233
-
234
-
235
-
236
-
237
-
238
-
239
-
240
-
241
-
242
-
243
-
244
-
245
-
246
-
247
-
248
-
249
-
250
-
251
-
252
-
253
-
254
-
255
-
256
-
257
-
258
-
259
-
260
-
261
-
262
-
263
-
264
-
265
-
266
-
267
-
268
-
269
-
270
-
271
-
272
-
273
-
274
-
275
-
276
 |
 |