Troy-Bilt Storm Tracker 2690 Operation Manual - Page 7
Assembly & Set-Up - snow thrower manual
|
View all Troy-Bilt Storm Tracker 2690 manuals
Add to My Manuals
Save this manual to your list of manuals |
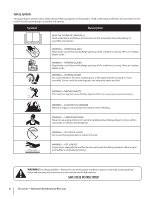
Page 7 highlights
Assembly & Set-Up 3 Contents of Crate • One Snow Thrower • One Snow Thrower Operator's Manual • One Engine Manual • Two Replacement Auger Shear Pins • One Chute Assembly • One Product Registration Card • One Chute Control Rod Assembly Handle 1. Place the shift lever in the Forward-6 position. 2. Remove the lower plastic wing nut and carriage bolt from each side of the upper handle; raise the upper handle assembly until it snaps over the lower handle. See Fig. 3-1. NOTE: Make certain the cables are seated properly in the roller guides. See Figure 3-2. Figure 3-2 Chute Control Head Chute Support Bracket Figure 3-1 3. Looking beneath the handle panel, check that all of the cables (steering, auger, shift, and drive) are properly routed and not pinched or kinked. 4. Secure the handle by tightening the plastic knob located on both the left and right sides of the handle. Remove and discard any rubber bands, if present. They are for packaging purposes only. Chute Assembly 1. Remove cotter pin, wing nut and hex screw from chute control head. Remove clevis pin and bow-tie cotter pin from chute support bracket. See Fig. 3-3. Chute Chute Base Figure 3-3 7
-
 1
1 -
 2
2 -
 3
3 -
 4
4 -
 5
5 -
 6
6 -
 7
7 -
 8
8 -
 9
9 -
 10
10 -
 11
11 -
 12
12 -
13
-
14
-
15
-
16
-
17
-
18
-
19
-
20
-
21
-
22
-
23
-
24
-
25
-
26
-
27
-
28
-
29
-
30
-
31
-
32
-
33
-
34
-
35
-
36
-
37
-
38
-
39
-
40
-
41
-
42
-
43
-
44
-
45
-
46
-
47
-
48
-
49
-
50
-
51
-
52
 |
 |
