Viper 5101 Owner Manual
Viper 5101 Manual
 |
View all Viper 5101 manuals
Add to My Manuals
Save this manual to your list of manuals |
Viper 5101 manual content summary:
- Viper 5101 | Owner Manual - Page 1
Remote Start Keyless Entry Model 5101 Owner's Guide © 2009 Directed Electronics, Vista, CA G4102V 2009-08 - Viper 5101 | Owner Manual - Page 2
- Viper 5101 | Owner Manual - Page 3
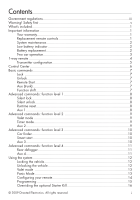
commands: function level 4 11 Rear defogger 11 Aux 4...11 Using the system 12 Locking the vehicle 12 Unlocking the vehicle 12 Valet mode 13 Panic Mode 13 Configuring your remote 14 Programming 15 Overriding the optional Starter Kill 16 © 2009 Directed Electronics. All rights reserved. i - Viper 5101 | Owner Manual - Page 4
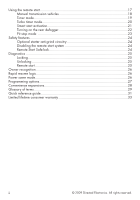
Locking 25 Unlocking 25 Remote start 25 Owner recognition 26 Rapid resume logic 26 Power saver mode 26 Programming options 27 Convenience expansions 28 Glossary of terms 29 Quick reference guide 31 Limited lifetime consumer warranty 33 ii © 2009 Directed Electronics. All rights reserved - Viper 5101 | Owner Manual - Page 5
installation. This equipment generates and can radiate radio frequency energy and, if not installed and used in accordance with the instruction manual do not support normal transmissions while it is carried in pockets or holsters next to a persons' body. © 2009 Directed Electronics. All - Viper 5101 | Owner Manual - Page 6
used if it is determined that it causes harmful interference to services authorized by IC. In addition, the user of this device must accept any radio interference that may be for compliance could void the user's authority to operate this device. iv © 2009 Directed Electronics. All rights reserved. - Viper 5101 | Owner Manual - Page 7
leave your car in neutral. You must read this Owner's Guide to familiarize yourself with the proper procedures regarding manual transmission remote starters. If you have any questions, ask your installer or contact Directed at 1-800-753-0600. Before remote starting a manual transmission vehicle, be - Viper 5101 | Owner Manual - Page 8
product installation guide. If the vehicle starts in gear, cease remote start operation immediately and consult with the authorized Directed dealer to fix the problem. After the remote start module has been installed, contact your authorized dealer to have him or her test the remote start module by - Viper 5101 | Owner Manual - Page 9
What's included • Two five-button/1-way Supercode remotes • The control module (installed out-of-sight) • Control Center with integrated status LED and Control button • A remote start defeat toggle switch • Window decals • Your warranty registration Important information Congratulations on the - Viper 5101 | Owner Manual - Page 10
to weaken, the operating range is reduced. ➢ Low battery indicator When the battery is low on the remote the vehicle system emits an additional honk when unlocking to let you know it is time to change the battery. Note: The optional horn honk should be installed for the system to emit any additional - Viper 5101 | Owner Manual - Page 11
correct when replacing. 3. Reposition all parts and snap together. ➢ Two car operation You can use the remote control system for two cars, with full command capability for both vehicles. To change the car selection: A U X • Press and hold the button for 3 seconds until the amber LED blinks once or - Viper 5101 | Owner Manual - Page 12
second to activate remote start. Press and hold for 1.5 second to activate optional trunk release. A1llows access to programming and modi- fies operation of the other buttons. 2 Note: If Keypad Lock is On, press and then press to unlock. 3 4 A U X 5 6 4 © 2009 Directed Electronics. All - Viper 5101 | Owner Manual - Page 13
Commands Level Button Direct Access Function A U X Level 1 x 1 Lock Silent Lock Advanced Commands Function A U X Level 2 x 2 Function A U X Level 3 x 3 Function A U X Level 4 x 4 Unlock Silent Unlock Valet Mode Car Finder Remote Start Reset Runtime Timer Mode Smart Start Rear A UA UX - Viper 5101 | Owner Manual - Page 14
In-vehicle system antenna, for 1-way communication to the system. • The Status LED, as a visual indicator of the system's status. • The Control button, for placing the system into Valet Mode and to per- form the Emergency Override operation. Control button LED 6 © 2009 Directed Electronics. All - Viper 5101 | Owner Manual - Page 15
for 1.5 seconds to lock the system and then activate the Panic output. For Panic to work, the optional horn honk feature must be connected. ➢ Unlock A U X Command: Press one time to Unlock. ➢ Remote Start AUX Command: Press one time to activate Remote Start. ➢AUX Aux (trunk) A U X Command: Press - Viper 5101 | Owner Manual - Page 16
: Unlocks the system without horn honksA*UX * Horn honk is an optional feature. The panic feature is also available when this option is installed. ➢ Runtime reset A U X Command: Notes: ➢ Aux 1 Press one-time and then . AUX Re-starts the remote start runtime counter if remote start is active - Viper 5101 | Owner Manual - Page 17
two-times and then . Prevents the system from automAaUX tically activating the Failsafe Starter Kill and locking the door passively. ➢ Timer mode A U X Command: Notes: Press two-times and then . Enables or disables the remote start timer mode. The parking lights flash fast 4 times when turned on - Viper 5101 | Owner Manual - Page 18
: The vehicle emits 1 long horn honAUkX and the parking lights flash 10 times. Lock/Unlock cancels the parking light flashes. ➢ Smart start A U X Command: Notes: ➢ Aux 3 A U X Press three-times and then press . Enables or disables the Smart Start feature. The parking lights flash fast 5 times - Viper 5101 | Owner Manual - Page 19
times, and then A U X . (after remote start is on.) Notes: Manually turns on the defogger when remote start is on. ➢ Aux 4 A U X Command: Notes: Press four times and then press AUX . Activates or deactivates optional Aux 4. See your authorized Directed dealer for details. *Additional parts - Viper 5101 | Owner Manual - Page 20
LED flashes in groups of three. Note: The optional horn honk and door input must be enabled for this feature to work. Locking without the honk (Silent Lock) Press the button on the remote one-time, and then press the button. The vehicle locks without the confirmation honk. The parking lights flash - Viper 5101 | Owner Manual - Page 21
➢ Valet mode You can prevent your system from automatically activating the Failsafe® Starter Kill. When the system is in Valet mode, the feature is disabled. The doors do not automatically lock. This is useful when washing or having the vehicle serviced. To enter or exit valet mode with the Control - Viper 5101 | Owner Manual - Page 22
want Auto Unlocking, it can be turned off by an authorized Directed Dealer. Car Select Car 2 must first be turned On (See Remote Features menu in the following Programming section to turn on). Press and hold the button for 3 seconds. The remote flashes the LED once or twice to indicate the selected - Viper 5101 | Owner Manual - Page 23
the buttons as indicated below,1 flash On, 2 flashes Off: • Autolock feature: PressAUX to turn on/off. • Car 2 feature: Press to turn on/AUoXff. The button has no function. Remote Pairing Remote pairing is a process where the Responder LE remote, and the in-vehicle system learn the other's encrypted - Viper 5101 | Owner Manual - Page 24
time. The LED on the Control Center will stop flashing and the optional Starter kill is bypassed. You can now start the vehicle with the key. Note: The override feature allows you to select a specific number of presses needed to disable the system. If the override button has been programmed to a new - Viper 5101 | Owner Manual - Page 25
desired settings before shutting Off the engine. To remote start your vehicle: • Press the bAuUXtton on the remote control. The vehicle parking lights flash. The vehicle remote starts and stays running for the programmed run time. The preset remote start run time is 12 minutes. This can be changed - Viper 5101 | Owner Manual - Page 26
engine continues to run. You can now remote start the vehicle. If a door is opened before the next remote start activation, the system will not remote start the vehicle. To drive your automatic or manual transmission vehicle after it has been remote started: 1. Get in without stepping on the brake - Viper 5101 | Owner Manual - Page 27
mode with a manual transmission: 1. Enter the MTS mode. 2. Exit the vehicle and lock the system. 3. Enter the timer mode. The parking lights quickly flash 4 times to confirm entry into timer mode (vehicle will not remote start at this point). The vehicle begins the timer mode sequence. Timer Mode - Viper 5101 | Owner Manual - Page 28
remote start is activated. 2. Turn Off the ignition. The car remains running. 3. Exit the vehicle and Lock the system. The vehicle remains running for the programmed run time. *Must be turned on by an authorized Directed dealer. To activate turbo timer mode with a manual transmission: Perform - Viper 5101 | Owner Manual - Page 29
by your authorized Directed dealer using the Bitwriter. To activate Smart Start mode: • Press the button on the remote 3 times and then press the bAuUXtton. The parking lights flash 5 times fast to confirm the remote is in Smart Start mode. To activate Smart Start mode with a manual transmission - Viper 5101 | Owner Manual - Page 30
ignition On • Press the brake pedal The parking lights flash 5 times slowly to confirm the remote has exited Smart Start mode. ➢ Turning on the rear defogger The optional rear defogger may be programmed to automatically activate when remote start is turned on. If the interior cabin temperature is - Viper 5101 | Owner Manual - Page 31
: To use Pit Stop mode with a manual transmission, open the door when going into MTS mode. The parking lights flash five-times to confirm entry into Pit Stop mode. After you exit the vehicle you can lock the system with the remote and the car remains running. If the vehicle shuts down when locking - Viper 5101 | Owner Manual - Page 32
works when the remote start system is operating the motor and the optional Failsafe® Starter Kill relay is installed. ➢ Disabling the remote start system This feature allows the remote start unit to be temporarily disabled to prevent the vehicle from being remote started accidentally. This feature - Viper 5101 | Owner Manual - Page 33
• 7 flashes: manual transmission mode is enabled and not initialized • 8 flashes: neutral safety wire has no ground or the remote start defeat toggle switch is off. Keep a record of the number of flashes, to assist your authorized Directed dealer when taking the vehicle in for service. © 2009 - Viper 5101 | Owner Manual - Page 34
their specific needs. It is almost like having four separate systems in your vehicle, one for each user. This feature is only available to authorized dealers using the Bitwriter programming tool. Rapid resume logic This Directed system will store its current state to non-volatile memory. If power - Viper 5101 | Owner Manual - Page 35
are independent features that can be programmed separately. • Panic mode enabled/disabled when the ignition is turned on or completely turned Off. • Comfort closure is a programming option which closes the vehicle's windows after remote locking. Note: Comfort closure can only be used on cars that - Viper 5101 | Owner Manual - Page 36
installer can tell you if any the features listed below are compatible with your vehicle. • Trunk Release • Windows open/close • Left Sliding door open/close • Right Sliding door open/close • Rear Hatch open/close • Sunroof open/close • Audio System on/off • Headlights on/off 28 © 2009 Directed - Viper 5101 | Owner Manual - Page 37
the remote start in a vehicle with a manual transmission. RF: Radio frequency Control Button: A small push button switch located on your systems Control Center. It is used to override the starter interrupt when a remote is lost or damaged, or to enter or exit Valet Mode. © 2009 Directed Electronics - Viper 5101 | Owner Manual - Page 38
- Viper 5101 | Owner Manual - Page 39
) 4 two times. LED on the Control Center stops flashing. The parking lights flash two times to confirm unlocking. 5 • Bypassing the opAUtiXonal Starter Kill without a remote 6 Turn on the ignition. Press and release the Control button within 15 seconds. The system should now bypass. If it does not - Viper 5101 | Owner Manual - Page 40
wallet for a quick and easy reference. • Remote Start Press . The AUX parking lights turns on (if connected). The vehicle starts and runs for the programmed duration. • Rear Defogger* Press four-times, and then press (oAUnX ly after remote start is On.) The parking lights flash 4 times confirming - Viper 5101 | Owner Manual - Page 41
: the unit was purchased from an authorized Directed dealer, the unit was professionally installed and serviced by an authorized Directed dealer; the unit will be professionally reinstalled in the vehicle in which it was originally installed by an authorized Directed dealer; and the unit is returned - Viper 5101 | Owner Manual - Page 42
and address o Type of alarm installed o Year, make, model and color of the automobile o Automobile license number o Vehicle identification number o All security options installed on automobile o Installation receipts 920-0003 06-06 34 © 2009 Directed Electronics. All rights reserved. - Viper 5101 | Owner Manual - Page 43
- Viper 5101 | Owner Manual - Page 44
The company behind this system is Directed Electronics Since its inception, Directed Electronics has had one purpose, to provide consumers with the finest vehicle security and car stereo products and accessories available. The recipient of nearly 100 patents and Innovations Awards in the field of
-
 1
1 -
 2
2 -
 3
3 -
 4
4 -
 5
5 -
 6
6 -
 7
7 -
8
-
9
-
10
-
11
-
12
-
13
-
14
-
15
-
16
-
17
-
18
-
19
-
20
-
21
-
22
-
23
-
24
-
25
-
26
-
27
-
28
-
29
-
30
-
31
-
32
-
33
-
34
-
35
-
36
-
37
-
38
-
39
-
40
-
41
-
42
-
43
-
44
 |
 |

Remote Start Keyless Entry
Model 5101
Owner’s Guide
© 2009 Directed Electronics, Vista, CA
G4102V
2009-08