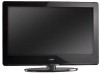
Vizio VA320E VA320E HDTV User Manual
Vizio VA320E - 32" 720p LCD HDTV Manual
 |
UPC - 845226002250
View all Vizio VA320E manuals
Add to My Manuals
Save this manual to your list of manuals |
Vizio VA320E manual content summary:
- Vizio VA320E | VA320E HDTV User Manual - Page 1
- Vizio VA320E | VA320E HDTV User Manual - Page 2
triangle is intended to alert the user to the presence of important operating and servicing instructions in the literature accompanying your HDTV. ! Do not overload power strips and extension cords. Overloading can result in fire or electric shock. ! The wall socket should be installed near your - Vizio VA320E | VA320E HDTV User Manual - Page 3
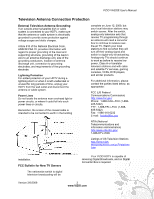
VIZIO VA320E User's Manual Television Antenna Connection Protection External Television Antenna Grounding If an outside antenna/satellite dish or cable system is connected to your HDTV, make sure that the antenna or cable system is electrically grounded to provide some protection against voltage - Vizio VA320E | VA320E HDTV User Manual - Page 4
Rear and Side Panel Connections 8! VIZIO Remote Control 10! INFO - This button turns the image and system information on or off 10! Inserting the remote control batteries 11! Using a Cable or Satellite Remote 11! Setting up Your HDTV 12! Wall Mounting your HDTV 12! Choosing a video connection - Vizio VA320E | VA320E HDTV User Manual - Page 5
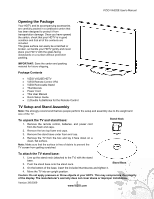
material for future shipping. Package Contents ! VIZIO VA320E HDTV ! VIZIO Remote Control VR4 ! VIZIO Removable Stand ! Thumbscrew ! Power Cord ! This User Manual ! Quick Setup Guide ! 2 (Double A) Batteries for the Remote Control TV Setup and Stand Assembly Note: We strongly recommend that two - Vizio VA320E | VA320E HDTV User Manual - Page 6
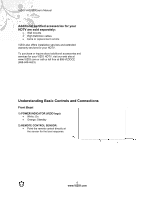
VIZIO VA320E User's Manual Additional certified accessories for your HDTV are sold separately: ! Wall mounts ! High Definition cables ! Extra or replacement remote VIZIO also offers installation services and extended warranty services for your HDTV. To purchase or inquire about additional - Vizio VA320E | VA320E HDTV User Manual - Page 7
Right Side Panel Controls POWER ( ) ! Turns your HDTV ON and OFF. MENU ! Activates the On-Screen Display (OSD). ! If a sub-menu is active, pressing MENU will proceed to the next screen (same as ENTER function on the remote). CHANNEL + / ! Steps up or down through the TV channels. ! Moves up and down - Vizio VA320E | VA320E HDTV User Manual - Page 8
VIZIO VA320E User's Manual Rear and Side Panel Connections 1 2 3 4 5 6 9 10 11 8 12 8 No. Connection 1 HDMI 1 2 HDMI 2 3 SERVICE 4 OPTICAL COMPONENT 1 5 (YPb/CbPr/Cr with Audio L/R) COMPONENT 2 6 (YPb/CbPr/Cr with Audio L/R) 7 RGB PC /PC Audio 8 DTV/TV (Cable/Antenna) 9 HDMI - Vizio VA320E | VA320E HDTV User Manual - Page 9
11 AV/S-Video 12 HEADPHONE Green Red Black VIZIO VA320E User's Manual For factory service only. This USB connection is to be used to update firmware version if necessary. Use of this input for any purpose other than factory authorized service will void the manufacturer's warranty of this equipment - Vizio VA320E | VA320E HDTV User Manual - Page 10
VIZIO VA320E User's Manual VIZIO Remote Control INFO - This button turns the image and system information on or off. ( ) POWER - Press to turn your HDTV ON. Press it again to turn it OFF. TV - Press to select TV. AV - Press to select the Audio Video input. Note: If the S-Video cable is being used, - Vizio VA320E | VA320E HDTV User Manual - Page 11
VIZIO remote uses codes 11758 and 10178 to work your LCD HDTV. To use a cable or satellite remote to work the LCD HDTV, refer to your cable or satellite remote user guide for more information on how to program the remote. If your cable or satellite remote uses a 5-digit code (like most Direct TV - Vizio VA320E | VA320E HDTV User Manual - Page 12
to prevent damage to the screen. ! Remove the eight (8) screws holding the base to the TV. ! Remove the stand base. 2. Mount your HDTV on the wall: ! Attach your HDTV to a wall mount (sold separately) using the mounting holes in the back panel of your HDTV. Read the instructions that came with your - Vizio VA320E | VA320E HDTV User Manual - Page 13
VIZIO VA320E User's Manual Additional Information: Mounting hole pitch Screw type Screw length 200mm horizontally x 200mm vertically Metric M6 .70mm pitch Depends on the thickness of the wall mount plate. VIZIO brackets come with different length screws. To find the perfect mount for your HDTV, - Vizio VA320E | VA320E HDTV User Manual - Page 14
VIZIO VA320E User's Manual Connecting Coaxial (RF) Using Your Antenna or Digital Cable for DTV /TV 1. Turn off the power to the HDTV. 2. Connect the coaxial (RF) connector from your antenna or digital cable (out-of-the-wall, not from the Cable Box) to the DTV/TV CABLE/ANTENNA connector. 3. Turn on - Vizio VA320E | VA320E HDTV User Manual - Page 15
to the audio connectors (red area) at the side of the High Definition TV. 4. Turn on the power to the HDTV and HDTV Set-Top Box. 5. Select HDMI using the INPUT button on the remote or on the side of your HDTV, or by pressing the HDMI button on the remote control. Version 3/6/2009 15 www.VIZIO.com - Vizio VA320E | VA320E HDTV User Manual - Page 16
VIZIO VA320E User's Manual Connecting your HDTV Set-Top Box (Better): Using Component Video 1. Turn off the power to the HDTV and HDTV SetTop Box. 2. Connect the Y (green color) connector on your HDTV Set-Top Box to the corresponding Y (green color) connector in the Component 1 group (yellow area on - Vizio VA320E | VA320E HDTV User Manual - Page 17
rear of the High Definition TV. 3. Turn on the power to the HDTV and Set-Top Box. 4. Select TV using the INPUT button on the remote or on the side of your HDTV, or by pressing the TV button on the remote control. Note: Refer to your Set Top Box user manual for more information about selecting the - Vizio VA320E | VA320E HDTV User Manual - Page 18
color area) at the rear or side of the HDTV. 3. Turn on the power to the High Definition TV and DVD player. 4. Select HDMI 1 using the INPUT button on the remote or on the side of your HDTV, or by pressing the HDMI button on the remote control. 5. If HDMI 1 is being used, connect to either HDMI - Vizio VA320E | VA320E HDTV User Manual - Page 19
CD DVD CD DVD Version 3/6/2009 VIZIO VA320E User's Manual Connecting your DVD Player (Better): Using Component Video 1. Turn off the power to the HDTV and DVD player. 2. Connect the Y (green color) connector on your DVD player to the corresponding Y (green color) connector in the Component 1 group - Vizio VA320E | VA320E HDTV User Manual - Page 20
AV/SVideo input on the HDTV. 4. Turn on the power to the HDTV and VCR or Video Camera. 5. Select AV using the INPUT button on the remote or on the side of your HDTV, or by pressing the AV button on the remote control. Note: Refer to your DVD player user manual for more information about the video - Vizio VA320E | VA320E HDTV User Manual - Page 21
OPTICAL OUT (white area) audio connector at the rear of the LCD HDTV. 3. Turn on the power to the LCD HDTV and Receiver/Amp. 4. Then press the MENU button on the remote control to open the On-Screen Display (OSD) menu. 5. Press the on the remote control to select the Audio menu. 6. Press the on the - Vizio VA320E | VA320E HDTV User Manual - Page 22
the INPUT button on the remote control or on the side of your HDTV. Note: For the best picture quality when connecting a pc computer through RGB PC, set your pc computer timing mode to VESA 1366 x 768 at 60Hz. Please refer to the pc or graphic card's user guide for additional information on how - Vizio VA320E | VA320E HDTV User Manual - Page 23
VIZIO VA320E User's Manual Preset PC Resolutions If connecting to a PC through the RGB PC input, set the TV timing mode to VESA 1366x768 at 60Hz for best picture quality (refer to the graphic card's user guide for questions on how to set 70.08 N P 28.32 800x600 60 37.88 60.32 P P 40.00 - Vizio VA320E | VA320E HDTV User Manual - Page 24
power outlet. 3. Turning Power On Press on the remote control to turn on your HDTV. 4. Initial Setup Press TV on the remote control. The Initial Setup screen comes up. Press the # button. 5. The Language screen opens. Press ! or " to select your language, and then press #. 6. The Mode Setting screen - Vizio VA320E | VA320E HDTV User Manual - Page 25
VIZIO VA320E User's Manual Press ! or " to select your input source (Antenna or Cable), then press #. The Channel Scan screen opens. NOTE: Select Cable only if you receive your cable service without a set channels your cable operator supplies in Clear QAM. Consult your cable operator for more - Vizio VA320E | VA320E HDTV User Manual - Page 26
VIZIO VA320E User's Manual Selecting Inputs 1. Press INPUT on the remote or on the side of your HDTV to select the input source that matches the connection you made on the back of your HDTV. Repeated presses of INPUT cycles you through the options. 2. Turn on your component (cable box, VCR, - Vizio VA320E | VA320E HDTV User Manual - Page 27
VIZIO VA320E User's Manual Using the Program Guide 1. Press INFO key twice on the remote to display program information for HDTV. Program Information: Provided by Broadcaster Audio is English / Stereo Channel Number Time & Program Rating Closed Caption is CC2 480i SDTV (Standard Definition TV - Vizio VA320E | VA320E HDTV User Manual - Page 28
VIZIO VA320E User's Manual Using the On-Screen Display (OSD) The remote control or the control buttons on the side of your HDTV control the function settings. The OnScreen Display (OSD) lets you adjust the contrast, brightness, and other settings. Changes are saved even when you turn off your HDTV. - Vizio VA320E | VA320E HDTV User Manual - Page 29
VIZIO VA320E User's Manual The following options are available in the Picture menu: 1. Picture Mode - Select Custom, Home, Movie, Game (Sports). 2. Backlight - Backlight adjusts the overall brilliance of the picture. It does not affect the Brightness (black level) or Contrast (white level) of the - Vizio VA320E | VA320E HDTV User Manual - Page 30
VIZIO VA320E User's Manual Adjusting the Audio Settings When viewing a DTV / TV or an HDMI, Component, AV, or PC source, the following audio adjustment OSD screens are available when you press MENU on the remote control. The source you are viewing is displayed in orange text in the bottom left-hand - Vizio VA320E | VA320E HDTV User Manual - Page 31
VIZIO VA320E User's Manual Adjusting the TV settings If you did not set up your HDTV for DTV / TV channels using the Initial Setup screens or if your setup has changed, you can do so from the TV menu. Press to select and adjust options, then press LAST when finished making adjustments. Press LAST - Vizio VA320E | VA320E HDTV User Manual - Page 32
VIZIO VA320E User's Manual Adjusting the Setup settings When viewing a DTV / TV or an HDMI, Component, AV, or PC source, the following setup adjustment OSD screens are available when you press MENU on the remote control. NOTE: When a computer is the source, the CC option is not available. Press to - Vizio VA320E | VA320E HDTV User Manual - Page 33
VIZIO VA320E User's Manual Adjusting the Parental Control settings When viewing a DTV / TV or a component, or AV source, the following parental control OSD screens are available within the Parental Control OSD menu. Parental Control options are not available when viewing an HDMI source. You can - Vizio VA320E | VA320E HDTV User Manual - Page 34
VIZIO VA320E User's Manual 3. Movie Rating - Block TV shows based on their rating. Select the desired rating and press MENU to block (locked) or unblock (unlocked). Movie Rating Definitions: G - General audience PG - Parental guidance suggested PG-13 - Recommended for children 13 years of age - Vizio VA320E | VA320E HDTV User Manual - Page 35
VIZIO VA320E User's Manual Understanding Viewing Modes Your HDTV features the following viewing modes. Normal Mode The original 4:3 aspect ratio (1.33:1 source) is preserved, so black bars are added to the left and right of the display image. Standard TV fit a traditional TV screen (4:3). Wide Mode - Vizio VA320E | VA320E HDTV User Manual - Page 36
VIZIO VA320E User's Manual Maintaining and Troubleshooting Maintenance Important 1. Make sure that the power cord is removed from the socket before cleaning your HDTV. 2. Do not use volatile solvents (such as toluene, rosin, and alcohol) to clean your HDTV. Such chemicals may damage the housing, - Vizio VA320E | VA320E HDTV User Manual - Page 37
) or e-mail us at [email protected]. Problem "No Signal" error message No power No sound The screen is black Power is ON but there is no screen image. Colors are wrong or abnormal Control buttons do not work Remote Control does not work Image quality issues Picture is distorted There is an - Vizio VA320E | VA320E HDTV User Manual - Page 38
VIZIO VA320E User's Manual Problem The picture has abnormal patterns The display image does not cover the entire screen There is a picture but no sound Your HDTV has pixels that are always dark or colored There is "noise" or "trash" on the screen The volume changes when you switch inputs The screen - Vizio VA320E | VA320E HDTV User Manual - Page 39
VIZIO VA320E User's Manual Regulations and Specifications Compliance Caution: Always use a power cord that is properly grounded. Use the AC cords listed below for each area. Country Power Cord USA UL Canada CSA Germany VDE UK BASE/BS Japan Electric Appliance Control Act FCC Class B - Vizio VA320E | VA320E HDTV User Manual - Page 40
VIZIO VA320E User's Manual Specifications Specifications Panel 32" Diagonal (31.51" Diagonal Viewing Area), 16:9 Aspect Ratio Resolution 1366x768 pixels Pixel Pitch 0.170mm (H) x 0.170mm (V) Display Compatibility 720p HDTV Composite Video (AV), 1x USB (Service Only) Outputs 1x Digital - Vizio VA320E | VA320E HDTV User Manual - Page 41
VIZIO VA320E User's Manual Glossary - Standard Definitions Analog TV: Today's TV system using radio frequency waves to transmit and display pictures and sound. Aspect Ratio (4x3): Traditional TV "aspect ratio", that is, the screen's width as compared to its height. For example, a "32 inch TV screen" - Vizio VA320E | VA320E HDTV User Manual - Page 42
inches generally will be performed at a VIZIO service center. Parts Repairs may be made with new or recertified parts, or the entire unit may be replaced with a new or recertified unit, at VIZIO's option and sole discretion. Replacement parts or replacement units provided under this limited warranty - Vizio VA320E | VA320E HDTV User Manual - Page 43
installation, abuse, operation contrary to furnished instructions, operation on incorrect power supplies, products not supplied by VIZIO, modification, alteration, improper servicing or tampering; damage from fire, water, lightning, power surges, abnormal environmental conditions or other acts - Vizio VA320E | VA320E HDTV User Manual - Page 44
. If VIZIO Technical Support determines that a problem with a display unit may be within the terms and conditions of the VIZIO Limited Product Warranty and that a mail-in repair may be performed, the customer will be provided with a return authorization number and mail-in repair instructions. Proof - Vizio VA320E | VA320E HDTV User Manual - Page 45
the picture, 25 flesh tone, 28 front bezel, 7 power indicator, 7 remote control sensor, 7 Glossary, 40 HDMI Connecting your DVD Player, 17 Connecting your HDTV Set-Top Box, 14 HDMI 1 jack, 8 HDMI 2 jack, 8 information banner, 26 installation services, 5 language selecting OSD, 31 lip sync turning - Vizio VA320E | VA320E HDTV User Manual - Page 46
VIZIO VA320E User's Manual block unrated TV, 33 channel block, 32 check for new DTV rating, 33 movie rating, 33 options, 32 TV rating, 32 password changing, 33 PC Resolutions, 22 picture settings, 27 advanced video, 28 backlight, 28 brightness, 28 color, 28 color temperature, 28 contrast, 28 - Vizio VA320E | VA320E HDTV User Manual - Page 47
types, 12 video input selecting, 25 video settings adaptive luma, 28 adjusting, 28 CTI, 28 DNR, 28 flesh tone, 28 white peak limiter, 28 VIZIO VA320E User's Manual viewing modes descriptions, 34 volume buttons, 7 wall mounting, 11 warranty services, 5 warrranty, 41 white peak limiter, 28 Wide
-
 1
1 -
 2
2 -
 3
3 -
 4
4 -
 5
5 -
 6
6 -
 7
7 -
8
-
9
-
10
-
11
-
12
-
13
-
14
-
15
-
16
-
17
-
18
-
19
-
20
-
21
-
22
-
23
-
24
-
25
-
26
-
27
-
28
-
29
-
30
-
31
-
32
-
33
-
34
-
35
-
36
-
37
-
38
-
39
-
40
-
41
-
42
-
43
-
44
-
45
-
46
-
47
 |
 |