Weider 230 Bench English Manual - Page 9
C„.
 |
View all Weider 230 Bench manuals
Add to My Manuals
Save this manual to your list of manuals |
Page 9 highlights
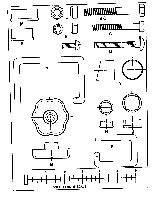
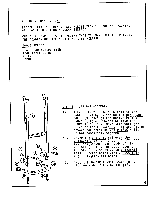
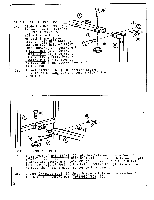
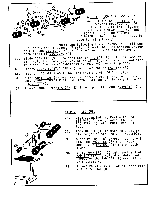
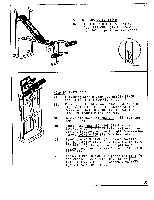
I c. • STEP 8 COMPLETED BENCH 8A. LOCKING PIN (P) is used to lock LEG CURL (4) tp frame for doing specified exercises. • C„. 0 0 Decal Locolion • FOLDING INSTRUCTIONS 9A. Following Step 8 your new WEIDER BENCH should be in the functional position. 9B. First you should ensure that LOCKING PIN (P) has the LEG CURL (4) locked to the frame and that LOCKING PIN (R) has the LEG CURL ADJUSTER (7) secured. 9C. Remove the BACKREST ADJ BAR (13) from the UPRIGHT (1). 9D. Loosen the THREADED KNOB (G) that is located under the MAIN FRAME (2) near the Upright Brackets on the Upright Crossmember Remove LOCKING PIN (R) from brackets. 9E. Pivot the MAIN FRAME (2) upward parallel to the UPRIGHT (1) and replace the BACKREST ADJ BAR (13) through the Upright hole pattern and the hole available on the MAIN FRAME (2). 9F. Loosen THREADED KNOB (G) under the SEAT (6) and remove LOCKING PIN (R). Lower FRONT FRAME (3) with LEG CURL Assembly to rest against MAIN FRAME (2). 8
-
 1
1 -
2
-
3
-
 4
4 -
 5
5 -
 6
6 -
 7
7 -
 8
8 -
 9
9
 |
 |
