Weider Platinum Xp800 Canadian English Manual - Page 16
Console Operation - workout
 |
View all Weider Platinum Xp800 manuals
Add to My Manuals
Save this manual to your list of manuals |
Page 16 highlights
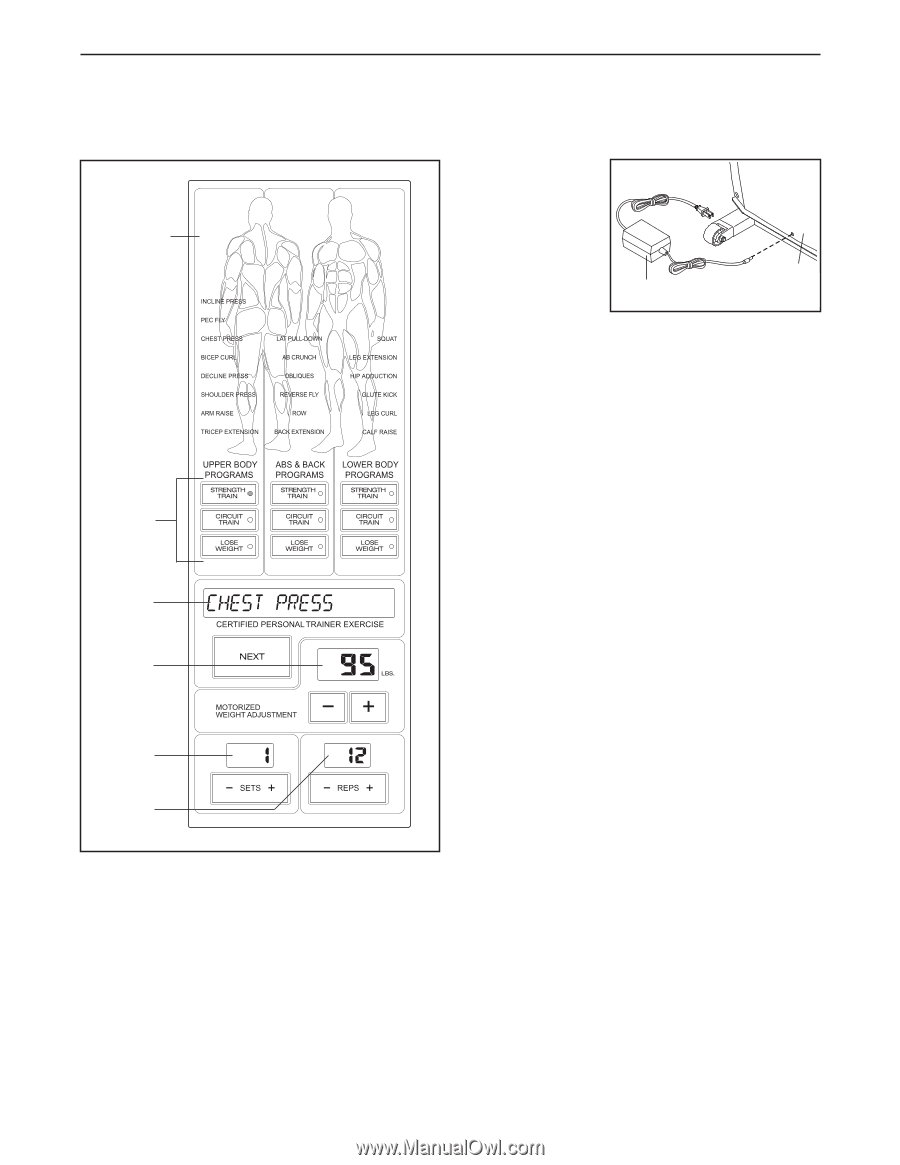
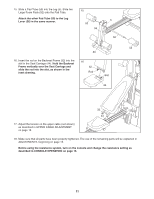
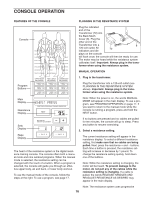
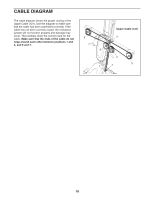
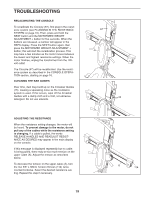
CONSOLE OPERATION FEATURES OF THE CONSOLE PLUGGING IN THE RESISTANCE SYSTEM Console Plug the indicated end of the Transformer (72) into the Back Mech Cover (8). Plug the other end of the Transformer into a 8 120-volt outlet. All 72 indicators and dis- plays on the console will flash once; the console will then be ready for use. The motor may be heard while the resistance system calibrates itself. Important: Always plug in the trans- former when using the resistance system. MANUAL OPERATION 1. Plug in the transformer. Program Buttons Plug the transformer into a 120-volt outlet (see PLUGGING IN THE RESISTANCE SYSTEM above). Important: Always plug in the transformer when using the resistance system. Main Display Resistance Display Note: When the power is on, the words MANUAL MODE will appear in the main display. To use a program, see PROGRAM OPERATION on page 17. If you want to return to the manual mode while the console is running a program, press and hold the NEXT button. Sets Display Reps Display The heart of the resistance system is the digital resistance training console. The console offers both a manual mode and nine workout programs. When the manual mode is selected, the resistance setting can be changed with the touch of a button. When a program is selected, the console will guide you through an effective upper body, ab and back, or lower body workout. To use the manual mode of the console, follow the steps at the right. To use a program, see page 17. If no buttons are pressed and no cables are pulled for ten minutes, the console will go to sleep. Press any button to resume exercising. 2. Select a resistance setting. The current resistance setting will appear in the resistance display. To select a different resistance setting, first make sure that no cables are being pulled. Next, press the resistance + and - buttons. Each time a button is pressed, the resistance setting will increase or decrease by 1 pound. To change the resistance setting quickly, hold down one of the buttons. Note: While the resistance setting is changing, the motor will be heard. To prevent damage to the motor, do not pull any of the cables while the resistance setting is changing. If a cable is pulled, the words RELEASE HANDLES AND READJUST RESISTANCE AS DESIRED may appear in the main display. Note: The resistance system uses progressive 16
-
 1
1 -
2
-
3
-
4
-
5
-
6
-
7
-
8
-
9
-
10
-
 11
11 -
 12
12 -
 13
13 -
 14
14 -
 15
15 -
 16
16 -
 17
17 -
 18
18 -
 19
19 -
 20
20 -
 21
21 -
22
-
23
-
24
-
25
-
26
-
27
 |
 |