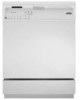
Whirlpool DU930PWSQ Installation Instructions
Whirlpool DU930PWSQ - 24 Inch 5 Cycle Dishwasher Manual
 |
UPC - 883049042695
View all Whirlpool DU930PWSQ manuals
Add to My Manuals
Save this manual to your list of manuals |
Whirlpool DU930PWSQ manual content summary:
- Whirlpool DU930PWSQ | Installation Instructions - Page 1
Undercounter Dishwasher Installation Instructions What do I need to have to install the dishwasher? • Tools, parts & materials • Requirements • Product dimensions 1-2 3-6 Back cover Lave-vaisselle encastré Instructions d'installation Que me faut-il pour installer le lave-vaisselle? • Outils, pièces - Whirlpool DU930PWSQ | Installation Instructions - Page 2
very important. We have provided many important safety messages in this manual and on your appliance. Always read and obey all safety DANGER You can be killed or seriously injured if you don't immediately follow instructions. Votre sécurité et celle des autres est très importante. Nous donnons - Whirlpool DU930PWSQ | Installation Instructions - Page 3
parts before starting installation. Read and follow the instructions provided with any tools listed here. Outils et accessoires nécessaires Rassembler l'outillage et les pièces nécessaires avant de commencer l'installation. Lire et suivre les instructions 16gauge wiring in dishwasher • small level - Whirlpool DU930PWSQ | Installation Instructions - Page 4
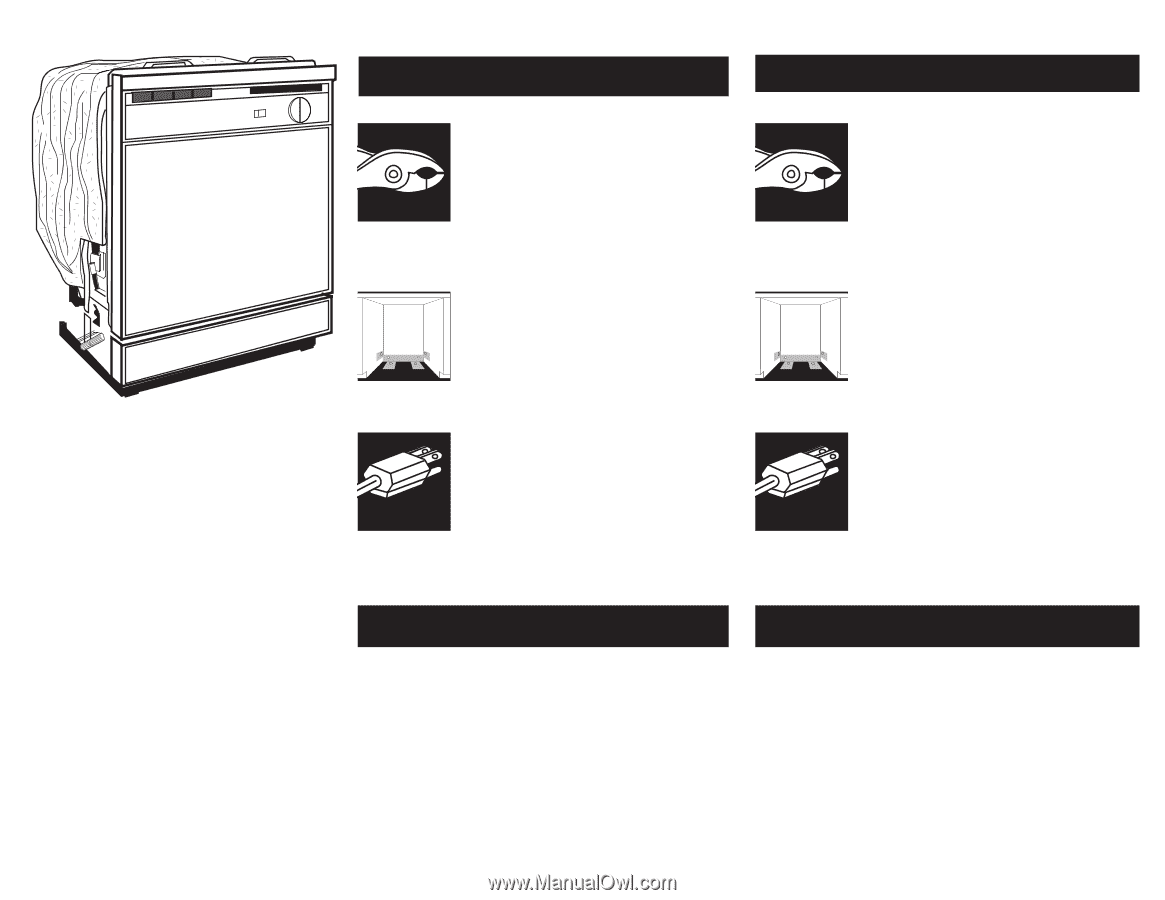
by the warranty. A side panel kit is available from your dealer for installing your dishwasher at end of cabinet. Risque de choc électrique Encastrer complètement le lave-vaisselle pour couvrir le dessus, les côtés et l'arrière. Le non-respect de cette instruction peut causer un décès ou un choc - Whirlpool DU930PWSQ | Installation Instructions - Page 5
S'assurer que la tuyauterie, le câblage et le tuyau de décharge se trouvent dans la zone ombragée. Si le lave-vaisselle restera inutilisé pendant une période prolongée ou s'il se trouve - Whirlpool DU930PWSQ | Installation Instructions - Page 6
Electrical It is the customer's responsibility: To contact a qualified electrician. To assure that the electrical installation is adequate and in conformance with all national and local codes and ordinances. You must have: ✔ 120-volt, 60-Hz, AC-only, 15- or 20- - Whirlpool DU930PWSQ | Installation Instructions - Page 7
Water You must have: ✔ a hot water line with 20-120 psi (103-827 kPa) water pressure. ✔ 120°F (49°C) water at dishwasher. ✔ 3/8" O.D. copper tubing with compression fitting (1/2" minimum plastic tubing is optional but not recommended). ✔ a 90° elbow with 3/8" N.P .T. external pipe threads on one end - Whirlpool DU930PWSQ | Installation Instructions - Page 8
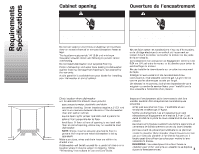
of cabinet walls or floor as specified in chart: OPENING FOR: water line drain line direct wire power supply cord 24" (61 cm)** DIAMETER: 1/2" (1.3 cm) 1-1/2" (3.8 cm) 3/4" (1.9 cm) 1-1/2" (3.8 cm) Installation Installation Couper les ouvertures dans la zone ombragée des parois de placard ou du - Whirlpool DU930PWSQ | Installation Instructions - Page 9
A. 1. 2. ạ - Whirlpool DU930PWSQ | Installation Instructions - Page 10
junction box. Use strain relief method provided with junction box. If no strain relief is provided, install a U.L.-listed/CSA-certified clamp connector for flexible-type wire. If installing conduit, attach a U.L.listed/CSA-certified conduit connector to junction box. Faire passer le câble dans la - Whirlpool DU930PWSQ | Installation Instructions - Page 11
Water line HELPFUL TIP: Routing the water line through the left side of cabinet opening will make water connection easier. Canalisation d'eau CONSEIL UTILE : Faire passer la canalisation d'eau du côté gauche de l'ouverture du placard facilitera le raccord. 6. ấ Cut a 1/2" (1.3 cm) minimum hole ấ - Whirlpool DU930PWSQ | Installation Instructions - Page 12
Drain hose 10. Cut a 1-1/2" (3.8 cm) diameter hole in cabinet wall or floor on the side of the dans la paroi du placard, ou dans le plancher sur le côté de l'ouverture le plus proche de l'évier. Connect drain hose to waste tee or waste disposer following one method. Connecter le tuyau de décharge - Whirlpool DU930PWSQ | Installation Instructions - Page 13
, no air gap 1. Remove the disposer knockout plug. Do not cut end of drain hose. 2. Attach drain hose Ẩ to disposer inlet ậ with spring-type clamp Ẫ. This connection ậ must be before drain trap Ắ and at least 20" (50.8 cm) above the floor where dishwasher will be installed. It is recommended that - Whirlpool DU930PWSQ | Installation Instructions - Page 14
B. Prepare dishwasher WARNING Préparation du lave-vaisselle AVERTISSEMENT Tip Over Hazard Do not use dishwasher until completely installed. Do not push down on open door. Doing so can result in serious injury or cuts. Risque de basculement Ne pas utiliser le lave-vaisselle jusqu' - Whirlpool DU930PWSQ | Installation Instructions - Page 15
3. ầ Ẩ ẩ Ẩ Ầ Apply Teflon® tape or pipe joint compound ầ to 90° elbow fitting Ẩ and connect fitting to water inlet valve ẩ. Hold bracket Ầ with pliers. Tighten elbow until snug, and be sure that it faces to the rear. Appliquer du ruban de Téflon® ou composé d'étanchéité pour tuyauterie ầ au coude - Whirlpool DU930PWSQ | Installation Instructions - Page 16
side of opening. IMPORTANT: If your model has the drain connector located near the back of the dishwasher, it will be easier to connect the drain hose to the connector now before moving the dishwasher completely into the cabinet opening. For instructions, go to "Drain Connection" , Step 8 on Page 21 - Whirlpool DU930PWSQ | Installation Instructions - Page 17
lave-vaisselle du plancher lors du réglage des pieds avant. 13. Ặ Check that leveling legs ẵ are firmly against the floor. Place level on the rack guide Ặ on one side of the dishwasher tub. Check that dishwasher is level from front to back. Adjust leveling leg or add shims under rear wheel until - Whirlpool DU930PWSQ | Installation Instructions - Page 18
C. water eau drain décharge electrical électrique Connect Dishwasher Electrical Connection Check electrical requirements (see pages 4-6). You need to: ✔ have the 1-4 1a and 2a Raccordement du lave-vaisselle Connexion électrique Vérifier les exigences de l'installation électrique (voir les pages 4 - Whirlpool DU930PWSQ | Installation Instructions - Page 19
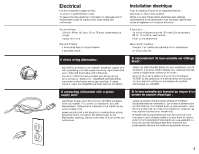
WARNING AVERTISSEMENT Electrical Shock Hazard Electrically ground dishwasher. Connect ground wire to green ground connector in terminal box. Do not use an extension cord. Failure to do so can result in death, fire, - Whirlpool DU930PWSQ | Installation Instructions - Page 20
-type plug. Some models are already equipped with a power supply cord. If a power supply cord is not supplied, use Power Supply Cord Kit (Part No. 4317824) available from your dealer. This cord kit is marked for use with dishwashers. Follow the kit instructions for installing the power supply cord - Whirlpool DU930PWSQ | Installation Instructions - Page 21
Water Connection HELPFUL TIP: ẫ Ậ Ẫ Compression fittings: 1. Slide nut Ẫ onto copper tubing ẫ about 1 inch (2.5 cm). 2. Slide ferrule Ậ onto the tubing. Do not position ferrule on the end of the tubing. 3. Put the tubing into the elbow ậ as far as it will go. 4. Slide the nut and ferrule forward and - Whirlpool DU930PWSQ | Installation Instructions - Page 22
Drain Connection 7. To help minimize vibration noise, route drain hose to avoid contact with motor, door springs, water line, cabinet, flooring or the edge of the hole where it passes through the cabinet. Raccordement - Whirlpool DU930PWSQ | Installation Instructions - Page 23
1. - Whirlpool DU930PWSQ | Installation Instructions - Page 24
E. 1. Check Operation Read the Use and Care Guide that came with your dishwasher. Vérification du fonctionnement Lire le manuel du propriétaire livré avec le lave-vaisselle. 2. Check that all parts have been installed and no steps were skipped. Check that you have all the tools you used. S' - Whirlpool DU930PWSQ | Installation Instructions - Page 25
F. To change door panel color (For models so equipped.) NOTE: If your model has a plastic door color panel, both sides of the panel are the same color. Changement de la couleur du panneau de la porte (Pour les - Whirlpool DU930PWSQ | Installation Instructions - Page 26
4. Bow door panel(s) and insert other side of door panel(s) into door frame. Cintrer le panneau et insérer l'autre côté dans l'encadrement de porte. 5. Ả Push in on door panel(s) near the top and slide panel(s) and spacer up inside bottom of control console Ả, allowing panel(s) to rest on - Whirlpool DU930PWSQ | Installation Instructions - Page 27
G. 1. To change access panel color (For models so equipped.) Changement de la couleur du panneau d'accès (Pour les modèles ainsi équipés.) Manipuler le panneau prudemment. Pousser vers le haut avec le pouce, de chaque côté de la garniture - Whirlpool DU930PWSQ | Installation Instructions - Page 28
H. - Whirlpool DU930PWSQ | Installation Instructions - Page 29
mm) thickness. Custom access panel more than 7/32" (5.6 mm) thick: Route all four sides to 7/32" (5.6 mm) thickness. Custom panels less than 7/32" (5.6 mm) thick: Install spacers behind panels. ạ door opened porte ouverte Usinage des panneaux personnalisés Découper le panneau de porte de manière - Whirlpool DU930PWSQ | Installation Instructions - Page 30
at outer edges ạ. Use one hand to bow bottom of panel(s). Remove panel(s) and spacer. Save panel(s) and spacer for future use. door frame about 3" (7.5 cm) below console Ả. Rotate wood door panel down against dishwasher door. Slide top edge of wood door panel under bottom edge of console ả. Press - Whirlpool DU930PWSQ | Installation Instructions - Page 31
. Slide panel down into groove along bottom of access panel frame. It may be necessary to remove the two screws securing top of access panel to dishwasher frame and tilt access panel forward to install some wood panels. Insérer le panneau en bois dans l'encadrement du panneau d'accès. Faire glisser - Whirlpool DU930PWSQ | Installation Instructions - Page 32
Product dimensions Dimensions du produit Side view Vue latérale 24" (61 cm)* Back view Vue arrière 23-7/8" (60.6 cm) 33-7/8" (86 cm) min. * to front of door frame * jusqu'au devant du cadre de la porte 20-3/4" (52.7 cm) Part No. 8535436 Pièce N° 8535436 ©2004 Printed in U.S.A. Imprimé aux
-
 1
1 -
 2
2 -
 3
3 -
 4
4 -
 5
5 -
 6
6 -
 7
7 -
8
-
9
-
10
-
11
-
12
-
13
-
14
-
15
-
16
-
17
-
18
-
19
-
20
-
21
-
22
-
23
-
24
-
25
-
26
-
27
-
28
-
29
-
30
-
31
-
32
 |
 |
Installation Instructions
Undercounter Dishwasher
What do I need to have to
install the dishwasher?
What do I need to do before
I install the dishwasher?
How do I install the
dishwasher?
• Tools, parts & materials
1-2
• Requirements
3-6
• Product dimensions
Back cover
• Prepare cabinet
7-12
• Prepare dishwasher
13-16
• Connect dishwasher
17-21
• Secure dishwasher
22-23
• Check operation
24
• Change door panel color
25-26
• Change access panel color
27-28
Important:
Read and save these instructions.
IMPORTANT:
Installer: Leave Installation Instructions with homeowner.
Homeowner: Keep Installation Instructions for
future reference.
Save Installation Instructions for local electrical
inspector’s use.
Call your dealer when you have questions or need
service. When you call, you will need the dishwasher
model and serial numbers.
Instructions d’installation
Lave-vaisselle encastré
Que me faut-il pour installer le
lave-vaisselle?
Que dois-je faire avant
d’installer le lave-vaisselle?
Comment dois-je installer le
lave-vaisselle?
• Outils, pièces et matériaux
1-2
• Spécifications
3-6
• Dimensions du produit
Couverture
arrière
• Préparation de l’encastrement
7-12
• Préparation du lave-vaisselle
13-16
• Raccordement du lave-vaisselle
17-21
• Fixation du lave-vaisselle
22-23
• Vérification du fonctionnement
24
• Changement de la couleur
du panneau de la porte
25-26
• Changement de la couleur
du panneau d’accès
27-28
Important :
Lire et conserver ces instructions.
Pièce N° 8535436
Part No. 8535436
IMPORTANT :
Installateur : Remettre la brochure des instructions
d’installation au propriétaire.
Propriétaire : Conserver la brochure des instructions
d’installation pour référence ultérieure.
Conserver les instructions d’installation pour consultation
par l’inspecteur local des installations électriques.
Appelez votre marchand quand vous avez des questions ou
si vous avez besoin de service. Lors de votre appel, il vous
faut le numéro de modèle et de série du lave-vaisselle.