Whirlpool EED4300V User Instructions
Whirlpool EED4300V Manual
 |
View all Whirlpool EED4300V manuals
Add to My Manuals
Save this manual to your list of manuals |
Whirlpool EED4300V manual content summary:
- Whirlpool EED4300V | User Instructions - Page 1
If you need assistance or service, first see the "Troubleshooting" section. Additional help is available by calling our Customer experience Center at 1-800-253-1301 from anywhere in the U.S.A., or write: Whirlpool Brand Home Appliances Customer eXperience Center 553 Benson Road Benton Harbor - Whirlpool EED4300V | User Instructions - Page 2
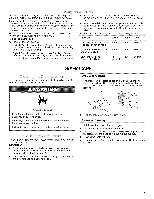
We have provided many important safety messages in this manual and on your appliance. Always read and obey all safety messages. This is replace any part of the dryer or attempt any servicing unless specificaUy recommended in this Use and Care Guide or in published user-repair instructions that you - Whirlpool EED4300V | User Instructions - Page 3
installed and vented, it will not be covered under the warranty. Proper venting of your dryer is important for satisfactory drying results. See the Installation Instructions for more detail. NOTE: Service calls caused by improper venting will be paid for by the customer, whether it was a paid - Whirlpool EED4300V | User Instructions - Page 4
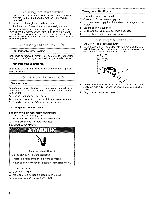
to help avoid wrinkling. 6. (OPTIONAL) Your dryer may have an End of Cycle Signal as part of the Push To Start button. This signal is package instructions. 8. Press PUSH TO START. Stopping and Restarting You can stop your dryer anytime during a cycle, To stop your dryer Open the dryer door or - Whirlpool EED4300V | User Instructions - Page 5
information, please refer to the front page of your manual or contact the dealer from whom you purchased your dryer. 2. Put wet items on top of rack, . 2. Wet both sides of lint screen with hot water. 3. Wet a nylon brush with hot water and liquid detergent. Scrub lint screen with the brush to - Whirlpool EED4300V | User Instructions - Page 6
3. Turn bulb counterclockwise. Replace the bulb with a 10-watt appliance bulb only. Replace the cover and secure with the screw. 4. Plug in dryer or reconnect power. E_ectrica_ Shock Hazard Disconnect power before servicing. Replace aH parts and pane_s before operating. Failure to do so can result - Whirlpool EED4300V | User Instructions - Page 7
TROUBLESHOOTING First try the solutions suggested here and possibly avoid the cost of a service call... Dryer will not run • Has a household fuse blown, or has a circuit breaker tripped? Electric dryers foil vent. Failure to follow these instructions can result in death or fire. Is the exhaust vent - Whirlpool EED4300V | User Instructions - Page 8
must have ventilation openings at the top and bottom of the door. Sides and front of dryer require a minimum of 1" (2.5 cm) of airspace, and the rear of the dryer requires 5" (12.7 cm). See the Installation Instructions. • Has an air dry cycle been selected? Select the right cycle for the types of - Whirlpool EED4300V | User Instructions - Page 9
installation of your major appliance, to instruct you how to use your major appliance, to replace or repair house fuses or to correct house wiring or plumbing. 2. Service calls to repair or replace appliance light bulbs, air filters or water filters. Those consumable parts are excluded from warranty - Whirlpool EED4300V | User Instructions - Page 10
los EE.UU., o escriba a: Whirlpool Brand Home Appliances Customer eXperience Center 553 Benson Road Benton del distribuidor Nt_mero de serie Direcci6n Para ordenar partes y accesorios, Ilame al 1-800-442-9991 mensajes importantes de seguridad en este manual yen su electrodomestico. Lea y obedezca - Whirlpool EED4300V | User Instructions - Page 11
repararla a menos que esto se recomiende especificamente en el Manual del propietario o en instrucciones de reparaci6n pubJicadas para el Ias &eas adyacentes a esta apertura sin peJusa, polvo o tierra. m La parte interior de Ia secadora y el ducto de escape se deben limpiar peri6dicamente. Esta - Whirlpool EED4300V | User Instructions - Page 12
Su secadora debe estar instalada y ventilada adecuadamente para obtener una eficiencia maxima de secado y acortar el tiempo de secado. Use los espacios mfnimos recomendados para la instalaci6n que se encuentran en las Instrucciones de instalaci6n. Vea las Instrucciones de instalaci6n para mas - Whirlpool EED4300V | User Instructions - Page 13
puede tener una SeSal de fin de ciclo (End of Cycle Signal) como parte del bot6n de Empuje para poner en marcha (Push To Start). Esta serial , usted puede comprar uno para su modelo. Refierase a la portada del manual o p6ngase en contacto con el distribuidor donde compr6 su secadora para saber - Whirlpool EED4300V | User Instructions - Page 14
No quite el filtro de pelusa. Deslice el estante de secado encima de la parte inferior de la abertura de la puerta de la secadora. Empuje hacia abajo para . Limpieza de cada carga 1. El filtro de pelusa esta ubicado en la parte superior de la secadora. Jale el filtro de pelusa hacia usted. Quite la - Whirlpool EED4300V | User Instructions - Page 15
Para secadoras con cableado directo: 1. Aplique un limpiador liquido domestico no inflamable al Area manchada del tambor y frote con un paso suave hasta que desaparezca la mancha. 2. Limpie el tambor minuciosamente con un paso h0medo. 3. Seque una carga de ropa limpia o toallas para secar el tambor - Whirlpool EED4300V | User Instructions - Page 16
que se escuche un sonido fuerte durante los primeros minutos de funcionamiento. • &Hay una moneda, botbn o sujetapapeles entre el tambor y la parte frontal o trasera de la secadora? Revise los bordes frontales y traseros del tambor para verificar si hay objetos pequer_os. Limpie los bolsillos antes - Whirlpool EED4300V | User Instructions - Page 17
en un armario? Las puertas del armario deben tener aberturas de ventilaci6n en la parte superior e inferior de la puerta. La parte lateral y anterior de la secadora necesitan un minimo de 1" (2,5 cm) de espacio y la parte trasera necesita 5" (12,7 cm). Vea las Instrucciones de instalaci6n. • &Se ha - Whirlpool EED4300V | User Instructions - Page 18
Estados Unidos y CanadA. P6ngase en contacto con el distribuidor autorizado de Whirlpool para determinar si corresponde otra garantia. Si necesita servicio, consulte primero la secci6n "Soluci6n de problemas" del Manual de uso y cuidado. Despues de consultar la secci6n "Soluci6n de problemas - Whirlpool EED4300V | User Instructions - Page 19
avez besoin d'assistance ou service, consulter d'abord la section "Depannage". On peut obtenir de I'aide supplementaire en telephonant au Centre pour I'eXperience de la clientele au 1-800-253-1301 de n'importe ou aux E.-U. ou ecrire a : Whirlpool Brand Home Appliances Customer eXperience Center 553 - Whirlpool EED4300V | User Instructions - Page 20
certaines pr6cautions elementaires dont ies suivantes : Life toutes les instructions avant d'utiliser ia secheuse. Ne pas placer des articles Iorsque la secheuse est utilisee pros d'eux. Avant d'enlever Ia secheuse du service ou Ia jeter, enlever la porte du compartiment de sechage. Ne pas mettre - Whirlpool EED4300V | User Instructions - Page 21
Pour obtenir les meilleurs resultats de sechage, I'evacuation de I'air doit _tre adequate. Voir les Instructions d'installation pour plus de renseignements. REMARQUE : Les visites de service causees par une evacuation inadequate seront aux frais du client peu importe s'il a fait faire I'installation - Whirlpool EED4300V | User Instructions - Page 22
(arr_t). Le signal sera entendu seulement si le bouton seiecteur est regle a ON. 7. Ajouter une feuille d'assouplissant de tissus, si desire. Suivre les instructions sur I'emballage. 8. Appuyer sur la touche PUSH TO START. Arr_t et remise en marche On peut arr_ter la secheuse a tout moment au cours - Whirlpool EED4300V | User Instructions - Page 23
secheuseo P_acer _a secheuse au moins 46 crn (18 po) au-deseus du plancher pour une installation darts un garage. Le non=respect de cee instructions peut causer un decee, une explosion ou un incendie. Nettoyer le filtre a charpie avant chaque charge. Un filtre obstrue de charpie peut augmenter le - Whirlpool EED4300V | User Instructions - Page 24
iii"@::i_i!_i_iix:i¸i>O,yii,C_!i:i{!"i:i:ii!_!_@'%@iqii - Whirlpool EED4300V | User Instructions - Page 25
fusible ou reenclencher le disjoncteur. Si le probleme persiste, appeler un electricien. • Pour Bruits inhabituels • La s_cheuse est-elle rest_e hors service pendant un certain temps? Si la secheuse n'a pas en feuiHe Le non-respect de ces instructions peat causer un decee ou un incendieo - Whirlpool EED4300V | User Instructions - Page 26
, loin de masecheuse. Pmacermasecheuse au moins 46 cm (18 po) au-dessus du piancher pour une installation darts un garage. Le non-respect de ces instructions peut causer un deces, une explosion ou un ineendie. La s_cheuse se trouve-t-elle dans une piece ok la temperature ambiante est inferieure _ 45 - Whirlpool EED4300V | User Instructions - Page 27
installe dans un endroit inaccessible ou n'est pas installe conformement aux instructions d'installation fournies. 11. Le coot des pieces de rechange et Whirlpool autorise pour determiner si une autre garantie s'applique. Si vous avez besoin de service, voir d'abord la section "Depannage" du Guide - Whirlpool EED4300V | User Instructions - Page 28
Canada LP Licensee in Canada ® Marca registrada/TM Marca de comercio de Whirlpool, U.S.A., usada bajo licencia de Whirlpool Canada LP en Canada1 @ Marque d@os6e/TM Marque de commerce de Whirlpool. U.S.A.. emploi sous licence par Whirlpool Canada LP au Canada 12/06 Printed in U.S.A. Impreso en EE,UU
-
 1
1 -
 2
2 -
 3
3 -
 4
4 -
 5
5 -
 6
6 -
 7
7 -
8
-
9
-
10
-
11
-
12
-
13
-
14
-
15
-
16
-
17
-
18
-
19
-
20
-
21
-
22
-
23
-
24
-
25
-
26
-
27
-
28
 |
 |
DRYERUSERINSTRUCTIONS
INSTRUCCIONES PARA ELUSUARIO DE LA SECADORA
INSTRUCTIONSPOUR L'UTILISATEURDE
LA SECHEUSE
TableofContents
/
l'ndice
/
Tabledes mati_res
DRYER SAFETY
...............................................
2 SEGURIDAD DE LASECADORA
.................
.10 SECURITE DE LA SECHEUSE
.....................
"19
DRYER USE
......................................................
4 USO DE LA SECADORA
...............................
"13
UTILISATIONDE LA SECHEUSE
.................
22
DRYER CARE
...................................................
5 CUIDADO DE LASECADORA
......................
"14 ENTRETIEN DE LA SECHEUSE
...................
23
TROUBLESHOOTING
......................................
7 SOLUClON DE PROBLEMAS
.......................
"16 DEPANNA_E
..................................
25
WARRANTY
......................................................
9 GARANTiA
......................................................
"18 GARANTIE
....................................
27
Assistance or Service
If you need assistance
or service, first see the "Troubleshooting"
section. Additional
help is available by calling our Customer
experience
Center at 1-800-253-1301
from anywhere
in the
U.S.A., or write:
Whirlpool
Brand
Home Appliances
Customer
eXperience
Center
553 Benson
Road
Benton
Harbor,
MI 49022-2692
To order accessories,
call 1-800-442-9991
or visit our website
at
www.estateappliances.com.
In Canada, for assistance,
installation
parts or service, call us at
1-800-807-6777,
or write:
Whirlpool
Canada
LP
Customer
Interaction
Centre
1901 Minnesota
Court
Mississauga,
Ontario
L5N 3A7
In
Canada, visit www.estateappliances.com.
Please include a daytime
phone number
in your correspondence.
Keep this book
and your
sales slip together
for future
reference.
You must provide
proof
of purchase
or installation
date for in-warranty
service.
Write down the following
information
about your appliance to help
you obtain assistance
or service if you ever need it. You will need
to know your complete
model number and serial number. You can
find this information
on the model and serial number label, located
on your appliance.
Dealer
name
Serial
number
Address
Phone
number
Model
number
Purchase
date
W10118621A