Whirlpool RF263LXTQ Owners Manual - Page 10
Troubleshooting - replacement keypad
 |
View all Whirlpool RF263LXTQ manuals
Add to My Manuals
Save this manual to your list of manuals |
Page 10 highlights
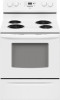
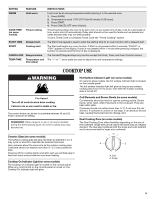
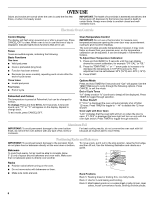
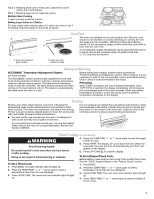
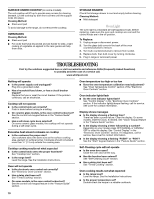
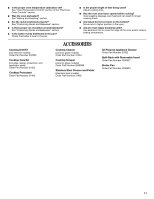
SURFACE UNDER COOKTOP (on some models) The coil cooktop will lift up to provide easy access for cleaning beneath. Lift the cooktop by both front corners until the support locks into place. Cleaning Method: ■ Steel-wool pad To avoid damage to the range, do not remove the cooktop. OVEN RACKS Cleaning Method: ■ Steel-wool pad ■ For racks that have discolored and are harder to slide, a light coating of vegetable oil applied to the rack guides will help them slide. STORAGE DRAWER Check that storage drawer is cool and empty before cleaning. Cleaning Method: ■ Mild detergent Oven Light The oven light is a standard 40-watt appliance bulb. Before replacing, make sure the oven and cooktop are cool and the control knobs are in the off position. To Replace: 1. Unplug range or disconnect power. 2. Turn the glass bulb cover in the back of the oven counterclockwise to remove. 3. Turn bulb counterclockwise to remove from socket. 4. Replace bulb, then bulb cover by turning clockwise. 5. Plug in range or reconnect power. TROUBLESHOOTING First try the solutions suggested here or visit our website and reference FAQs (Frequently Asked Questions) to possibly avoid the cost of a service call. www.whirlpool.com Nothing will operate ■ Is the power supply cord unplugged? Plug into a grounded outlet. ■ Has a household fuse blown, or has a circuit breaker tripped? Replace the fuse or reset the circuit breaker. If the problem continues, call an electrician. Cooktop will not operate ■ Is the control knob set correctly? Push in knob before turning to a setting. ■ On ceramic glass models, is the oven control lockout set? See the control lock keypad feature in the "Feature Guide" section. ■ Has a self-clean cycle been selected? On some ceramic glass models, the cooktop will not operate during a self-clean cycle. Excessive heat around cookware on cooktop ■ Is the cookware the proper size? Use cookware about the same size as the surface cooking area, element or surface burner. Cookware should not extend more than ½" (1.3 cm) outside the cooking area. Cooktop cooking results not what expected ■ Is the control knob set to the proper heat level? See "Cooktop Use" section. ■ Is the range level? Level the range. See the Installation Instructions. Oven will not operate ■ Is the electronic oven control set correctly? See "Electronic Oven Controls" section. ■ Has a delay start been set? See "Timed Cooking" section. ■ On some models, is the oven control lockout set? See the control lock keypad feature in the "Feature Guide" section. Oven temperature too high or too low ■ Does the oven temperature calibration need adjustment? See "Oven Temperature Control" section of the "Electronic Oven Controls" section. Oven indicator lights flash ■ Do the oven indicator lights flash? See "Control Display" in the "Electronic Oven Controls" section. If the indicator light(s) keeps flashing, call for service. See cover for contact information. Display shows messages ■ Is the display showing a flashing time? There has been a power failure. Clear the display. On some models, reset the clock, if needed. See "Clock" keypad feature in the "Feature Guide" section. ■ Is the display showing a letter followed by a number? Depending on your model, press OFF/CANCEL or CANCEL/ OFF to clear the display. See "Control Display" in the "Electronic Oven Controls" section. If it reappears, call for service. See cover for contact information. ■ Is the display showing a flashing "PUSH?" or "PSH"? See the "Start" keypad feature in the "Feature Guide" section. Self-Cleaning cycle will not operate ■ Is the oven door open? Close the oven door all the way. ■ Has the function been entered? See "Self-Cleaning Cycle" section. ■ Has a delay start been set? See "Timed Cooking" section. Oven cooking results not what expected ■ Is the range level? Level the range. See the Installation Instructions. ■ Is the proper temperature set? Double-check the recipe in a reliable cookbook. 10
-
 1
1 -
2
-
3
-
4
-
 5
5 -
 6
6 -
 7
7 -
 8
8 -
 9
9 -
 10
10 -
 11
11 -
 12
12
 |
 |