Whirlpool SB160PEEB User Manual
Whirlpool SB160PEEB Manual
 |
View all Whirlpool SB160PEEB manuals
Add to My Manuals
Save this manual to your list of manuals |
Whirlpool SB160PEEB manual content summary:
- Whirlpool SB160PEEB | User Manual - Page 1
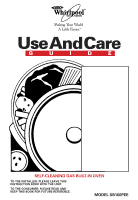
Cycle 25 Caring for Your Oven 30 Troubleshooting ......... 33 Requesting Assistance or Service 35 Index 39 Warranty 40 1-800-253-1301 Call us with questions or comments. SELF-CLEANING GAS BUILT-IN OVEN TO THE INSTALLER: PLEASE LEAVE THIS INSTRUCTION BOOK WITH THE UNIT. TO THE CONSUMER - Whirlpool SB160PEEB | User Manual - Page 2
26 Setting the controls 26 Special tips 28 How the cycle works 29 Caring for Your Oven 30 Cleaning chart 30 The oven light 32 Troubleshooting 33 Requesting Assistance or Service ........ 35 Index 39 Warranty 40 2 - Whirlpool SB160PEEB | User Manual - Page 3
You Thank you for buying a WHIRLPOOL® appliance. Because your life is getting busier and more complicated, WHIRLPOOL ovens are easy to use, save time, and help you manage your home better. To ensure that you enjoy years of trouble-free operation, we developed this Use and Care Guide. It is full of - Whirlpool SB160PEEB | User Manual - Page 4
SAVE THESE INSTRUCTIONS Gas ovens have been thoroughly tested for safe and efficient operation. However, as with any appliance, there are specific installation and safety precautions which must be followed to ensure safe and satisfactory operation. WARNING: If the information in this manual is not - Whirlpool SB160PEEB | User Manual - Page 5
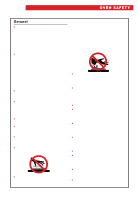
fuels and their use in appliances can cause minor exposures to benzene for oven use. Follow cookware manufacturer's instructions, especially when using glass or plastic line oven bottom, or any other part of the oven. Use aluminum foil only as recommended in this manual. • Never use a match or - Whirlpool SB160PEEB | User Manual - Page 6
any part of the oven unless specifically recommended in this manual. All other servicing should be referred to a qualified technician. • Any additions, changes, or conversions required in order for this appliance to satisfactorily meet the application needs must be made by a Whirlpool service - Whirlpool SB160PEEB | User Manual - Page 7
what they look like. Use the page references to help you quickly find out more about the part or feature you are interested in. Oven vent (p. 24) Control panel Automatic oven light/door switch TIMER CLEAN LOCKED BAKE TIME STOP TIME CLOCK TIMER ON/OFF CANCEL Manual oven light switch (p. 32) 7 - Whirlpool SB160PEEB | User Manual - Page 8
use with Liquified Petroleum Propane gas. Instructions for conversions are in the Installation Instructions. Positioning racks and pans General When baking/roasting on 2 racks, arrange the racks on the 2nd and 4th rack guides from the bottom. • Do not place items on the oven door when it is - Whirlpool SB160PEEB | User Manual - Page 9
air must circulate around the pans in the oven for even heat to reach all parts of the oven. This results in better baking. • Place the pans so that Use only one cookie sheet in the oven at a time. Use the following as a guide to determine where to place the pans: One pan Place in the center of the - Whirlpool SB160PEEB | User Manual - Page 10
USING YOUR OVEN The electronic oven control Bake button (p. 15) Display (see below) Up and down arrow buttons (p. 11) Preheat button (p. 13) Clean button (p. 26) PREHEAT BAKE CLEAN BROIL HR O BROIL N DELAY BAKE DELAY BAKE CLN STOP TIMER CLEAN LOCKED BAKE TIME STOP TIME CLOCK TIMER - Whirlpool SB160PEEB | User Manual - Page 11
USING YOUR OVEN Command buttons PREHEAT BAKE CLEAN BROIL HR O BROIL N DELAY BAKE DELAY BAKE CLN STOP TIMER CLEAN LOCKED BAKE TIME STOP TIME CLOCK TIMER ON/OFF CANCEL The command buttons tell the oven what to do and in what order. A few examples: - Clock tells the oven you are going to - Whirlpool SB160PEEB | User Manual - Page 12
USING YOUR OVEN Using the electronic Minute Timer The Minute Timer does not start or stop the oven. It works like a kitchen timer. It can be set in minutes and seconds up to 9 hours and 55 minutes. 1. Press the Timer On/Off button. PRESS YOU SEE TIMER ON/OFF TIMER 2. Press and hold the Up arrow - Whirlpool SB160PEEB | User Manual - Page 13
, preheating will take an additional 10 minutes. • Do not attempt to light the oven burner during a power failure. See "Important Safety Instructions" on page 5 for more information. 1. Position the rack(s) properly before turning on the oven. For further information, see "Positioning racks and - Whirlpool SB160PEEB | User Manual - Page 14
time of day) Baking/roasting without preheating NOTE: Do not attempt to light the oven burner during a power failure. See "Important Safety Instructions" on page 5 for more information. 1. Position the rack(s) properly before turning on the oven. For further information, see "Positioning racks and - Whirlpool SB160PEEB | User Manual - Page 15
USING YOUR OVEN 2. Press the Bake button. PRESS YOU SEE BAKE BAKE 3. Press and hold the Up or Down arrow button until the desired temperature shows on the small display. The display will increase in 5°F amounts. The burner will light in 50-60 seconds. NOTE: If the oven is still warm from an - Whirlpool SB160PEEB | User Manual - Page 16
USING YOUR OVEN Adjusting the oven temperature control Although your new oven is properly adjusted to provide accurate temperatures, it may cook faster or slower than your old oven. If, after using the oven for a period of time, you are not satisfied with the baking/roasting results, you can - Whirlpool SB160PEEB | User Manual - Page 17
USING YOUR OVEN 4. To change the setting, press and hold the Up or Down arrow button until the desired amount of offset appears on the display. You can change the setting up or down 35°F, in 5°F amounts. NOTE: If you have decreased the setting, a minus sign (-) will appear before the number. If you - Whirlpool SB160PEEB | User Manual - Page 18
USING YOUR OVEN 3. Press and hold the Up or Down arrow button to the setting you want. When the oven turns on, the ON Indicator Light will come on. The burner lights automatically in 50-60 seconds. Preheat for 5 minutes. You can broil at one of two settings - "LO" or "HI." When the oven turns on, - Whirlpool SB160PEEB | User Manual - Page 19
USING YOUR OVEN Broiling tips • Use the broiler pan and grid for broiling. They are designed to drain excess liquid and grease away from the cooking surface to help prevent spatter, smoke, or fire. • If you broil small quantities, you may want to use a small broiler pan. They are available in the - Whirlpool SB160PEEB | User Manual - Page 20
USING YOUR OVEN Using the electronic MEALTIMER™ control The electronic MEALTIMER control will turn the oven on and off at times you set, even when you are not around. Delayed time baking/roasting is ideal for foods which do not require a preheated oven, such as meats and casseroles. Do not use - Whirlpool SB160PEEB | User Manual - Page 21
USING YOUR OVEN 5. Press and hold the Up or Down arrow button until the desired baking/roasting temperature shows on the small display. The display will count down in 1-minute amounts. NOTE: When the oven starts heating, the display will show the actual oven temperature. The displayed temperature - Whirlpool SB160PEEB | User Manual - Page 22
USING YOUR OVEN 3. Press and hold the Up arrow button until the desired baking/ roasting time, up to 11 hours 59 minutes, shows on the large display. PRESS YOU SEE AND HOLD BAKE BAKE TIMER (example shows 30-minute baking/roasting time) 4. Press the Stop Time button. PRESS STOP TIME YOU SEE - Whirlpool SB160PEEB | User Manual - Page 23
USING YOUR OVEN 7. Press and hold the Up or Down arrow button to set the desired baking/roasting temperature. NOTE: Changes can be made at any time by pressing a command button. PRESS YOU SEE AND HOLD DELAY BAKE DELAY BAKE STOP TIME (example shows 350°F baking/roasting temperature) 8. When the - Whirlpool SB160PEEB | User Manual - Page 24
USING YOUR OVEN The oven vents Oven vent Oven vent OVEN LIGHT PREHEAT BAKE CLEAN BROIL HR O BROIL N DELAY BAKE DELAY BAKE CLN STOP TIMER CLEAN LOCKED BAKE TIME STOP TIME CLOCK TIMER ON/OFF CANCEL Hot air and moisture escape from the oven through vents located above and below the - Whirlpool SB160PEEB | User Manual - Page 25
Self-Cleaning cycle with the easy-to-use controls. Please review the instructions in this section to keep your oven spotless. wWARNING Burn Hazard Do in the Self-Cleaning cycle, place them on the 2nd and 4th rack guides. (Guides are counted from bottom to top.) • Heat and odors are normal during - Whirlpool SB160PEEB | User Manual - Page 26
USING THE SELF-CLEANING CYCLE TIPS: • Do not force the door lock. You could bend or break it. The door lock is designed to stay locked until the oven is cool enough to safely open. Wait until it opens. • Do not block the vent during the SelfCleaning cycle. Air must move freely for best cleaning - Whirlpool SB160PEEB | User Manual - Page 27
USING THE SELF-CLEANING CYCLE To delay the start: 1. Press the Clean button and press and hold the Up or Down arrow button until the desired cleaning time shows on the display. • Use 2 hours for light soil. • Use 3 hours to 4 hours maximum for moderate to heavy soil. PRESS CLEAN PRESS YOU SEE AND - Whirlpool SB160PEEB | User Manual - Page 28
USING THE SELF-CLEANING CYCLE After the Self-Cleaning cycle is completed: YOU SEE When the oven reaches HI broil temperatures: The LOCKED Indicator Light will go off when the cooling time is over (after 30 minutes or more). The door lock will release 12-15 seconds after the LOCKED Indicator Light - Whirlpool SB160PEEB | User Manual - Page 29
USING THE SELF-CLEANING CYCLE How the cycle works The Self-Cleaning cycle uses very high heat to burn away soil and grease. During the cycle, the oven gets much hotter than it does for normal baking or broiling. This high heat breaks up the soil or grease and burns it away. We recommend a 3-hour - Whirlpool SB160PEEB | User Manual - Page 30
Explosion Hazard Do not store flammable materials such as gasoline near this appliance. Doing so can result in death, explosion, fire, or burns. Cleaning chart Use the following table to help you clean your oven. PART Control panel and other exterior surfaces Broiler pan and grid (clean after - Whirlpool SB160PEEB | User Manual - Page 31
CARING FOR YOUR OVEN PART Oven racks Oven door glass Oven cavity WHAT TO USE HOW TO CLEAN Steel-wool pad and warm, soapy water OR The Self-Cleaning cycle • - Whirlpool SB160PEEB | User Manual - Page 32
closed, push the Oven Light Switch on the control panel. Push the switch again to turn off the light. To replace the oven light: 1. Unplug appliance or disconnect at the main power supply. 2. Remove the glass bulb cover in the back of the oven by pushing the wire holder to the - Whirlpool SB160PEEB | User Manual - Page 33
to gas supply? Contact an authorized Whirlpool service company to reconnect oven to gas supply. (See Installation Instructions.) w Is the flow of combustion and/or ventilation air to the oven blocked? Other possible problems and their causes: PROBLEM The oven will not operate Burner fails - Whirlpool SB160PEEB | User Manual - Page 34
TROUBLESHOOTING PROBLEM The cooling off the cooling fan. • The oven is not level. (See Installation Instructions.) • The oven temperature seems too low or too high. See " an authorized servicer. If none of these items was causing your problem, see "Requesting Assistance or Service" on page 35. 34 - Whirlpool SB160PEEB | User Manual - Page 35
HOUSEHOLDMAJOR, SERVICE & REPAIR - See: Whirlpool Appliances or Authorized Whirlpool Service (Example: XYZ Service Co.) • WASHING MACHINES & DRYERS, SERVICE & REPAIR - See: Whirlpool Appliances or Authorized Whirlpool Service (Example: XYZ Service Co.) 3. If you need FSP® replacement parts ... FSP - Whirlpool SB160PEEB | User Manual - Page 36
NOTES 36 - Whirlpool SB160PEEB | User Manual - Page 37
NOTES 37 - Whirlpool SB160PEEB | User Manual - Page 38
NOTES 38 - Whirlpool SB160PEEB | User Manual - Page 39
contains all the topics included in this manual, along with the page(s) on which you 13, 15, 16, 20, 22 OVEN VENTS 24 PANS 8, 9 PARTS 7 POWER FAILURE 5 PREHEATING 13 RACKS 8 ROASTING Pans 8, 9 Racks SERVICE 35 STORAGE DRAWER Removing 24 Replacing 24 TROUBLESHOOTING 33 WARRANTY 40 39 - Whirlpool SB160PEEB | User Manual - Page 40
replacement parts and repair labor to correct defects WARRANTY in materials or workmanship. Service must be provided by FROM DATE OF PURCHASE an authorized Whirlpool service company. WHIRLPOOL WILL NOT PAY FOR A. Service calls to: 1. Correct the installation of your built-in oven. 2. Instruct
-
 1
1 -
 2
2 -
 3
3 -
 4
4 -
 5
5 -
 6
6 -
 7
7 -
8
-
9
-
10
-
11
-
12
-
13
-
14
-
15
-
16
-
17
-
18
-
19
-
20
-
21
-
22
-
23
-
24
-
25
-
26
-
27
-
28
-
29
-
30
-
31
-
32
-
33
-
34
-
35
-
36
-
37
-
38
-
39
-
40
 |
 |
SELF-CLEANING GAS BUILT-IN OVEN
G
U
I
D
E
UseAndCare
Table of Contents
(complete)
................
2
A Note to You
...............
3
Oven Safety
...............
4-6
Getting to Know
Your Oven
.....................
7
Using Your Oven
..........
8
Using the Self-
Cleaning Cycle
...........
25
Caring for Your
Oven
............................
30
Troubleshooting
.........
33
Requesting
Assistance
or Service
....................
35
Index
............................
39
Warranty
.....................
40
1-800-253-1301
Call us with questions or comments.
TM
TO THE INSTALLER: PLEASE LEAVE THIS
INSTRUCTION BOOK WITH THE UNIT.
TO THE CONSUMER: PLEASE READ AND
KEEP THIS BOOK FOR FUTURE REFERENCE.
PART NO. 318103502 Rev. A/4372833
MODEL SB160PEE