Whirlpool WDF518SAAW Installation Guide - Page 13
Securing dishwasher to countertop
 |
View all Whirlpool WDF518SAAW manuals
Add to My Manuals
Save this manual to your list of manuals |
Page 13 highlights
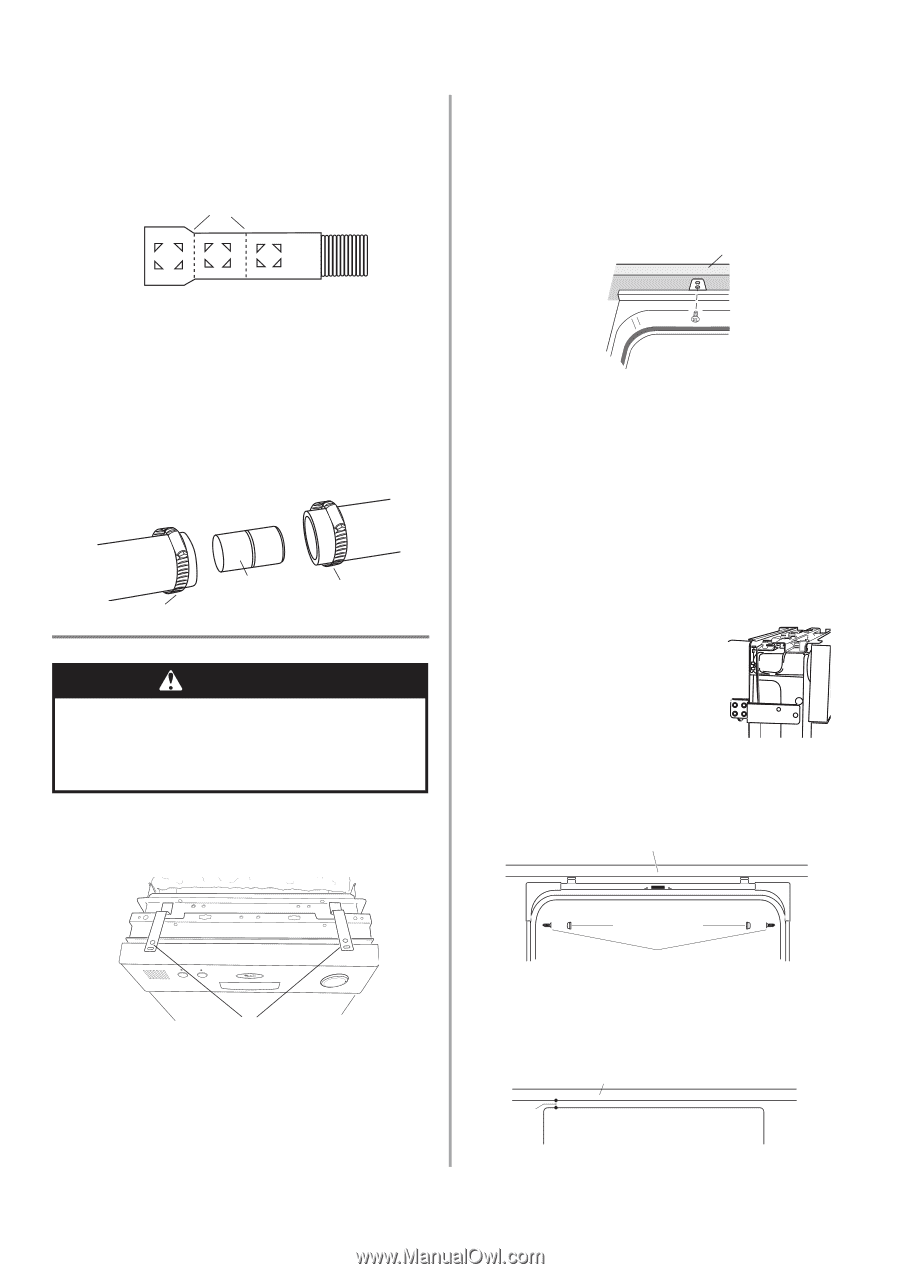
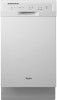
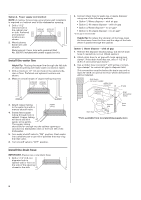
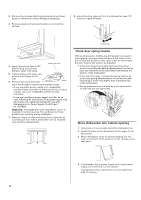
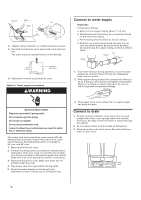
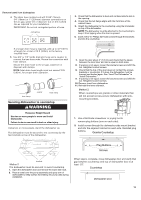
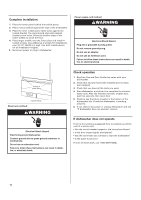
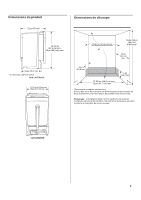
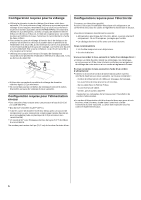
Remove towel from dishwasher. 4. The drain hose molded end will fit 5/8" (16mm), 3/4" (19mm) or 1" (25.4mm) diameter connections on the air gap, waste tee or disposer. Cut on the marked line as required for your installation. IMPORTANT: Do not cut corrugated portion of hose. cutting lines 1" 3/4" 5/8" 3. Check that the dishwasher is level and centered side to side in the opening. 4. Check that the tub flange aligns with the front face of the cabinet frame. 5. Attach the dishwasher to the countertop using the 2 brackets on top of the dishwasher. NOTE: The dishwasher must be attached to the countertop to keep it from tipping when the door is opened. 6. Insert 2 #8 x ⁵⁄₈" Phillips flat-head screws through the brackets and into the countertop. If a longer drain hose is required, add up to 42"(1.07m) of length for a total of 10 ft (3.05m) to the factory installed hose. 5. Use 5/8" or 7/8" inside diameter hose and a coupler to connect the two hose ends. Secure the connection with hose clamps. Secure the drain hose to the air gap, waste tee or disposer with clamps. NOTE: Total drain hose length must not exceed 10 ft (3.05m), for proper drain operation. hose clamp coupler hose clamp Securing dishwasher to countertop WARNING Excessive Weight Hazard Use two or more people to move and install dishwasher. Failure to do so can result in back or other injury. Using two or more people, stand the dishwasher up. The dishwasher must be secured to the countertop by the two brackets on top of the dishwasher. 7. Open the door about 3" (7.6 cm) and check that the space between the inner door and tub is equal on both sides. 8. If spacing is not equal, loosen the bracket screws and shift the tub. Retighten bracket screws. 9. Check that the top of the door does not contact the screws, brackets or countertop. If it does, the dishwasher must be lowered and leveled again. See "Level The Dishwasher" in "Install Dishwasher." 9. If spacing is not equal, loosen the bracket screws and shift the tub. Retighten bracket screws. 10. Remove towel from dishwasher. 11. Reinstall the lower dishrack. `Method 2 When countertops are granite or other materials that will not accept screws,secure dishwasher with sidemounting brackets. 1. Use a flat-blade screwdriver or prying tool to remove plug buttons (one on each side). 2. Install screws through the dishwasher side mount bracket and into the adjacent cabinet on each side. Reinstall plug buttons. Granite Countertop START/ RESUME HEATED DRY HEATED DRY RINSE ONLY OFF POTS & PANS HEAVY WASH NORMAL WASH QUICK WASH brackets Method 1 The dishwasher must be secured to wood countertop. 1. Open the dishwasher door and remove the lower dish rack. 2. Place a towel over the pump assembly and spray arm of dishwasher to keep screws from falling into pump area during installation. Plug Buttons Screws When step is complete, close dishwasher door and verify that gap between countertop and top of dishwasher door is at least 1/2". Countertop Dishwasher Door 13
-
 1
1 -
2
-
3
-
4
-
5
-
6
-
7
-
 8
8 -
 9
9 -
 10
10 -
 11
11 -
 12
12 -
 13
13 -
 14
14 -
 15
15 -
 16
16 -
 17
17 -
 18
18 -
19
-
20
-
21
-
22
-
23
-
24
-
25
-
26
-
27
 |
 |