Whirlpool WED94HEXW Installation Instructions - Page 19
Door Reversal Optional - instructions
 |
View all Whirlpool WED94HEXW manuals
Add to My Manuals
Save this manual to your list of manuals |
Page 19 highlights
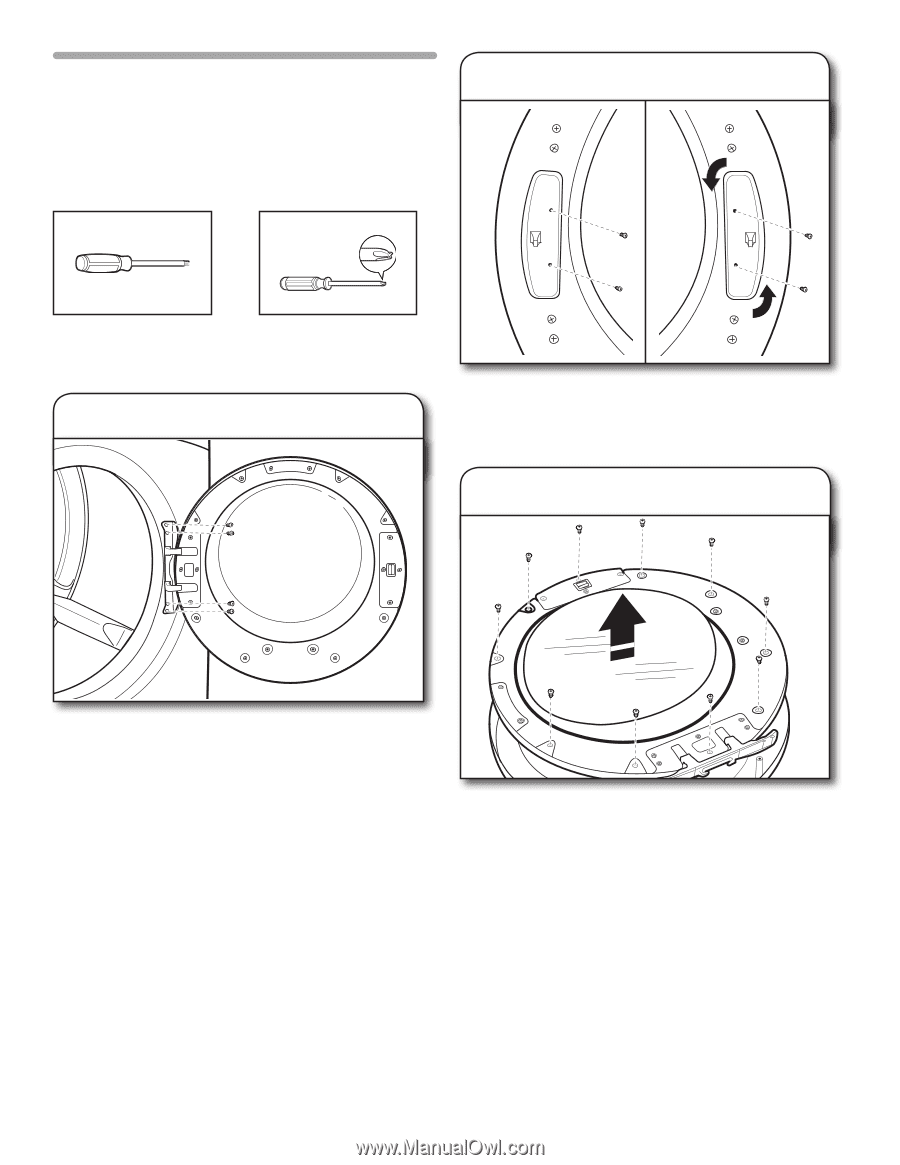
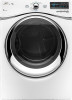
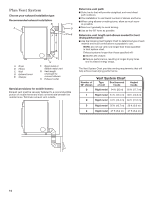
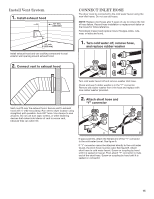
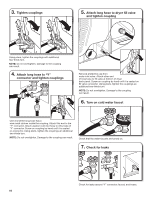
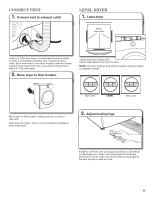
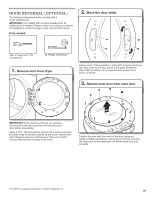
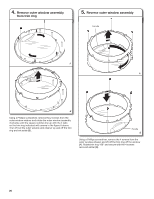
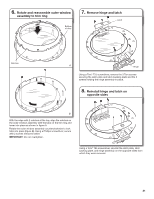
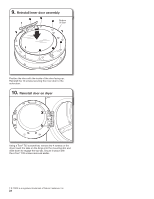
Door Reversal (optional) The following instructions are for models with a round-shaped door. IMPORTANT: For models with a square shaped door, an additional kit is needed. Please contact your retailer, or see the For Assistance or Service page in your Use and Care Guide. Tools needed: 2. Move the door strike Min. 8" long Torx® T25 screwdriver #2 Phillips screwdriver 1. Remove door from dryer Using a Torx®† T25 screwdriver, remove the 2 screws securing the door strike to the door frame of the dryer. Rotate the strike 180° and attach to the opposite side of dryer door frame, as shown. 3. Remove inner door from outer door IMPORTANT: If the protective film has not yet been removed from the dryer, peel the film from the dryer door before proceeding. Using a Torx® T25 screwdriver, remove the 4 screws securing the door hinge to the dryer and lift up and out to remove the door. Place the door on a soft towel or other non-scratch surface. Reinstall the 4 screws in the holes. Position the door with the inside of the door facing up. Using a Phillips screwdriver, remove the 10 screws securing the inner door to the outer door. Lift off the inner door and set aside. † ® TORX is a registered trademark of Saturn Fasteners, Inc. 19
-
 1
1 -
2
-
3
-
4
-
5
-
6
-
7
-
8
-
9
-
10
-
11
-
12
-
13
-
 14
14 -
 15
15 -
 16
16 -
 17
17 -
 18
18 -
 19
19 -
 20
20 -
 21
21 -
 22
22 -
 23
23 -
 24
24
 |
 |