Whirlpool WRR56X18F Owners Manual - Page 4
Electrical Requirements, Refrigerator Door
 |
View all Whirlpool WRR56X18F manuals
Add to My Manuals
Save this manual to your list of manuals |
Page 4 highlights
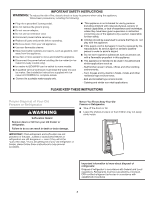
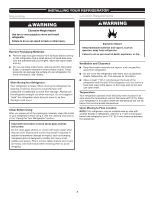
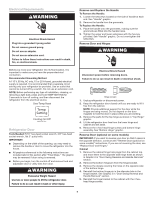
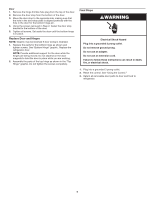
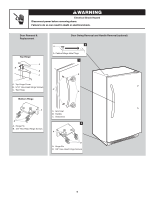
Electrical Requirements WARNING Electrical Shock Hazard Plug into a grounded 3 prong outlet. Do not remove ground prong. Do not use an adapter. Do not use an extension cord. Failure to follow these instructions can result in death, fire, or electrical shock. Remove and Replace the Handle To Remove the Handle: 1. Loosen the setscrews located on the side of handle at each end. See "Handle" graphic. 2. Remove the handle from the grommets. To Replace the Handle: 1. Place the handle onto the grommets, making sure the grommets are fitted into the handle holes. 2. Tighten the upper and lower setscrews with the hex key provided. See "Handle" graphic. Do not over-tighten the setscrews. Remove Door and Hinges WARNING Before you move your refrigerator into its final location, it is important to make sure you have the proper electrical connection. Recommended Grounding Method A 115 V, 60 Hz, AC only, 15 or 20 A fused, grounded electrical supply is required. It is recommended that a separate circuit serving only your refrigerator be provided. Use an outlet that cannot be turned off by a switch. Do not use an extension cord. NOTE: Before performing any type of installation, cleaning, or removing a light bulb, press and hold TEMP SETTING for 3 seconds to turn off cooling, and then disconnect the refrigerator from the electrical source. Refrigerator Door Tools Needed: 5/16" hex-head socket wrench, 3/8" hex-head socket wrench, flat 2" putty knife. IMPORTANT: ■■ Depending on the width of the opening, you may need to remove the handle or door to move the refrigerator into the house. ■■ All graphics referenced in the following instructions are included later in this section after "Final Steps." The graphic may be reversed if door swing is reversed. ■■ Before you begin, turn the control off and remove food and adjustable door or utility bins from door. WARNING Excessive Weight Hazard Use two or more people to lift the refrigerator door. Failure to do so can result in back or other injury. Electrical Shock Hazard Disconnect power before removing doors. Failure to do so can result in death or electrical shock. Hinge screws 1. Unplug refrigerator or disconnect power. 2. Keep the refrigerator door closed until you are ready to lift it free from the cabinet. NOTE: Provide additional support for the door while the hinges are being moved. Do not depend on the door magnets to hold the door in place while you are working. 3. Remove the parts for the top hinge as shown in "Top Hinge" graphic. 4. Lift the refrigerator door free from the lower hinge and cabinet and set aside. 5. Remove the 4 hex-head hinge screws and bottom hinge assembly. See "Bottom Hinge" graphic. Reverse Door (optional on some models) IMPORTANT: If you want to reverse your door so that it opens in the opposite direction, continue with "Reverse Door (optional on some models)" instructions. If you are not reversing the door, see "Replace Door and Hinges." Cabinet 1. Remove the cabinet hinge hole plugs from the cabinet top and move them to the opposite side hinge holes as shown in Graphic 2 in "Door Swing Reversal and Handle Removal" section. 2. Remove the bottom hinge pin from the hinge bracket. 3. Remove the decals covering the holes on the opposite side of the bottom hinge. 4. Reinstall the bottom hinge pin in the alternate hole in the hinge bracket. See Graphic 3 in "Door Swing Reversal and Handle Removal" section. 5. Reinstall the hinge bracket to the cabinet with the 4 hexhead hinge screws. 4
-
 1
1 -
 2
2 -
 3
3 -
 4
4 -
 5
5 -
 6
6 -
 7
7 -
 8
8 -
 9
9 -
 10
10 -
11
-
12
-
13
-
14
-
15
-
16
-
17
-
18
-
19
-
20
-
21
-
22
-
23
-
24
-
25
-
26
-
27
-
28
 |
 |
