Xerox 2121MB Network Guide - Page 28
Click on U
 |
UPC - 095205428667
View all Xerox 2121MB manuals
Add to My Manuals
Save this manual to your list of manuals |
Page 28 highlights
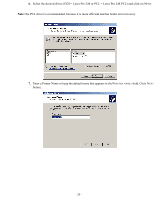
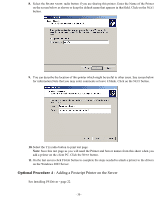
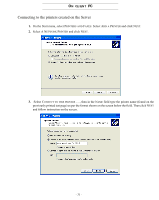
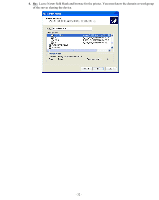
3. Click on NEXT and go to the next screen. 4. Select the LOCAL PRINTER ATTACHED TO THIS COMPUTER radio button. Click on the NEXT button. 5. Click on USE THE FOLLOWING PORT and Select the Newly created port from the dropdown menu. - 28 -
-
 1
1 -
2
-
3
-
4
-
5
-
6
-
7
-
8
-
9
-
10
-
11
-
12
-
13
-
14
-
15
-
16
-
17
-
18
-
19
-
20
-
21
-
22
-
 23
23 -
 24
24 -
 25
25 -
 26
26 -
 27
27 -
 28
28 -
 29
29 -
 30
30 -
 31
31 -
 32
32 -
 33
33 -
34
-
35
-
36
-
37
-
38
-
39
-
40
-
41
-
42
-
43
-
44
-
45
-
46
-
47
-
48
-
49
-
50
-
51
-
52
-
53
-
54
-
55
-
56
-
57
-
58
-
59
-
60
-
61
-
62
-
63
-
64
-
65
-
66
-
67
-
68
-
69
-
70
-
71
-
72
-
73
-
74
-
75
-
76
-
77
-
78
-
79
-
80
-
81
-
82
-
83
-
84
-
85
-
86
-
87
-
88
-
89
-
90
-
91
-
92
-
93
-
94
-
95
-
96
-
97
-
98
-
99
-
100
-
101
-
102
-
103
-
104
-
105
-
106
-
107
-
108
-
109
-
110
-
111
-
112
 |
 |

- 28 -
3.
Click on N
EXT
and go to the next screen.
4.
Select the L
OCAL
PRINTER
ATTACHED
TO
THIS
COMPUTER
radio button. Click on the N
EXT
button.
5.
Click on U
SE
THE
FOLLOWING
PORT
and Select the Newly created port from the dropdown menu.