Xerox 3220DN User Guide - Page 56
Changing the default document settings, Receiving options - duplex
 |
UPC - 095205754346
View all Xerox 3220DN manuals
Add to My Manuals
Save this manual to your list of manuals |
Page 56 highlights
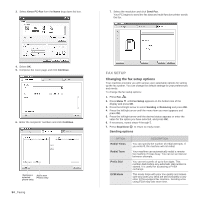
OPTION DESCRIPTION Send Report You can set your machine to print a confirmation report showing whether a transmission was successful, how many pages were sent, and more. The available options are On, Off, and OnError, which prints only when a transmission is not successful. Image TCR This function allows users to know what fax messages have been sent by showing sent messages in the transmission report. The first page of the message is turned into an image file than is printed on the transmission report so the users can see what messages have been sent. However, you can not use this function when sending fax without saving the data in the memory. Dial Mode This setting may not be available depending on your country. If you cannot reach this option, your machine does not support this feature. You can set the dial mode for your machine to either tone dialling or pulse dialling. If you have a public telephone system or a private branch exchnage(PBX) system, you may need to select Pulse. Contact your local telephone company if you are not sure which dial mode to use. If you select Pulse, some phone system features might not be available. It can also take longer to dial a fax or phone number. Receiving options OPTION DESCRIPTION Receive Mode You can select the default fax receiving mode. For details on receiving faxes in each mode, see page 49. Ring to Answer You can specify the number of times the machine rings before answering an incoming call. Stamp RCV Name This option allows the machine to automatically print the page number, and the date and time of reception at the bottom of each page of a received fax. RCV Start Code This code allows you to initiate fax reception from an extension phone plugged into the EXT socket on the back of the machine. If you pick up the extension phone and hear fax tones, enter the code. It is preset to *9* at the factory. Auto Reduction When receiving a fax containing pages as long as or longer than the paper loaded in the paper tray, the machine can reduce the size of the original to fit the size of the paper loaded in the machine. Turn on this feature if you want to automatically reduce an incoming page. With this feature set to Off, the machine cannot reduce the original to fit onto one page. The original will be divided and printed in actual size on two or more pages. OPTION DESCRIPTION Discard Size When receiving a fax containing pages as long as or longer than the paper in your machine, you can set the machine to discard a specific length from the end of the received fax. The machine will print the received fax on one or more sheets of paper, minus the data that would have been on the specified discard segment. When the received fax contains pages larger than the paper in your machine, and Auto Reduction has been turned on, the machine will reduce the fax to fit on the existing paper, and nothing will be discarded. Junk Fax Setup This setting may not be available depending on your country. Using this feature, the system will not accept faxes sent from remote stations whose numbers are stored in the memory as junk fax numbers. This feature is useful for blocking any unwanted faxes. When you turn on this feature, you can access the following options to set junk fax numbers. • Add: Allows you to set up to 20 fax numbers. • Delete: Allows you to delete the desired junk fax number. • Delete All: Allows you to delete all junk fax numbers. DRPD Mode Duplex Print This mode enables a user to use a single telephone line to answer several different telephone numbers. In this menu, you can set the machine to recognize which ring patterns to answer. For details about this feature, see page 50. • Long Edge: Prints pages to be read like a book. • Short Edge: Prints pages to be read by flipping like a note pad. • Off: Prints received fax on one sides of a paper. Changing the default document settings The fax options, including resolution and darkness, can be set to the most frequently used modes. When you send a fax, the default settings are used if they are not changed by using the corresponding button and menu. 1. Press Fax . 2. Press Menu until Fax Setup appears on the bottom line of the display and press OK. 3. Press the left/right arrow until Change Default appears and press OK. 4. Press OK when Resolution appears. 5. Press the left/right arrow until the resolution you want appears and press OK. 6. Press the left/right arrow until Darkness appears and press OK. 7. Press the left/right arrow until the darkness you want appears and press OK. 8. Press Stop/Clear to return to ready mode. Faxing_ 55
-
 1
1 -
2
-
3
-
4
-
5
-
6
-
7
-
8
-
9
-
10
-
11
-
12
-
13
-
14
-
15
-
16
-
17
-
18
-
19
-
20
-
21
-
22
-
23
-
24
-
25
-
26
-
27
-
28
-
29
-
30
-
31
-
32
-
33
-
34
-
35
-
36
-
37
-
38
-
39
-
40
-
41
-
42
-
43
-
44
-
45
-
46
-
47
-
48
-
49
-
50
-
 51
51 -
 52
52 -
 53
53 -
 54
54 -
 55
55 -
 56
56 -
 57
57 -
 58
58 -
 59
59 -
 60
60 -
 61
61 -
62
-
63
-
64
-
65
-
66
-
67
-
68
-
69
-
70
-
71
-
72
-
73
-
74
-
75
-
76
-
77
-
78
-
79
-
80
-
81
-
82
-
83
-
84
-
85
-
86
-
87
-
88
-
89
-
90
-
91
-
92
-
93
-
94
-
95
-
96
-
97
-
98
-
99
-
100
-
101
-
102
-
103
-
104
-
105
-
106
-
107
-
108
-
109
-
110
-
111
-
112
-
113
-
114
-
115
-
116
-
117
-
118
-
119
-
120
-
121
-
122
-
123
-
124
-
125
-
126
-
127
-
128
-
129
-
130
-
131
-
132
-
133
-
134
-
135
-
136
-
137
-
138
-
139
-
140
 |
 |
