Xerox 4260S System Administration Guide - Page 50
Internet Printing Protocol (IPP) Port, How to Enable the IPP Port - print drivers
 |
UPC - 095205742985
View all Xerox 4260S manuals
Add to My Manuals
Save this manual to your list of manuals |
Page 50 highlights
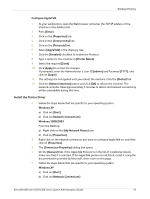
4 Print Drivers 17. Click on the [Next] button. 18. The [Name your Printer] screen appears. 19. To configure the settings: a) Enter a Printer Name. b) If you want to set this printer as your default printer, click on [Set as default]. For Windows Vista users, go to step 25. 20. Click on the [Next] button. 21. The [Printer Sharing Screen] appears. If you will be sharing this printer with other clients, then: a) Select: • [Share As:] - Windows 2000. • [Share Name] - Windows XP/2003. b) Enter a Share Name. 22. Click on the [Next] button. 23. Enter a Location name (and Comment if required.) 24. Click on the [Next] button. 25. Click on [Yes] to Print a Test Page. 26. Click on the [Next] button. 27. Click on the [Next] button.to close the [Test Page] window. 28. Click on the [Finish] button. The printer driver will install. 29. Verify that the test page is printed at the machine. Internet Printing Protocol (IPP) Port Internet Printing Protocol (IPP) is a TCP/IP protocol which enables the device to print via the Internet. IPP Printing is enabled by default. How to Enable the IPP Port 1. At your workstation, open the web browser and enter the TCP/IP address of the machine in the Address bar. 2. Press [Enter]. 3. Click on the [Properties] tab. 4. Click on the [Connectivity] link. 5. Click on the [Protocols] link. 6. Select [IPP] in the directory tree. 7. Select [Enable]. The Printer URL will show the http:// IP address of the device and the ipp:// IP address of the device. 38 Xerox WorkCentre 4250/4260 Series System Administration Guide
-
 1
1 -
2
-
3
-
4
-
5
-
6
-
7
-
8
-
9
-
10
-
11
-
12
-
13
-
14
-
15
-
16
-
17
-
18
-
19
-
20
-
21
-
22
-
23
-
24
-
25
-
26
-
27
-
28
-
29
-
30
-
31
-
32
-
33
-
34
-
35
-
36
-
37
-
38
-
39
-
40
-
41
-
42
-
43
-
44
-
 45
45 -
 46
46 -
 47
47 -
 48
48 -
 49
49 -
 50
50 -
 51
51 -
 52
52 -
 53
53 -
 54
54 -
 55
55 -
56
-
57
-
58
-
59
-
60
-
61
-
62
-
63
-
64
-
65
-
66
-
67
-
68
-
69
-
70
-
71
-
72
-
73
-
74
-
75
-
76
-
77
-
78
-
79
-
80
-
81
-
82
-
83
-
84
-
85
-
86
-
87
-
88
-
89
-
90
-
91
-
92
-
93
-
94
-
95
-
96
-
97
-
98
-
99
-
100
-
101
-
102
-
103
-
104
-
105
-
106
-
107
-
108
-
109
-
110
-
111
-
112
-
113
-
114
-
115
-
116
-
117
-
118
-
119
-
120
-
121
-
122
-
123
-
124
-
125
-
126
-
127
-
128
-
129
-
130
-
131
-
132
-
133
-
134
-
135
-
136
-
137
-
138
-
139
-
140
-
141
-
142
-
143
-
144
-
145
-
146
-
147
-
148
-
149
-
150
-
151
-
152
-
153
-
154
-
155
-
156
-
157
-
158
-
159
-
160
-
161
-
162
-
163
-
164
-
165
-
166
-
167
-
168
-
169
-
170
-
171
-
172
-
173
-
174
-
175
-
176
-
177
-
178
-
179
-
180
-
181
-
182
-
183
-
184
-
185
-
186
-
187
-
188
-
189
-
190
-
191
-
192
-
193
-
194
-
195
-
196
-
197
-
198
-
199
-
200
-
201
-
202
-
203
-
204
-
205
-
206
-
207
-
208
-
209
-
210
 |
 |
