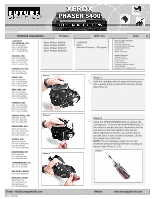
Xerox 5400DX Technical Reference - Page 3
Step 10, Step 11, Step 12, Step 13, Step 14, Step 15
 |
UPC - 042215476539
View all Xerox 5400DX manuals
Add to My Manuals
Save this manual to your list of manuals |
Page 3 highlights
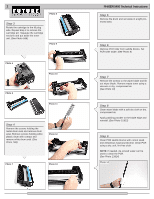
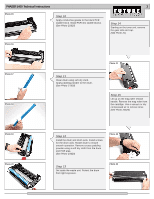
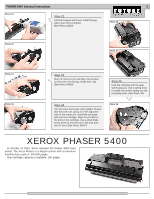
PHASER 5400 Technical Instructions Photo 15 Step 10 Apply conductive grease to the black PCR saddle block. Install PCR into saddle blocks. (See Photo 15&16) 3 Step 14 Starting on the toner unit, remove the gear side end cap. (See Photo 21) Photo 16 Photo 17 Photo 18 Step 11 Clean drum using soft dry cloth. Apply padding powder to the drum. (See Photo 17&18) Photo 21 Step 15 Lift up on the mag roller release handle. Remove the mag roller from the cartridge. Use a vacuum or dry compressed air to remove toner. (See Photo 22&23) Photo 19 Photo 20 Step 12 Install the drum and drum axils. Install screws for the drum axils. Rotate drum to ensure smooth operation. Remove excess padding powder using a soft dry cloth from the drum and PCR area. (See Photo 19&20) Photo 22 Step 13 Set aside the waste unit. Protect the drum from light exposure. Photo 23
-
 1
1 -
 2
2 -
 3
3 -
 4
4 -
 5
5
 |
 |
