Xerox 850DX Account Management Tool Administrator's Guide version 10.0 (Englis - Page 35
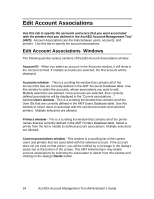
How to Connect Accounts - Printers - Users on, the Edit Account Associations Dialog
 |
UPC - 042215454865
View all Xerox 850DX manuals
Add to My Manuals
Save this manual to your list of manuals |
Page 35 highlights
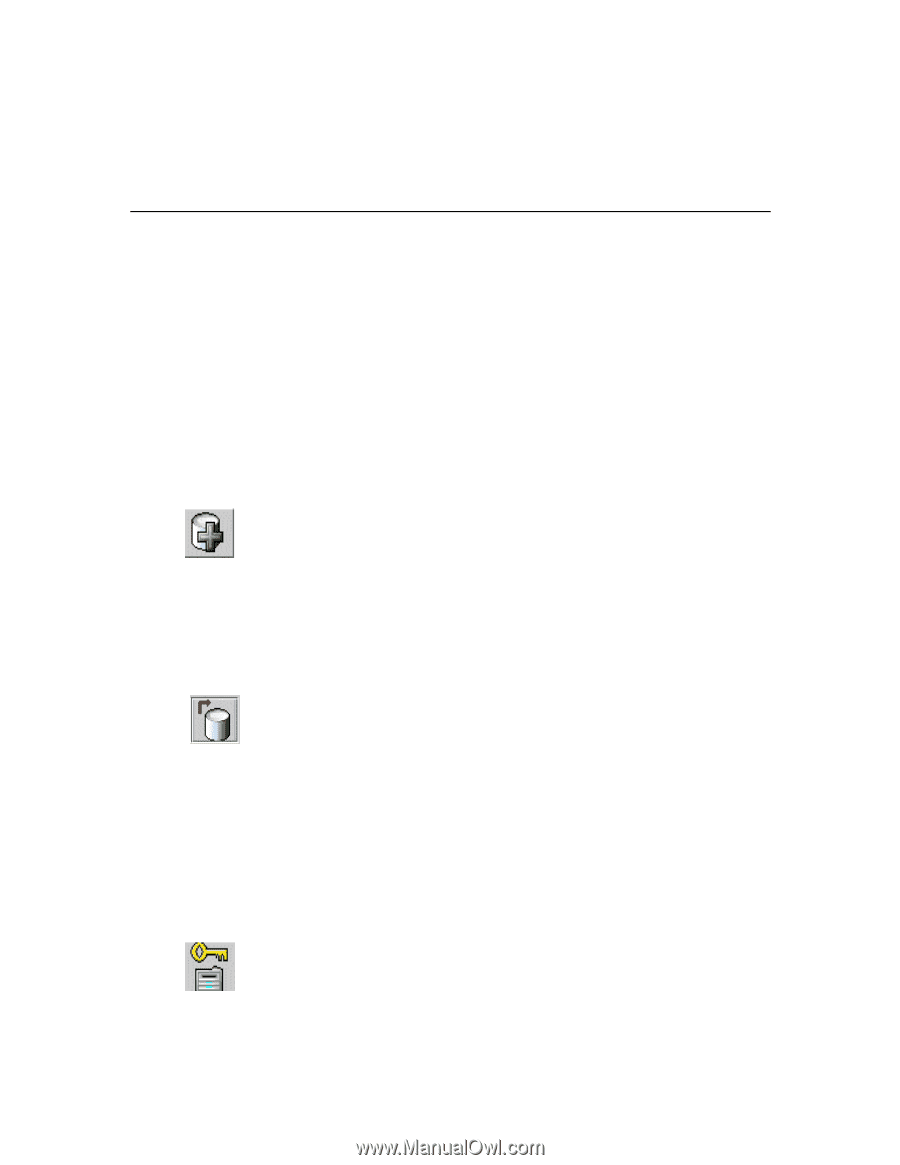
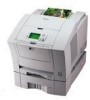
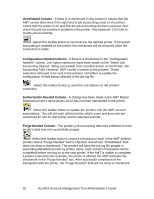
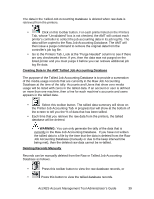
How to Connect Accounts - Printers - Users on the Edit Account Associations Dialog 1. In the Edit Account Associations window, click on the account whose user and printer associations you want to edit. The name will now appear in the Account ID field. 2. In the Printers window, click on the printers that you wish to associate with this account. Multiple selections are allowed. 3. Look in the "Current associations" window at the bottom of the screen. It lists all of the associations for the currently selected accounts and users. If the window is blank, then there are no current associations. NOTE: To refresh the current association window, in the toolbar menus, select View > Associations. 4. In the Users window, select any additional Users that you want to be associated with the selected Account and selected Printers. 5. Select this toolbar button to place the defined associations into the "Current associations" window. A checkmark will appear in the "Database Status" box to indicate that the associations that you just made have not yet been placed into the AMT Associations Database. The checkmark in the "Printers Status" column means that the affected printers have not yet been notified of the associations. The printer is also marked on the Printers Tab as "Authorization Needed". 6. Select this toolbar button to apply the updated associations, whose "Database Status" box has a checkmark in it, to the AMT Associations Database. The checkmark will be removed from the "Database Status" column. A checkmark will now appear in the "Printers Status" column, which means the affected printers have not yet been notified of the associations. The printer is also marked on the Printers Tab as "Authorization Needed". NOTE: If you exit the AMT application, or the Edit Account Associations dialog without saving the changes to the database, you will receive a warning message. 7. Click on this toolbar button to update the printers with the updated associations. The button is available from both the Edit Account Associations Tab and from the Printer Job Accounting Tab. When the printer is updated with the associations, the checkmark will be removed AccXES Account Management Tool Administrator's Guide 35
-
 1
1 -
2
-
3
-
4
-
5
-
6
-
7
-
8
-
9
-
10
-
11
-
12
-
13
-
14
-
15
-
16
-
17
-
18
-
19
-
20
-
21
-
22
-
23
-
24
-
25
-
26
-
27
-
28
-
29
-
 30
30 -
 31
31 -
 32
32 -
 33
33 -
 34
34 -
 35
35 -
 36
36 -
 37
37 -
 38
38 -
 39
39 -
 40
40 -
41
-
42
-
43
-
44
-
45
-
46
-
47
-
48
-
49
-
50
-
51
-
52
-
53
-
54
-
55
-
56
-
57
-
58
-
59
-
60
-
61
-
62
-
63
-
64
-
65
-
66
-
67
-
68
-
69
-
70
 |
 |