Xerox M118i Network Connection Quick Setup Guide
Xerox M118i - WorkCentre B/W Laser Manual
 |
UPC - 095205219265
View all Xerox M118i manuals
Add to My Manuals
Save this manual to your list of manuals |
Xerox M118i manual content summary:
- Xerox M118i | Network Connection Quick Setup Guide - Page 1
- Xerox M118i | Network Connection Quick Setup Guide - Page 2
- Xerox M118i | Network Connection Quick Setup Guide - Page 3
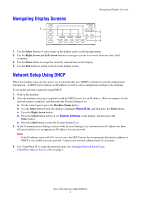
Xerox WorkCentre® M118/M118i Network Connection Quick Setup Guide This guide includes instructions for: ■ Navigating Display Screens on page 2 ■ Network Setup Using DHCP on page 2 ■ Network Setup Using a Static IP Address on page 3 ■ Verifying Network Setup Using CentreWare Internet Services (IS) on - Xerox M118i | Network Connection Quick Setup Guide - Page 4
DHCP server has not properly allocated an address or DHCP is not enabled on your network. Contact your network administrator for assistance. 4. Use CentreWare IS to verify the network setup. See Verifying Network Setup Using CentreWare Internet Services (IS) on page 5. Xerox WorkCentre M118/M118i 2 - Xerox M118i | Network Connection Quick Setup Guide - Page 5
to select Network/Port. 3. Press the Select button until you see TCP/IP Settings on the display, and then press the Enter button. 4. Select Get IP Address, and then press the Enter button. 5. Select Manual, and then press the Enter button. 6. Press the Exit button. Xerox WorkCentre M118/M118i 3 - Xerox M118i | Network Connection Quick Setup Guide - Page 6
Step 3 to enter the remaining numbers. Note If you are using a server name for the machine (instead of an IP address), you must enter the DNS server information. Use CentreWare IS to set the DNS server address. See Verifying Network Setup Using CentreWare Internet Services (IS) on page 5. 5. Press - Xerox M118i | Network Connection Quick Setup Guide - Page 7
software, you can access and manage your printers over a TCP/IP network using a web browser. Note To enter network configuration settings via CentreWare IS, your computer must be on the same subnet as the Xerox WorkCentre M118/M118i. For additional information about using CentreWare IS, see the User - Xerox M118i | Network Connection Quick Setup Guide - Page 8
IP statique à la page 8 ■ Vérification de la configuration réseau avec CentreWare Internet Services (IS) à la page 10 Ce guide d'installation fournit des instructions pour connecter le système Xerox WorkCentre M118/M118i à un réseau Ethernet TCP/IP. Il contient les procédures de configuration de la - Xerox M118i | Network Connection Quick Setup Guide - Page 9
votre réseau. Contactez votre administrateur réseau pour assistance. 4. Utilisez CentreWare IS pour vérifier la configuration réseau. Voir Vérification de la configuration réseau avec CentreWare Internet Services (IS) à la page 10. Xerox WorkCentre M118/M118i 7 - Xerox M118i | Network Connection Quick Setup Guide - Page 10
bouton Entrer. 4. Sélectionnez Obtenir l'adresse IP et appuyez sur le bouton Entrer. 5. Sélectionnez Manuellement et appuyez sur le bouton Entrer. 6. Appuyez sur le bouton Quitter. Xerox WorkCentre M118/M118i 8 - Xerox M118i | Network Connection Quick Setup Guide - Page 11
de serveur DNS. Voir Vérification de la configuration réseau avec CentreWare Internet Services (IS) à la page 10. 5. Appuyez sur le bouton Entrer pour valider l'adresse. 6. Appuyez sur le Appuyez sur le bouton Connexion/Déconnexion pour revenir au menu principal. Xerox WorkCentre M118/M118i 9 - Xerox M118i | Network Connection Quick Setup Guide - Page 12
avec CentreWare Internet Services (IS) Vérification de la configuration réseau avec CentreWare Internet Services (IS) me Xerox WorkCentre M118/M118i. Pour de plus amples informations au sujet de CentreWare IS, consultez le Guide de l'utilisateur ainsi que le Guide Xerox WorkCentre M118/M118i 10 - Xerox M118i | Network Connection Quick Setup Guide - Page 13
CentreWare Internet Services (IS) a pagina 15 Questa guida all'installazione fornisce istruzioni relative alla connessione di Xerox WorkCentre M118/M118i su una IP fornito dall'amministratore della rete. Nota La System Administrator Guide (Guida per l'amministratore di sistema, solo in lingua inglese - Xerox M118i | Network Connection Quick Setup Guide - Page 14
rete. Contattare l'amministratore di rete per assistenza. 4. Utilizzare CentreWare IS per controllare la configurazione di rete. Vedere Verifica dell'impostazione di rete utilizzando CentreWare Internet Services (IS) a pagina 15. Xerox WorkCentre M118/M118i 12 - Xerox M118i | Network Connection Quick Setup Guide - Page 15
Impostaz. sistema. a. Utilizzare la tastierina numerica per inserire la Password. La password predefinita è 11111. b. Premere il pulsante di selezione per Ottieni indirizzo IP e premere Invio. 5. Selezionare Manuale e premere Invio. 6. Premere il pulsante Esci. Xerox WorkCentre M118/M118i 13 - Xerox M118i | Network Connection Quick Setup Guide - Page 16
l'indirizzo del server DNS. Vedere Verifica dell'impostazione di rete utilizzando CentreWare Internet Services (IS) a pagina 15. 5. Premere il pulsante Invio per accettare l'indirizzo il pulsante Esci. 6. Premere il pulsante Accesso per tornare al menu principale. Xerox WorkCentre M118/M118i 14 - Xerox M118i | Network Connection Quick Setup Guide - Page 17
utilizzando CentreWare Internet Services (IS) Verifica dell'impostazione di rete utilizzando CentreWare Internet Services (IS) CentreWare IS di Xerox WorkCentre M118/M118i. Per ulteriori informazioni sull'utilizzo di CentreWare IS, vedere la Guida per l'utente e la System Administrator Guide nel CD - Xerox M118i | Network Connection Quick Setup Guide - Page 18
der Netzwerkeinrichtung mit CentreWare Internet Services (IS) auf Seite 20 In dieser Kurzanleitung wird beschrieben, wie Sie das Xerox WorkCentre M118/M118i an ein Ethernet TCP/IP- manuell zugewiesen. Hinweis Im System Administrator Guide (Systemhandbuch) befinden sich detaillierte Anleitungen zum - Xerox M118i | Network Connection Quick Setup Guide - Page 19
. Wenden Sie sich in diesem Fall an Ihren Netzwerkadministrator. 4. Überprüfen Sie die Netzwerkeinrichtung mit CentreWare IS. Siehe Überprüfen der Netzwerkeinrichtung mit CentreWare Internet Services (IS) auf Seite 20. Xerox WorkCentre M118/M118i 17 - Xerox M118i | Network Connection Quick Setup Guide - Page 20
aus und drücken Sie dann die Eingabetaste. 5. Wählen Sie Manuell aus und drücken Sie dann die Eingabetaste. 6. Drücken Sie die Beenden-Taste. Xerox WorkCentre M118/M118i 18 - Xerox M118i | Network Connection Quick Setup Guide - Page 21
die DNS-Serveradresse über CentreWare IS fest. Siehe Überprüfen der Netzwerkeinrichtung mit CentreWare Internet Services (IS) auf Seite 20. 5. Drücken Sie die Eingabetaste, um die Adresse zu best Drücken Sie die Anmelde-/Abmeldetaste, um zum Hauptmenü zurückzukehren. Xerox WorkCentre M118/M118i 19 - Xerox M118i | Network Connection Quick Setup Guide - Page 22
Netzwerkeinrichtung mit CentreWare Internet Services (IS) Überprüfen der Netzwerkeinrichtung mit CentreWare Internet Services (IS) CentreWare Xerox WorkCentre M118/M118i befinden. Weitere Informationen zur Verwendung von CentreWare IS finden Sie im Benutzerhandbuch und im System Administration Guide - Xerox M118i | Network Connection Quick Setup Guide - Page 23
utilizando Servicios de Internet de CentreWare en la página 25 En esta guía de configuración se proporcionan instrucciones para conectar el sistema Xerox WorkCentre M118/M118i en una red Ethernet TCP/IP. Incluye procedimientos para configurar la conexión a la red usando uno de estos métodos: ■ DHCP - Xerox M118i | Network Connection Quick Setup Guide - Page 24
de CentreWare para verificar la configuración de red. Consulte Verificación de la configuración de red utilizando Servicios de Internet de CentreWare en la página 25. Xerox WorkCentre M118/M118i 22 - Xerox M118i | Network Connection Quick Setup Guide - Page 25
ón Seleccionar hasta que vea Opciones de TCP/IP en la pantalla y, después, pulse el botón Intro. 4. Seleccione Obtener dirección IP y pulse el botón Intro. 5. Seleccione Manual y pulse el botón Intro. 6. Pulse el botón Salir. Xerox WorkCentre M118/M118i 23 - Xerox M118i | Network Connection Quick Setup Guide - Page 26
. 4. Pulse el botón Intro para aceptar la máscara de subred. 5. Pulse el botón Salir. 6. Presione el botón Iniciar/Terminar sesión para volver al menú principal. Xerox WorkCentre M118/M118i 24 - Xerox M118i | Network Connection Quick Setup Guide - Page 27
como imprimir trabajos guardados. Con el software Servicios de Internet de CentreWare puede , el PC debe estar en la misma subred que el Xerox WorkCentre M118/M118i. Si desea haga clic en el botón Aplicar opciones nuevas, situado en la parte inferior de la página. 6. Introduzca la ID de usuario y - Xerox M118i | Network Connection Quick Setup Guide - Page 28
o software Serviços de Internet CentreWare (IS) na página 30 Este guia de configuração fornece instruções para conectar o Xerox WorkCentre M118/M118i a Esta é a configuração padrão. ■ Endereço IP estático: Use este método para atribuir manualmente um endereço IP fornecido pelo administrador da - Xerox M118i | Network Connection Quick Setup Guide - Page 29
ativado em sua rede. Entre em contato com o administrador da rede para obter ajuda. 4. Use o software CentreWare IS para verificar a configuração da rede. Consulte Verificação da Configuração da Rede usando o software Serviços de Internet CentreWare (IS) na página 30. Xerox WorkCentre M118/M118i 27 - Xerox M118i | Network Connection Quick Setup Guide - Page 30
botão de Seleção abaixo do visor para selecionar Configurações do Sistema. a. Use o teclado numérico para inserir a Senha. A senha padrão é 11111. , pressione o botão Entrar. 5. Selecione Manual, e, em seguida, pressione o botão Entrar. 6. Pressione o botão Sair. Xerox WorkCentre M118/M118i 28 - Xerox M118i | Network Connection Quick Setup Guide - Page 31
as informações do servidor DNS. Use o software CentreWare IS para definir o Endereço do servidor DNS. Consulte Verificação da Configuração da Rede usando o software Serviços de Internet CentreWare (IS . 6. Pressione o botão de Log in/out para voltar ao menu principal. Xerox WorkCentre M118/M118i 29 - Xerox M118i | Network Connection Quick Setup Guide - Page 32
usando o software CentreWare IS, o seu computador deve estar na mesma máscara da sub-rede que o Xerox WorkCentre M118/M118i. Para informa Endereço de DNS 1 e, em seguida, clique no botão Aplicar Novas Configurações na parte inferior da página. 6. Digite a ID de usuário padrão e a senha na caixa - Xerox M118i | Network Connection Quick Setup Guide - Page 33
Xerox WorkCentre® M118/M118i 32 DHCP 32 IP 33 CentreWare Internet Services (IS) на стр. 35 Xerox WorkCentre M118/M118i Ethernet TCP/IP DHCP DHCP IP IP IP System Administrator Guide Novell IPX System Administrator Guide Customer Documentation Xerox. TCP/IP - Xerox M118i | Network Connection Quick Setup Guide - Page 34
1 2 3 4 1 2 3 4 DHCP DHCP DHCP IP DHCP: 1 2 IP DHCP a b c d e 3 IP Если IP 167.xxx.xxx.xxx DHCP IP DHCP 4 CentreWare IS CentreWare Internet Services (IS 35. Xerox WorkCentre M118/M118i 32 - Xerox M118i | Network Connection Quick Setup Guide - Page 35
IP IP DHCP IP DHCP IP DNS IP IP DNS: IP 1 2 3 a 11111. b DHCP 1 2 3 TCP/IP 4 IP 5 6 Xerox WorkCentre M118/M118i 33 - Xerox M118i | Network Connection Quick Setup Guide - Page 36
IP IP-адрес. 1 IP 2 IP 3 IP 4 3 IP DNS CentreWare IS DNS CentreWare Internet Services (IS 35. 5 6 1 2 3 2 4 5 1 2 3 2 4 5 6 Xerox WorkCentre M118/M118i 34 - Xerox M118i | Network Connection Quick Setup Guide - Page 37
CentreWare Internet Services (IS) CentreWare Internet Services (IS) CentreWare IS web CentreWare IS CentreWare IS TCP/IP web CentreWare IS Xerox WorkCentre M118/M118i CentreWare IS System Administrator Guide Customer Documentation Xerox CentreWare IS: 1 web 2 IP Address http - Xerox M118i | Network Connection Quick Setup Guide - Page 38
ě 40 Tato příručka obsahuje pokyny pro připojení přístroje Xerox WorkCentre M118/M118i do sítě Ethernet s protokolem TCP/IP. Jsou zde popsány í IP adresy, kterou stanovil správce sítě. Poznámka Dokument System Administrator Guide [Prírucka správce systému] obsahuje podrobné pokyny pro nastavení - Xerox M118i | Network Connection Quick Setup Guide - Page 39
správce sítě se žádostí o asistenci. 4. Nastavení sítě ověřte pomocí IS CentreWare. Viz Ověření nastavení sítě pomocí Internetových služeb (IS) CentreWare na straně 40. Xerox WorkCentre M118/M118i 37 - Xerox M118i | Network Connection Quick Setup Guide - Page 40
ěte tlačítko Enter. 4. Vyberte Získat IP adresu, a stiskněte tlačítko Enter. 5. Vyberte Ručně a stiskněte tlačítko Enter. 6. Stiskněte tlačítko Konec. Xerox WorkCentre M118/M118i 38 - Xerox M118i | Network Connection Quick Setup Guide - Page 41
čítka Enter nastavte zadanou masku podsítě. 5. Stiskněte tlačítko Konec. 6. Stiskem tlačítka Přihlášení/odhlášení se vrat'te do hlavní nabídky. Xerox WorkCentre M118/M118i 39 - Xerox M118i | Network Connection Quick Setup Guide - Page 42
ých služeb CentreWare, pocítac musí být ve stejné podsíti jako prístroj Xerox WorkCentre M118/M118i. Další informace o použití Internetových služeb CentreWare viz Uživatelská prírucka a System Administrator Guide [Prírucka správce systému] na disku CD-ROM Customer Documentation [Dokumentace pro - Xerox M118i | Network Connection Quick Setup Guide - Page 43
Ta instrukcja obsługi zawiera wskazówki dotyczące podłączenia urządzenia Xerox WorkCentre M118/M118i do sieci Ethernet TCP/IP. Przedstawione są tu procedury konfiguracji połączeń zostaje przypisany ręcznie. Notatka System Administrator Guide (Podrecznik administratora systemu) zawiera szczególowe - Xerox M118i | Network Connection Quick Setup Guide - Page 44
sieci, aby uzyskać pomoc. 4. Użyj aplikacji CentreWare IS, aby potwierdzić ustawienia sieci. Patrz Sprawdzanie konfiguracji sieciowej za pomocą usług internetowych CentreWare (IS) strona 45. Xerox WorkCentre M118/M118i 42 - Xerox M118i | Network Connection Quick Setup Guide - Page 45
następnie naciśnij przycisk Wprowadź. 2. Naciśnij przycisk Wprowadź, aby zaznaczyć opcję Network/Port. 3. Naciskaj przycisk Wybierz, aż na ekranie zostanie wyświetlone Ustawienia TCP/IP, a cznie, a następnie naciśnij przycisk Wprowadź. 6. Naciśnij przycisk Wyprowadź. Xerox WorkCentre M118/M118i 43 - Xerox M118i | Network Connection Quick Setup Guide - Page 46
łe człony maski. 4. Naciśnij przycisk Wprowadź, aby potwierdzić maskę. 5. Naciśnij przycisk Wyprowadź. 6. Naciśnij przycisk Logowanie/Wylogowanie, aby wrócić do menu głównego. Xerox WorkCentre M118/M118i 44 - Xerox M118i | Network Connection Quick Setup Guide - Page 47
WorkCentre M118/M118i. Dodatkowe informacje na temat korzystania z uslug CentreWare IS znajduja sie w Podreczniku uzytkownika oraz podreczniku System Administrator Guide na plycie CD Dokumentacja klienta oraz w witrynie internetowej firmy Xerox. Aby sprawdzić konfigurację sieciową za pomocą usług - Xerox M118i | Network Connection Quick Setup Guide - Page 48
oldal ■ A hálózati beállítások ellenőrzése a CentreWare internetes szolgáltatások (IS) programmal, 50. oldal Jelen útmutató a Xerox WorkCentre M118/M118i berendezés Ethernet TCP/IP hálózathoz csatlakoztatásának menetét ismerteti. A bemutatott eljárások kétféle kapcsolatbeállítási módszert használnak - Xerox M118i | Network Connection Quick Setup Guide - Page 49
ítségével ellenőrizze a hálózati beállításokat Lásd: A hálózati beállítások ellenőrzése a CentreWare internetes szolgáltatások (IS) programmal, 50. oldal. Xerox WorkCentre M118/M118i 47 - Xerox M118i | Network Connection Quick Setup Guide - Page 50
. 4. Válassza ki az IP-cím beszerzése lehetőséget, és nyomja meg a Beadás gombot. 5. Válassza ki a Kézi értéket, és nyomja meg a Beadás gombot. 6. Nyomja meg a Kilépés gombot. Xerox WorkCentre M118/M118i 48 - Xerox M118i | Network Connection Quick Setup Guide - Page 51
álózati maszk jóváhagyásához nyomja meg a Beadás gombot. 5. Nyomja meg a Kilépés gombot. 6. A főmenübe való visszatéréshez nyomja meg a be- és kijelentkezéshez használható gombot. Xerox WorkCentre M118/M118i 49 - Xerox M118i | Network Connection Quick Setup Guide - Page 52
ül kezelheti nyomtatóit. Megjegyzés A CentreWare IS programmal csak akkor állíthatja be a hálózati konfigurációt, ha a számítógép és a Xerox WorkCentre M118/M118i berendezés ugyanazon az alhálózaton található. A CentreWare IS program használatáról bovebb tájékoztatás a Fogyasztói dokumentáció CD-ROM - Xerox M118i | Network Connection Quick Setup Guide - Page 53
Utilizarea CentreWare Internet Services (IS) la pagina 55 Acest ghid de programare oferă instrucţiuni pentru conectarea Xerox WorkCentre M118/M118i la o reţea ă pentru a atribui manual o adresă IP, furnizată de administratorul de reţea. Notă System Administrator Guide (Ghidul pentru Administrarea - Xerox M118i | Network Connection Quick Setup Guide - Page 54
de reţea pentru asistenţă. 4. Se utilizează CentreWare IS pentru a verifica configurarea reţelei. Se consultă Verificarea Setării Reţelei prin Utilizarea CentreWare Internet Services (IS) la pagina 55. Xerox WorkCentre M118/M118i 52 - Xerox M118i | Network Connection Quick Setup Guide - Page 55
adresa IP, adresa gateway, masca de subreţea şi adresa Serverului DNS trebuie introduse manual. Condiţii Esenţiale pentru utilizarea unei Adrese IP Statice Înainte de a î . 5. Se selectează Manual, apoi se apasă butonul Introducere. 6. Se apasă butonul Ieşire. Xerox WorkCentre M118/M118i 53 - Xerox M118i | Network Connection Quick Setup Guide - Page 56
se utilizeaza CentreWare IS. Se consultă Verificarea Setării Reţelei prin Utilizarea CentreWare Internet Services (IS) la pagina 55. 5. Se apasă butonul Introducere pentru a accepta adresa. 6. Se apasă butonul Conectare/Deconectare pentru a reveni la meniul principal. Xerox WorkCentre M118/M118i 54 - Xerox M118i | Network Connection Quick Setup Guide - Page 57
aplicaţia software CentreWare IS, utilizatorul îşi poate accesa şi gestiona imprimantele printr-o reţea TCP/IP, cu ajutorul unui browser web. Notă Pentru a introduce setarile de configurare ale retelei via CentreWare IS, computerul trebuie sa fie pe aceeasi subretea ca si Xerox WorkCentre M118/M118i - Xerox M118i | Network Connection Quick Setup Guide - Page 58
IP Adresi Kullanarak Ağ Ayarları sayfa 58 ■ Ağ Ayarlarını CentreWare Internet Hizmetlerini (IS) Kullanarak Doğrulama sayfa 60 Bu kurulum kılavuzu, Xerox WorkCentre M118/M118i aygıtını bir Ethernet TCP/IP ağına bağlamayla ilgili yönergeler sağlar. Aşağıdaki yöntemlerden birini kullanarak ağ bağlant - Xerox M118i | Network Connection Quick Setup Guide - Page 59
ğildir. Yardım için ağ yöneticinize başvurun. 4. Ağ ayarlarını doğrulamak için CentreWare Internet Hizmetlerini kullanın. Bkz: Ağ Ayarlarını CentreWare Internet Hizmetlerini (IS) Kullanarak Doğrulama sayfa 60. Xerox WorkCentre M118/M118i 57 - Xerox M118i | Network Connection Quick Setup Guide - Page 60
Giriş düğmesine basın. 4. IP Adresi Al'ı seçin ve sonra Giriş düğmesine basın. 5. El ile'yi seçin ve sonra Giriş düğmesine basın. 6. Çıkış düğmesine basın. Xerox WorkCentre M118/M118i 58 - Xerox M118i | Network Connection Quick Setup Guide - Page 61
ıları girmek için adım 2'yi yineleyin. 4. Alt ağ maskesini kabul etmek için Giriş düğmesine basın. 5. Çıkış düğmesine basın. 6. Ana menüye dönmek için Oturum Aç/Kapat düğmesine basın. Xerox WorkCentre M118/M118i 59 - Xerox M118i | Network Connection Quick Setup Guide - Page 62
yazıcılarınıza erişebilir ve onları yönetebilirsiniz. Not CentreWare Internet Hizmetleri yoluyla ağ yapılandırması girmek için, bilgisayarınız Xerox WorkCentre M118/M118i ile aynı alt ağda olmalıdır. CentreWare Internet Hizmetlerini kullanma hakkında ek bilgi için, Müşteri Belgeleri CD-ROM'unda ya
-
 1
1 -
 2
2 -
 3
3 -
 4
4 -
 5
5 -
 6
6 -
 7
7 -
8
-
9
-
10
-
11
-
12
-
13
-
14
-
15
-
16
-
17
-
18
-
19
-
20
-
21
-
22
-
23
-
24
-
25
-
26
-
27
-
28
-
29
-
30
-
31
-
32
-
33
-
34
-
35
-
36
-
37
-
38
-
39
-
40
-
41
-
42
-
43
-
44
-
45
-
46
-
47
-
48
-
49
-
50
-
51
-
52
-
53
-
54
-
55
-
56
-
57
-
58
-
59
-
60
-
61
-
62
 |
 |