Xerox M118i Network Connection Quick Setup Guide - Page 4
Navigating Display Screens, Network Setup Using DHCP, Report/List, System Settings - workcentre
 |
UPC - 095205219265
View all Xerox M118i manuals
Add to My Manuals
Save this manual to your list of manuals |
Page 4 highlights
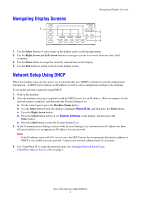
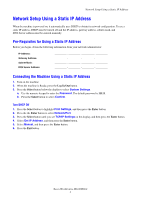
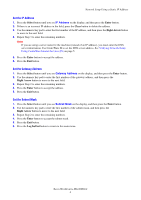
Navigating Display Screens 1 Navigating Display Screens 2 3 4 1. Use the Select buttons to select items on the display and to scroll through menus. 2. Use the Right Arrow and Left Arrow buttons to navigate screens or to move from one entry field to another. 3. Use the Enter button to accept the currently selected item on the display. 4. Use the Exit button to return to the previous display screen. Network Setup Using DHCP When the machine starts up after power on, it automatically uses DHCP to obtain its network configuration information. A DHCP server delivers an IP address as well as other configuration settings to the machine. To set up the network connection using DHCP: 1. Turn on the machine. 2. After the machine starts up, it negotiates with the DHCP server for an IP address. Wait two minutes for the network setup to complete, and then print the System Settings List: a. On the control panel, press the Machine Status button. b. Use the Select button below the display to highlight Report/List, and then press the Enter button. c. Press the Right Arrow button. d. Press the Select button until you see System Settings on the display, and then press the Enter button. e. Press the Start button to print the System Settings List. 3. In the Communications Settings section of the System Settings List, confirm that an IP address has been allocated and that it is an appropriate IP address for your network. Note If the IP address starts with 167.xxx.xxx.xxx, the DHCP server has not properly allocated an address or DHCP is not enabled on your network. Contact your network administrator for assistance. 4. Use CentreWare IS to verify the network setup. See Verifying Network Setup Using CentreWare Internet Services (IS) on page 5. Xerox WorkCentre M118/M118i 2
-
 1
1 -
 2
2 -
 3
3 -
 4
4 -
 5
5 -
 6
6 -
 7
7 -
 8
8 -
 9
9 -
 10
10 -
11
-
12
-
13
-
14
-
15
-
16
-
17
-
18
-
19
-
20
-
21
-
22
-
23
-
24
-
25
-
26
-
27
-
28
-
29
-
30
-
31
-
32
-
33
-
34
-
35
-
36
-
37
-
38
-
39
-
40
-
41
-
42
-
43
-
44
-
45
-
46
-
47
-
48
-
49
-
50
-
51
-
52
-
53
-
54
-
55
-
56
-
57
-
58
-
59
-
60
-
61
-
62
 |
 |
