Yamaha CVP-79A Owner's Manual
Yamaha CVP-79A Manual
 |
View all Yamaha CVP-79A manuals
Add to My Manuals
Save this manual to your list of manuals |
Yamaha CVP-79A manual content summary:
- Yamaha CVP-79A | Owner's Manual - Page 1
of the main keyboard unit near the power cord. Make sure that the voltage selector de tension est réglé sur 240 V au départ d'usine. Pour modifier ce réglage, utilisez un tournevis selector de tensión se ajusta a 240V cuando la unidad sale de fábrica. Para cambiar el ajuste, emplee un destornillador - Yamaha CVP-79A | Owner's Manual - Page 2
number, serial number, power requirements, etc., are located on this plate. You should record the model number, serial number, and the date of purchase in the spaces provided below and retain this manual as a permanent record of your purchase. CVP-79A CVP-69/69A CVP-59S Model Serial No Purchase - Yamaha CVP-79A | Owner's Manual - Page 3
. q 16-track built-in sequencer records and plays back your keyboard performances. q Digital reverb and effects add extra ambiance and depth to your sound. q Registration Memory memorizes 25 (15 in the case of the CVP-59S) complete control-panel setups that you can recall whenever needed. q Internal - Yamaha CVP-79A | Owner's Manual - Page 4
Taking Care of Your Clavinova 2 Preparation 3 The Music Stand 3 The Key Cover (CVP-79A/69/69A) ........ 3 The Power Switch 3 Headphones 3 The Panel Controls 4 The Volume Controls 6 Master Volume 6 ABC/Song Volume 6 Other Volume Controls 7 Expression Control (CVP-79A only - Yamaha CVP-79A | Owner's Manual - Page 5
or other parts of your Clavinova, and avoid scratching or bumping it with hard objects. Further, always turn the POWER switch off after use, and close the key cover to protect the keyboard (CVP-79A/ 69/69A), or cover the instrument with the dust cover provided (CVP-59S). 5. Clean Carefully - Yamaha CVP-79A | Owner's Manual - Page 6
on. Press the [POWER] switch again to turn the power off. When the power is initially turned on, the PIANO voice selector indicator will light, the POP style selector indicator will light, and the display will appear as shown to the left. Headphones CVP-79A PHONES CVP-69/69A/59S One or two - Yamaha CVP-79A | Owner's Manual - Page 7
E0 F0 G0 A0 B0 C1 D1 E1 F1 G1 A1 B1 C2 D2 E2 F2 G2 A2 B2 C3 D3 E3 PHONES S CVP-79A PHONES S CVP-69/69A/59S 1 POWER Switch page 3 VOLUME Section 2 MASTER VOLUME Control page 6 3 ABC/SONG VOLUME Control ......... page 6, 37, 65 4 [DEMO/HELP] Button page 11, 13 5 [REVERB] Button - Yamaha CVP-79A | Owner's Manual - Page 8
RECORD GUIDE WER SONG CONTROL REW FF PAUSE TYU PIANO E. PIANO I VOICE HARPSI. VIBES GUITAR CLAVI. TONE/ SYNTH O DUAL a EFFECT ORGAN STRINGS/ CHOIR BRASS MEMORY BANK 1 sd SAX/ FLUTE BASS DRUMS/ PERC. REGISTRATION 2 3 4 f P SPLIT 5 ABC FREEZE g h k CVP-59S A F3 - Yamaha CVP-79A | Owner's Manual - Page 9
PAGE DISPLAY HOLD EXIT -+ PLAY SONG RECORD GUIDE SONG CONTROL REW FF PAUSE PIANO E. PIANO HARPSI. VOICE VIBES GUITAR CLAVI. TONE/ overall volume of sound produced by the Clavinova. It also adjusts headphone volume when one or two pairs of headphones are plugged into the PHONES jacks. - Yamaha CVP-79A | Owner's Manual - Page 10
see page 41 for details. When the Clavinova's Disk Orchestra Collection playback function is in use the [MIXER] button accesses individual volume parameters for each Disk Orchestra Collection part. FUNCTION MIXER Expression Control (CVP-79A only) An optional Yamaha FC7 Foot Controller can be plugged - Yamaha CVP-79A | Owner's Manual - Page 11
Related Controls In addition to a range of direct-operation buttons, the CVP-79A/69/ 69A/59S features a large LCD (Liquid Crystal Display) panel and several related or held to scroll continuously through the parameter's values. The panel [+]/[-] buttons allow singlestep operation only. -+ 8 - Yamaha CVP-79A | Owner's Manual - Page 12
General Operation: The Display & Related Controls In many cases where v and w or < and > LCD buttons appear, both buttons can be pressed simultaneously to recall the default setting for that parameter. The panel [+] and [-] buttons can be used in the same way. This applies to most parameters that - Yamaha CVP-79A | Owner's Manual - Page 13
top page icon. PAGE DISPLAY HOLD The [MIXER] Button This button calls the CVP-79A/69/69A/59S mixer display which includes individual volume parameters for the auto-accompaniment RHYTHM, BASS, CHORD, PAD, and PHRASE parts. These parameters can be used to the achieve the best overall balance for - Yamaha CVP-79A | Owner's Manual - Page 14
power is turned off. CONTRAST Press the [CONTRAST] button again or [EXIT] button to exit from the LCD CONTRAST display. The Help Function If you're ever in doubt about a function, the CVP-79A/69/69A/59S setting is retained in memory even when the Clavinova power is turned off. Use the SELECT v w - Yamaha CVP-79A | Owner's Manual - Page 15
turned off. Parameters that are backed up will be retained in memory for about a week if the Clavinova is not turned on during this time. All parameters will be reset to their default values if the power remains off for longer than about a week. To ensure that your backed-up settings are maintained - Yamaha CVP-79A | Owner's Manual - Page 16
Clavinova SONG RECORD GUIDE SONG CONTROL REW FF PAUSE PIANO E. PIANO HARPSI. VOICE VIBES GUITAR CLAVI. TONE/ SYNTH DUAL EFFECT ORGAN STRINGS/ CHOIR BRASS SAX/ FLUTE BASS DRUMS/ PERC. SPLIT REGISTRATION MEMORY BANK 1 2 3 4 5 ABC FREEZE ZTurn Power - Yamaha CVP-79A | Owner's Manual - Page 17
Clavi. Tone/Synth Organ Strings/Choir Brass Sax/Flute Style Demo Pop Latin Latin Pop Traditional Waltz Title Piano Concerto No.1 op.23 1st movement A Whole New World from the motion picture "Aladdin" Polonaise No.6 listed above. All other songs are original (©1995 by Yamaha Corporation). 14 - Yamaha CVP-79A | Owner's Manual - Page 18
. ZSelect a Voice ...The CVP-79A/69/69A/59S voices are organized in 12 voice groups (see page 116 for a complete voice list). Use the voice group buttons to select the group from which you want to select a voice. The corresponding voice display will appear. PIANO E. PIANO HARPSI. VOICE VIBES - Yamaha CVP-79A | Owner's Manual - Page 19
121 for a complete list of the instruments in each Drum Kit. PIANO E. PIANO HARPSI. VOICE VIBES GUITAR CLAVI. TONE/ SYNTH DUAL EFFECT • shows all stereo, 2-element, and 1-element voices in the CVP-79A/69/69A/59S. The Clavinova also offers keyboard touch response, so the volume and timbre of - Yamaha CVP-79A | Owner's Manual - Page 20
ON START/STOP TAP SYNCHRO START/STOP CONTRAST BEAT FUNCTION MIXER PAGE DISPLAY HOLD EXIT -+ PLAY SONG RECORD GUIDE SONG CONTROL REW FF PAUSE PIANO E. PIANO HARPSI. VOICE VIBES GUITAR CLAVI. TONE/ SYNTH DUAL EFFECT ORGAN STRINGS/ CHOIR BRASS SAX/ FLUTE BASS DRUMS/ PERC - Yamaha CVP-79A | Owner's Manual - Page 21
can also be used once the DETUNE DEPTH parameter is selected. The higher the value the greater the amount of detuning. The "normal" setting of "5" can is turned off and on while the power remains on. The DUAL mode settings can also be backed up even after the power is turned off via the "Backup" - Yamaha CVP-79A | Owner's Manual - Page 22
with the left and piano with the right, for example. You can assign any of the Clavinova's voices to the PLAY SONG RECORD GUIDE SONG CONTROL REW FF PAUSE PIANO E. PIANO HARPSI. VOICE VIBES point is initially set at the F#2 key when the power is turned on, and the Acoustic Bass 1 voice is - Yamaha CVP-79A | Owner's Manual - Page 23
Split Mode The VOICE selector indicator of the group containing the left-hand voice lights while the SPLIT mode pop-up display is showing, and the left-hand voice group can be selected via the VOICE selectors. The names of both the left- and right-hand voices appear separated by a "/" symbol in - Yamaha CVP-79A | Owner's Manual - Page 24
the SPLIT POINT section of the display has been highlighted. The keyboard guide lamp corresponding to the selected split point will light. • The dual is turned off and on while the power remains on. The SPLIT mode settings can also be backed up even after the power is turned off via the "Backup" - Yamaha CVP-79A | Owner's Manual - Page 25
Reverb The CVP-79A/69/69A/59S provides a number of digital reverb types that you can use for extra "ambiance" and expressive power. REVERB VOLUME PAGE DISPLAY HOLD EXIT -+ PLAY SONG RECORD GUIDE SONG CONTROL REW FF PAUSE PIANO E. PIANO HARPSI. VOICE VIBES GUITAR CLAVI. TONE/ - Yamaha CVP-79A | Owner's Manual - Page 26
Digital Reverb Total Depth Control The overall depth of the selected reverb type in page 2 of the reverb display. These values are relative to the total depth value. Use the PAGE buttons to select page 2, press the LCD button corresponding to the part for which you want to adjust the reverb depth - Yamaha CVP-79A | Owner's Manual - Page 27
required. A range of 20 (17 in the case of the CVP-69/69A/59S) effects provides extensive musical versatility. VOLUME MASTER VOLUME ABC/SONG VOLUME PAGE DISPLAY HOLD EXIT -+ PLAY SONG RECORD GUIDE SONG CONTROL REW FF PAUSE PIANO E. PIANO HARPSI. VOICE VIBES GUITAR CLAVI. TONE/ - Yamaha CVP-79A | Owner's Manual - Page 28
effect. Wah effect that varies filter sweep according to touch. COMPRESSOR (CVP-79A only) BOOST HL Affects the dynamics of the sound by depth can be adjusted in five step intervals. • The DEPTH1(R) and/or DEPTH2(L) value for some effect types may be fixed to 100 and/or 0 respectively and cannot be - Yamaha CVP-79A | Owner's Manual - Page 29
functions in the same way as a damper pedal on an acoustic piano. When the damper pedal is pressed notes played have a long sustain. Releasing the pedal immediately stops (damps) any sustained notes. CVP-79A CVP-69/69A CVP-59S • The CVP-79A damper pedal can be set for continuous (default) or on - Yamaha CVP-79A | Owner's Manual - Page 30
which can be selected via the LEFT PEDAL function described on page 93. CVP-79A CVP-69/69A CVP-59S • The damper and sostenuto pedal functions do not affect DRUMS/PERC. voices where inappropriate. Left Pedal CVP-79A Left Pedal Left Pedal Soft Pressing the soft pedal subtly reduces the - Yamaha CVP-79A | Owner's Manual - Page 31
GUIDE SONG CONTROL REW FF PAUSE PIANO E. PIANO HARPSI. VOICE VIBES GUITAR CLAVI. TONE/ SYNTH DUAL EFFECT ORGAN STRINGS/ CHOIR BRASS SAX/ FLUTE BASS DRUMS/ PERC. SPLIT REGISTRATION MEMORY BANK 1 2 3 4 5 ABC FREEZE Style Selection The CVP-79A/69/69A/59S - Yamaha CVP-79A | Owner's Manual - Page 32
selected style can be recalled at any time by pressing both the TEMPO [+] and [-] buttons simultaneously. Tempo You can change the tempo to any value between 32 and 280 beats per minute, however, by using the TEMPO [+] and [-] buttons. This can be done either before the accompaniment is started - Yamaha CVP-79A | Owner's Manual - Page 33
Accompaniment Starting the Accompaniment There are several ways to start the accompaniment: s Straight Start ...Press the [START/STOP] button. Each of the styles also has two main variations that can be selected by pressing the [MAIN A] button or [MAIN B] button before pressing the [START/STOP] - Yamaha CVP-79A | Owner's Manual - Page 34
Accompaniment s Synchronized Start Any of the start types described above can be synchronized to the first note or chord played on the keyboard by first pressing the [SYNCHRO] button so that its indicator lights. When the keyboard is split or Auto Bass Chord Single Finger or Fingered mode is - Yamaha CVP-79A | Owner's Manual - Page 35
Accompaniment Fill-ins The CVP-79A/69/69A/59S provides four types of automatic "fill-ins." q Fill To be canceled before the beginning of the next measure by pressing the pedal a second time. CVP-79A Stopping the Accompaniment The accompaniment can be stopped at any time by pressing the [START - Yamaha CVP-79A | Owner's Manual - Page 36
STOP). The left pedal can also be assigned for INTRO A/FILL TO A, INTRO B/FILL TO B, and ENDING operation - pages 30 and 32. The CVP-79A/69/69A/59S also offers a metronome function that is ideal for practice. To start the metronome, simply press the [METRONOME] button so that its indicator lights - Yamaha CVP-79A | Owner's Manual - Page 37
Chord (ABC The CVP-79A/69/69A/59S includes a sophisticated EXIT -+ PLAY SONG RECORD GUIDE SONG CONTROL REW FF PAUSE PIANO E. PIANO HARPSI. VOICE VIBES GUITAR CLAVI the "Full Keyboard" mode is selected the Clavinova will automatically create appropriate accompaniment while you play - Yamaha CVP-79A | Owner's Manual - Page 38
FINGER, FINGERED CHORD, or FULL KEYBOARD ABC mode. The default mode is SINGLE FINGER, but the mode you select is backed up even after the [POWER] switch is turned off. Backup can be turned off via the Backup function - page 107. BStart & Play ...Start playback by pressing the [START/STOP] button - Yamaha CVP-79A | Owner's Manual - Page 39
lower keyboard (up to the split point - normally the F#2 key), the Clavinova will automatically begin to play the chord along with the rhythm and an "*" will appear if the chord is not recognizable by the CVP-79A/69/69A/ 59S. • The automatic accompaniment will sometimes not change when related - Yamaha CVP-79A | Owner's Manual - Page 40
Auto Bass Chord (ABC) q Full-keyboard ABC When this advanced auto-accompaniment mode is engaged the Clavinova will automatically create appropriate accompaniment while you play just about anything, anywhere on the keyboard: chords, a bass line, arpeggiated chords, a melody line. The name of - Yamaha CVP-79A | Owner's Manual - Page 41
Part Volume Control The CVP-79A/69/69A/59S has five accompaniment parts - RHYTHM, BASS, CHORD, PAD, and PHRASE. - that function as follows: RHYTHM BASS CHORD PAD PHRASE This is the main rhythm part. The RHYTHM part (manually played values (100 for KBD part, and 90 for all other parts). Part - Yamaha CVP-79A | Owner's Manual - Page 42
button. When this button is pressed so that its indicator lights some of the accompaniment parts are turned off to create a simpler, "smaller" accompaniment sound. • ABC will not • The split point is indicated by the keyboard guide lamp above the split point key. ENDING SMALL ABC ABC ON -+ 39 - Yamaha CVP-79A | Owner's Manual - Page 43
an electronic "chord book" that will show you appropriate fingerings for chords you enter via the display. The fingerings are indicated via the keyboard guide lamps, and correspond to those recognized in the ABC Fingered mode. You can also play chords on the keyboard in the same way as in - Yamaha CVP-79A | Owner's Manual - Page 44
dim7, (b5), 7(b5), mM7. All fingered-mode chords (page 36) can be entered via the keyboard. • The split point is not shown on the guide lamps when the Chord Assist function is engaged. • If the split point is set below F#2 it will automatically be set at F#2. Harmony This feature automatically - Yamaha CVP-79A | Owner's Manual - Page 45
the harmony will be different from the currently selected voice. Harmony Type List • Duet • Tremolo Oct • Trio • Strumming • 4 Part • Trio Delay • 4 Part Jazz • Vibes & J.Gtr • Country • Add Trp & Sax • Octave • Backing Vocal • Tremolo • Add Strings • Tremolo Duet • Forest -+ CSet - Yamaha CVP-79A | Owner's Manual - Page 46
as required. • The Left Pedal HARMONY ON/OFF function is not effective when the HARMONY feature is off (i.e. the [HARMONY] button's indicator is not lit). CVP-79A 43 - Yamaha CVP-79A | Owner's Manual - Page 47
SETTING] button to create different musical textures. The CVP-69/69A styles have 3, and the CVP-59S styles have 1. The ONE TOUCH SETTING setups even when the power is turned off. This way the desired setup can be recalled immediately when the [ONE TOUCH SETTING] button is pressed. (CVP-79A/69/69A - Yamaha CVP-79A | Owner's Manual - Page 48
The CVP-79A/69/69A/59S Custom in memory when the power is turned off, so be sure to save your custom styles to disk before turning the power off. • One pre DISPLAY HOLD EXIT -+ PLAY SONG RECORD GUIDE SONG CONTROL REW FF PAUSE PIANO E. PIANO HARPSI. VOICE VIBES GUITAR CLAVI. TONE - Yamaha CVP-79A | Owner's Manual - Page 49
PAGE [>] button to go to CUSTOM STYLE page 2. Current recording section and part Use the BEAT LCD button to select a different time signature, or the to change the beat value, the "Clear STYLE ?" prompt will appear, since you will have to completely clear all sections and parts of the style and - Yamaha CVP-79A | Owner's Manual - Page 50
as you choose to change the number of measures in the section, the "Clear SECTION ?" prompt will appear, since you will have to clear all parts of the currently selected section and start recording from scratch if you change the number of measures. Press OK to clear the section, or CANCEL - Yamaha CVP-79A | Owner's Manual - Page 51
as required while in the Custom Style mode - data cannot be recorded while playback is stopped. • The timing guide will stop as soon as the Custom Style is stored. • The sound of all parts is automatically stopped at the end of the style - i.e. at the point between repeats when recording. It is - Yamaha CVP-79A | Owner's Manual - Page 52
will not be able to UNDO once another button has been pressed. Name the Custom Style When your - Yamaha CVP-79A | Owner's Manual - Page 53
is not retained in memory when the power is turned off, so be sure to save your custom style before turning the power off - see "Save to disk" to recall the last-stored version of the currently selected section (all parts of the section are recalled). Simply press the RECALL SECTION LCD button - Yamaha CVP-79A | Owner's Manual - Page 54
1 • CHORUS 2 • CHORUS 3 • CELESTE 1 • CELESTE 2 • CELESTE 3 • FLANGER 1 • FLANGER 2 • SYMPHONIC (CVP-79A only) • PHASER (CVP-79A only) • OFF • Normally the preset VALUE and EFFECT TYPE are initially selected. If PART is set to "ALL", the R1 part preset values are displayed. If SECT. is set to "ALL - Yamaha CVP-79A | Owner's Manual - Page 55
styles or individual custom styles can be saved to disk via CUSTOM STYLE page 5. After making sure that a properly formatted disk is inserted in the Clavinova disk drive (page 98), use the MEMORY No. v and w buttons to select the memory number of the custom style you want to save to disk - Yamaha CVP-79A | Owner's Manual - Page 56
the style you are currently recording. Press CANCEL to return to CUSTOM STYLE page 1, at which point you can simplify the current style (by clearing a part, etc.), or DELETE to go to the "Delete STYLE ?" display: Use the MEMORY No. v and w buttons to select the number of the style you want - Yamaha CVP-79A | Owner's Manual - Page 57
Custom Style s Exit Before Store ...If you press [EXIT] button to exit from the Custom Style function before storing the style the following display will appear. Select a memory number and press YES to store the style and then exit, press NO to exit without storing the style, or press CANCEL to - Yamaha CVP-79A | Owner's Manual - Page 58
Yamaha "Style File" disks, or disks containing custom style files you've created yourself, can be loaded into the CVP-79A/69/69A/59S and played as required. • Loaded disk styles will be retained in memory only until the power GUIDE SONG CONTROL REW FF PAUSE PIANO E. PIANO the Clavinova reads - Yamaha CVP-79A | Owner's Manual - Page 59
Style File Load A set of 8 files saved by using the Custom Style save "ALL" function (page 45) can be loaded by pressing the ALL LOAD LCD button rather than the LOAD SINGLE button. The rest of the ALL LOAD procedure is essentially the same as the LOAD SINGLE procedure, as follows. XSelect a - Yamaha CVP-79A | Owner's Manual - Page 60
Style File Load • The amount of memory being used for the selected style is also shown on the display (in approximate kilobytes) so as to set up the approximate standard which style to delete in relation to the total 160 KB memory space. VEject the Disk When Done When you've finished with the - Yamaha CVP-79A | Owner's Manual - Page 61
you can recall whenever needed. 25 in the CVP-79A and CVP-69/69A (5 banks x 5 memories), and 15 in the CVP-59S (3 banks x 5 memories). VOLUME MASTER VOLUME DISPLAY HOLD EXIT -+ PLAY SONG RECORD GUIDE SONG CONTROL REW FF PAUSE PIANO E. PIANO HARPSI. VOICE VIBES GUITAR CLAVI. TONE/ - Yamaha CVP-79A | Owner's Manual - Page 62
through E in the CVP-79A/69/69A, and A through C in the CVP-59S). REGISTRATION MEMORY BANK 1 2 3 4 5 ABC FREEZE CVP-79A/69/69A CRegister registration data will be initialized to the factory-preset settings when the power is turned off. • Factory-preset data is provided for all - Yamaha CVP-79A | Owner's Manual - Page 63
Registration Memory Recall the Registered Panel Settings Simply select the appropriate bank as described above, then press the desired [REGISTRATION] button at any time to recall the memorized settings. The corresponding Registration Memory number will appear next to the "R" symbol in the - Yamaha CVP-79A | Owner's Manual - Page 64
disks the Clavinova will let you enjoy listening to automated performances, or function as your "private music tutor," allowing you to practice various parts of a piece while the others are played automatically. The CVP-79A/69/69A/59S also shows you which keys to play with keyboard guide lamps that - Yamaha CVP-79A | Owner's Manual - Page 65
PLAY page 1 display. • When playing back a song recorded on the Clavinova, only the keyboard voice can be changed. The keyboard voice name is shown guide lamps corresponding to the keys being played by the RIGHT and LEFT part (or PART 1 and PART 2) will light in real time. The keyboard guide - Yamaha CVP-79A | Owner's Manual - Page 66
the disk drive EJECT button to remove it. • NEVER eject a disk or turn the power off while: 1. The disk drive lamp is on. 2. A song is playing. Playing Back Specific Parts The RIGHT, LEFT, and ORCH LCD buttons (PART 1, PART 2, and OTHERS when an original song disk is being played) can be used to - Yamaha CVP-79A | Owner's Manual - Page 67
Disk Orchestra Collection & Song Playback ZSelect the TRACK PLAY Page Use the PAGE buttons to select page 5 - the SONG PLAY [TRACK PLAY] display. The numbers of tracks which contain data are shown above the TRACK LCD buttons. Tracks which are enabled for playback are indicated by a box - Yamaha CVP-79A | Owner's Manual - Page 68
and w buttons can be used to select a track, or the data dial or [+]/[-] buttons can be used once the parameter is selected. • The [PART ASSIGN] display will not appear when Disk Orchestra Collection or Disklavier data (see "Playing Other Types of Music Data", page 71) is being played. The - Yamaha CVP-79A | Owner's Manual - Page 69
been selected to select the voice used for the left- and right-hand parts. • When playing back Disklavier PianoSoft disks (see "Playing Other Types of buttons will appear. • The voice change for the left- and right-hand parts by this operation does not affect the keyboard voice. But if you press - Yamaha CVP-79A | Owner's Manual - Page 70
without ABC, the MIXER display will function as the ABC part volume control rather than the song part volume control. Guided Right- and Left-hand Practice With this feature, the Clavinova indicates the notes to play via the keyboard guide lamps and waits for you to play the appropriate keys before - Yamaha CVP-79A | Owner's Manual - Page 71
PLAY page 1) to begin playback, the introduction will play automatically but then the Clavinova will stop and wait for you to play the correct note(s). The CVP-79A/69/ 69A/59S indicates the key(s) to be played via the guide lamps above the keyboard. As you play the appropriate notes, the piece will - Yamaha CVP-79A | Owner's Manual - Page 72
Disk Orchestra Collection & Song Playback Repeat Functions The CVP-79A/69/69A/59S has a range of repeat functions that can be useful aids for learning to play difficult passages. The repeat modes are all accessible via the SONG - Yamaha CVP-79A | Owner's Manual - Page 73
Disk Orchestra Collection & Song Playback s A-B Repeat ...This function allows you to specify any section of a song for continuous repeat playback. When the A-B REPEAT mode is selected, A-> and B point entry buttons will appear on the display. While the song is playing, press the A-> button once - Yamaha CVP-79A | Owner's Manual - Page 74
playing with the guide function. • Using Yamaha ESEQ data recorded on other Clavinovas (CVP- 55/65/75/83S/85A/ 87A/89) will normally be played back with the correct voices. It may be necessary, however, to change the voice numbers of the data to conform to the CVP 79A/69/69A/59S PART ASSIGN] display - Yamaha CVP-79A | Owner's Manual - Page 75
The CVP-79A/69/69A/59S features a built-in "sequencer" which can be used to independently record up to 16 separate parts of a single musical composition. Each part is recorded on a separate song "track". The music data that you record is stored on a 3.5" floppy disk loaded into the Clavinova's disk - Yamaha CVP-79A | Owner's Manual - Page 76
be set to OFF. In this state the Clavinova is ready to record the keyboard track only. Dual or Split mode. (In this case the KBD part uses two tracks.) • When the ABC&RHY track is "PLAY", the metronome will sound to provide a timing guide in the synchronized start mode before recording is started • - Yamaha CVP-79A | Owner's Manual - Page 77
or the [EXIT] button, to exit from the QUICK RECORD mode. • The Clavinova may continue to write data to the disk for a short time after you stop The guide lamps do not light during recording. • [ABC ON] and/or [HARMONY] button indicator(s) automatically go out when the recording of these parts has - Yamaha CVP-79A | Owner's Manual - Page 78
Song Recording Multi-track Recording & Playback ZInsert a Formatted Disk, Engage the Record Mode & Select a Song ...The first three steps in the multi-track recording process are exactly the same as those for quick recording: insert a formatted disk, press the [RECORD] button to engage the record - Yamaha CVP-79A | Owner's Manual - Page 79
or two tracks can be record-enabled at a time to record the keyboard part. If ABC accompaniment is turned on tracks 9 through 16 are automatically record to record-enabled, the metronome will sound to provide a timing guide in the synchronized start mode before recording is started. VSet All - Yamaha CVP-79A | Owner's Manual - Page 80
Soft pedal • Volume (initially maximum) • Sostenuto pedal • Expression (CVP-79A only) • Reverb depth • Pan • Effect depth Other Accompaniment data which is recorded but not listed above includes: * Individual part volume * Modulation * Pitch bend * Pitch bend sensitivity Parameters Recorded - Yamaha CVP-79A | Owner's Manual - Page 81
Song Recording Punch-in/out Recording "Punch-in/out recording" allows you to start recording from any "punch-in" point within a previouslyrecorded track and stop recording at any "punch -out" point, leaving all recorded material up to the punchin point and following the punch-out point intact. - Yamaha CVP-79A | Owner's Manual - Page 82
Song Recording VSelect a Punch-in Mode Use the MODE LCD button to select the 1ST KEY or PEDAL punchin mode. 1ST KEY PEDAL Recording will begin with the first key played after the PUNCH IN LCD button is pressed. Recording will begin when the left pedal is pressed after the PUNCH IN LCD button - Yamaha CVP-79A | Owner's Manual - Page 83
root and type appear in the corresponding parameter locations. To enter a style change (style, section, and tempo) simply make the • If you enter the ABC part volume data via the MIXER display and the SET LCD button, the volume event symbol will appear in the box on the right side of - Yamaha CVP-79A | Owner's Manual - Page 84
is listed below. Data Recorded By the Chord Sequence Function • Style • Accompaniment Section (MAIN A & B/Intro/Ending/Fill-in/Break) • Chord • ABC part volume (MIXER settings) • Tempo • Rhythm on/off • ABC/SONG volume (as an initial setting only) VStop Recording When all the required chords and - Yamaha CVP-79A | Owner's Manual - Page 85
Song Recording q Delete Press the DELETE LCD button to delete the data at the current cursor location. The "Are you sure?" confirmation prompt will appear. Press YES to delete or CANCEL to abort. q End Mark Press the END MARK LCD button to enter an "end mark" at the current cursor location. An - Yamaha CVP-79A | Owner's Manual - Page 86
Song Recording Other Song Recording Functions • Track Mix, Track Delete, Track Quantize, Initial Edit, and Rename functions, described below, cannot be used when no disk is in the disk drive. Track Mix The TRACK MIX function combines the data from two specified tracks and places the result in a - Yamaha CVP-79A | Owner's Manual - Page 87
and stopping playback by using the [START/ STOP] button before the UNDO operation. Track Quantize You can "tighten up" the timing of a recorded part by aligning all notes to specified beats via the TRACK QUANTIZE function accessed via the RECORD [TRACK QUANTIZE] display (RECORD display page - Yamaha CVP-79A | Owner's Manual - Page 88
results are as you expected or not, by starting and stopping playback by using the [START/ STOP] button before the UNDO operation. Initial Edit The values of the initial data can be changed for each track or the entire song by using the INITIAL EDIT parameters accessible via the RECORD [INITIAL - Yamaha CVP-79A | Owner's Manual - Page 89
page as required. • Only the data-containing tracks will appear and can be selected. • The VOLUME parameter's initial default value is "100" for every track. This value can only be decreased. q Page 3: INITIAL EDIT [TRACK] Page 3 contains EFFECT TYPE and DEPTH parameters and a REVERB DEPTH - Yamaha CVP-79A | Owner's Manual - Page 90
This function lets you enter an original name for, or change the existing name of, any song file on the disk recorded by the CVP-79A/69/69A/59S. The rename function is accessed via the RECORD [RENAME] display (RECORD display page 7). ZSelect a Song & Engage the Rename Mode Use the SONG v and - Yamaha CVP-79A | Owner's Manual - Page 91
Song Recording XEnter a Name ...The current song file name appears in the upper right corner of the display. Use the > LCD button to position the underline cursor at the character you want to change (song names can be up to 12 characters in length). Use the data dial or [+]/[-] buttons to select - Yamaha CVP-79A | Owner's Manual - Page 92
Song Recording Recording Without a Disk The Clavinova has enough internal RAM memory (about 25KB) to allow page 61. You can individually select tracks to play back (page 63), use the guide modes and keyboard guide lamps with the data recorded on any two tracks (page 67), and use the A-B repeat - Yamaha CVP-79A | Owner's Manual - Page 93
functions" described in this chapter include keyboard, disk, MIDI, and general functions that significantly enhance the versatility and flexibility of the CVP-79A/69/69A/59S. All of the utility functions are selected and set in the same way for consistent, easy operation: ZPress the [FUNCTION - Yamaha CVP-79A | Owner's Manual - Page 94
the Drum Kit voices. • Notes below and above the original 88-key range of the Clavinova sound one octave higher and lower, respectively. • The Octave Shift setting is retained in memory even when the power is turned off if the BACKUP page VOICE SETTING parameter is turned on (page 107). • Notes - Yamaha CVP-79A | Owner's Manual - Page 95
. This function is useful for tuning the Clavinova to match other instruments or recorded music. TUNE parameter has been selected. The default value of 440.0Hz can be instantly recalled by is always set at 440.0Hz when the power is turned on. • The Tune function does CVP-79A 92 CVP-69/69A/59S - Yamaha CVP-79A | Owner's Manual - Page 96
+ Intro A/Fill to A Intro B/Fill to B Ending/rit. Break Sostenuto (CVP-59S only) Pressing the soft pedal subtly reduces the volume and slightly changes the timbre of notes played. The SOFT function is automatically selected when the POWER switch is initially turned on. The left pedal performs the - Yamaha CVP-79A | Owner's Manual - Page 97
when the power is turned off if the BACKUP page PEDAL parameter is turned on (page 107). MIDI 1 MIDI, the Musical Instrument Digital Interface, MIDI parameters included in the CVP-79A/69/69A/59S's three MIDI function pages provide extensive flexibility in adapting the Clavinova to just about any - Yamaha CVP-79A | Owner's Manual - Page 98
's internal voices, an external tone generator can be played from the Clavinova keyboard. Press the LOCAL LCD button to alternately turn local control ON and OFF. • The Local setting is retained in memory even when the power is turned off if the BACKUP page MIDI parameter is turned ON (page - Yamaha CVP-79A | Owner's Manual - Page 99
and OFF. • The Program setting is retained in memory even when the power is turned off if the BACKUP page MIDI parameter is turned ON (page cancel control change data reception and transmission if you do not want the Clavinova to be affected by control change data received from an external device or - Yamaha CVP-79A | Owner's Manual - Page 100
MIDI note pitch transmitted by the Clavinova will be affected by the setting The Send settings are retained in memory even when the power is turned off if the BACKUP page MIDI parameter is (9...16) and harmony (6...8) data to avoid data conflict problems. • If either of these parameters is on, the - Yamaha CVP-79A | Owner's Manual - Page 101
Format function which allows new disks or disks formatted on other equipment to be "formatted" for use with the Clavinova. The Clavinova uses only 3.5" 2DD or 2HD floppy disks. We recommend that you use Yamaha disks. Before you can use a new disk for recording, the disk must be formatted so that the - Yamaha CVP-79A | Owner's Manual - Page 102
The Utility Functions Registration The REGISTRATION function page provides access to the Clavinova's Registration and All Setup file disk operations - save, load, delete, and rename. Before selecting the Registration function, make sure that the disk you want to - Yamaha CVP-79A | Owner's Manual - Page 103
The Utility Functions An "empty" name appears in the upper right corner of the display. Use the > LCD button to position the underline cursor where you want to enter a character (file names can be up to 12 characters in length). Use the data dial and/or the [+]/[-] buttons to select the character - Yamaha CVP-79A | Owner's Manual - Page 104
or NO to cancel. Transform The TRANSFORM function page allows CVP-79A/69/69A/59S performance (i.e. song) data files to be converted to CVP Performance format so that the data can be played on other Clavinova models, or to Yamaha Piano Format 1 or Piano Format 2 so that the data can be played on - Yamaha CVP-79A | Owner's Manual - Page 105
alert display will appear. • If the Clavinova's internal memory contains song data, the "CVP-DISK" copy mode will be automatically selected copy operation again. • Only song data recorded on the CVP79A/69/69A/59S and Disk Orchestra Collection orchestra and rhythm data can be copied using this - Yamaha CVP-79A | Owner's Manual - Page 106
CANCEL to abort. If you press OK, the Clavinova will prompt you to insert the source and destination [RHYTHM] parts only) All Disk Orchestra data except the right-hand and left-hand parts can be described above. The "CVP - DISK" copy mode will automatically be selected and the "CVP" will be selected - Yamaha CVP-79A | Owner's Manual - Page 107
CVP" will appear and can be selected only when the internal memory contains data.) • The song delete function cannot be used when the song record mode is engaged - the "Button not valid!" alert display will appear. • Only song data recorded on the CVP79A/69/69A/59S on the Clavinova keyboard in - Yamaha CVP-79A | Owner's Manual - Page 108
pressing the key on the keyboard. The selected key will appear on the display. • The Micro-Tuning settings are retained in memory even when the power is turned off if the BACKUP page TUNE/ MICRO TUNING parameter is turned ON (page 107), otherwise all keys are set to "0". CTune ...Use the - Yamaha CVP-79A | Owner's Manual - Page 109
The Utility Functions s SAVE ...If you select SAVE the name entry display will appear and you will have to enter a name for the file to be saved. An "empty" name appears in the upper right corner of the display. Use the > LCD button to position the underline cursor where you want to enter a - Yamaha CVP-79A | Owner's Manual - Page 110
The Utility Functions s LOAD ...If you select LOAD, first use the FILE v and w LCD buttons to select the file you want to load, then press the START LCD button. When the "Are you sure?" prompt appears, press YES to load the file or NO to cancel. s DELETE ...If you select DELETE, first use the FILE - Yamaha CVP-79A | Owner's Manual - Page 111
group. Parameters that are backed up will be retained in memory for about a week if the Clavinova is not turned on during this time. All parameters will be reset to their default values if the power remains off for longer than about a week. To ensure that your backed-up settings are maintained - Yamaha CVP-79A | Owner's Manual - Page 112
The Utility Functions Popup Time Sets the amount of time the pop-up displays remain on the display screen before disappearing. The popup time of the voice/style displays can be set independently from all other pop-up displays. Use the VOICE/STYLE or OTHERS [v] and [w] LCD buttons to set the pop-up - Yamaha CVP-79A | Owner's Manual - Page 113
message appears when a new disk or a non Clavinova Formatted disk has been put into the disk drive CVP-79A/69/69A/59S. A button that does not have a function in the current mode has been pressed. (ex. the [GUIDE may be at fault. Refer the problem to your Yamaha dealer. The disk operation (formatting, - Yamaha CVP-79A | Owner's Manual - Page 114
can be used when converting data to the CVP Performance format or Piano format. If a 2HD disk is used this alert will appear. After optional Style File disk, if you are recording new parts in the CUSTOM STYLE mode prior to clearing data from parts other than R1 and R2, this confirmation prompt will - Yamaha CVP-79A | Owner's Manual - Page 115
to the factory-preset values. This message also appears when you intentionally recall all the factory data by turning the power on while holding the C7 key (see note on page 108). A problem has been detected in the hardware system during power up. Refer the problem to your Yamaha dealer. 112 - Yamaha CVP-79A | Owner's Manual - Page 116
, but is not affected by the Clavinova's volume control or reverb effect. • The AUX OUT jack signal must never be returned to the AUX IN jacks, either directly or through external equipment. s MIDI IN, THRU and OUT Connectors (MIDI IN and OUT on the CVP-59S CVP-79A/69/69A MIDI IN OUT THRU - Yamaha CVP-79A | Owner's Manual - Page 117
. Options q BC-8 Bench A stable, comfortable bench styled to match your Yamaha Clavinova. q HPE-160 Stereo Headphones High-performance lightweight dynamic headphones with extra-soft ear pads. q KC-883 Key Cover for the CVP-59S A convenient way to keep your keyboard clean and dust-free. • Some - Yamaha CVP-79A | Owner's Manual - Page 118
CVP-59S assembly 150 CVP-69/69A assembly 142 CVP-79A assembly 136 D Damper mode (CVP Guide modes 67 H Harmony 41 Headphones Part depth, reverb 23 Part selection 63 Pause 70 Pedal utilities 92 Phrase repeat 69 Playback start/stop 62 Polyphony 16 Popup time 109 Power 97 Troubleshooting 114 - Yamaha CVP-79A | Owner's Manual - Page 119
. Sitar Banjo Shamisen Koto Kalimba CVP-59S Element Pan CVP-79A CVP-69/69A CVP-59S Grand Piano1 c 2 (S) 2 2 Grand Piano2 k 1 1 1 BrightPiano c 2 (S) 2 2 Rock Piano c 1 1 1 Mellow Piano c 2 (S) 1 1 - k 2 - - Piano EP 1 k 2 2 2 Piano EP 2 c 2 2 2 Honky Tonk - Yamaha CVP-79A | Owner's Manual - Page 120
de voces Group Clavi. tone/ synth Organ Strings / Choir Bank Program MSB LSB Number CVP-79A CVP-69/69A CVP-59S Element Pan CVP-79A CVP-69/69A CVP-59S 0 112 89 Clavinova T. Clavinova T. Clavinova T. k 2 1 1 0 0 89 New Age Pad1 New Age Pad1 New Age Pad1 c 2 2 2 0 115 89 New Age - Yamaha CVP-79A | Owner's Manual - Page 121
Lead CalliopeLead Chiff Lead Charang Lead Voice Lead Fifths Lead Bass & Lead Synth Wood CVP-59S Element Pan CVP-79A CVP-69/69A CVP-59S - c 2 - - Brass Sect.1 k 1 1 1 Brass Sect.2 c 1 1 1 Pop Brass k 1 1 1 Synth Brass1 c 2 2 2 Synth Brass2 c 2 2 2 - k 1 - - Trumpet - Yamaha CVP-79A | Owner's Manual - Page 122
Voice List / Stimmenverzeichnis / Liste des voix / Lista de voces Group Bank Program MSB LSB Number CVP-79A CVP-69/69A CVP-59S Element Pan CVP-79A CVP-69/69A CVP-59S Bass 0 112 33 Acous.Bass 1 Acous.Bass 1 Acous.Bass 1 k 1 1 1 00 33 Acous.Bass 2 Acous.Bass 2 Acous.Bass 2 c 1 1 1 - Yamaha CVP-79A | Owner's Manual - Page 123
List / Rhythmusverzeichnis / Liste des styles / Lista de estilos Group POP 16BEAT DANCE POP ROCK Style Name Pop Ballad 1 Pop Ballad 2 Light Pop Piano Ballad Organ Ballad 8Beat Folk Pop Rhumba NewAge 16Bt Ballad1 16Bt Ballad2 16Bt Ballad3 16Beat Pop Funk Fusion Fusion Balad Fusion Shffl Funky - Yamaha CVP-79A | Owner's Manual - Page 124
Cymbal Cup - Yamaha CVP-79A | Owner's Manual - Page 125
Touch Setting Setup Selection (CVP-79A/69/69A) OO Style within each group O O SONG SETTING Song List Priority OO Guide Mode OO Part Assign OO MIDI Send Channel be reset to the initial factory values by turning the power on while holding the C7 key. Default Values: LCD contrast= 10, Help - Yamaha CVP-79A | Owner's Manual - Page 126
Fingering Chart / Akkordkiste / Tablature / Gráfica de digitado * All fingerings shown are simple root-position types. * Die hier gezeigten Akkorde sind jeweils die Grundakkorde. * Tous les doigtés indiqués sont du type à position fondamentale simple. * Todos los digitados se muestran como tipos - Yamaha CVP-79A | Owner's Manual - Page 127
corresponds to a portion of the XG format, the Clavinova does not perfectly correspond to all XG parameters. 1. Channel Messages 1.1 Key On and Key Off Receivable note range: C-2 to G8 (true voice A-1 to C7) Velocity range: 1 to 127 (Value accepted only at Note On) 1.2 Control Change If the - Yamaha CVP-79A | Owner's Manual - Page 128
MSB and LSB to select the control parameter, then set the value by Data Entry. The following NRPN values are supported. NRPN Data entry MSB LSB MSB Parameter Data Range $01 to that channel. (Default = drum setup 1.) Note: The CVP 79A/69/69A/59S contain 3 drum setups (1 Preset Drum & Drum Setup 1, - Yamaha CVP-79A | Owner's Manual - Page 129
Messages 2.1 Parameter Change The CVP 79A/69/69A/59S models support the following Parameter Change YAMAHA ID When N is received N=0~F, whichever is received. When N is transmitted N always=0. Model parameter change See Tables 1-1, 1-3. 2.1.4.4 Multi Part Data parameter change See Tables 1-1, 1-4. - Yamaha CVP-79A | Owner's Manual - Page 130
01000011 43 0vvvvvvv vv 11110111 F7 Exclusive status YAMAHA ID Clavinova ID CVP-79A/69/69A/59S ID Sub ID n = MIDI Channel Dual Detune Value vv: $00 - $40 - $7F first byte of the bulk. 2.4 Dump Request The CVP 79A/69/69A/59S models support the following request for data covered by bulk dump. - Yamaha CVP-79A | Owner's Manual - Page 131
Parameter Base Address Model ID = 4C Parameter Change Address (H) (M) (L) CVP MIDI 00 00 00 SYSTEM 00 1 Drum Setup 2 Note: The CVP 79A/69/69A/59S contain 3 drum setups (1 Preset Drum Parameter List Refer to Effect Parameter List Default value (H) 01(=HALL1) 00 Depends on reverb - Yamaha CVP-79A | Owner's Manual - Page 132
2 4A 2 4C 2 4E 2 50 2 52 2 54 2 56 1 57 1 58 1 59 1 5A 1 5B 1 00-7F 00-7F 00-7F 00-7F 00-7F 00-7F 00-7F Depends on variation type Depends on variation type Depends on variation type Default value (H) 00 (Part other than 10) 01 (Part10) 7F 40 40 40 40 40 40 40 40 40 40 40 - Yamaha CVP-79A | Owner's Manual - Page 133
* Stage1* Plate1* - Yamaha CVP-79A | Owner's Manual - Page 134
9 EQ High Gain 10 Dry/Wet 11 EQ Mid Frequency 12 EQ Mid Gain 13 EQ Mid Width 14 - 15 - 16 - Data Range MIDI Value CVP-79A CVP-69/69A/59S 0.00~39.7Hz 0~127 -63~+63 0~127 - 50Hz~2.0kHz -12~+12dB 500Hz~16.0kHz -12~+12dB D63>W~D=W~D - Yamaha CVP-79A | Owner's Manual - Page 135
MIDI Data Format / MIDI-Datenformat / Format des donées MIDI / Formato de datos MIDI ○ No. Parameter Data Range MIDI Value CVP-79A CVP-69/69A/59S GUITAR AMP SIMULATOR 1 Drive 2 AMP Type 3 LPF Cutoff 4 Output Level 5- 6- 7- 8- 9- 10 Dry/Wet 0~127 Off,Stack,Combo,Tube 1.0k~Thru 0~127 - - - - - - Yamaha CVP-79A | Owner's Manual - Page 136
No. Parameter Data Range MIDI Value CVP-79A CVP-69/69A/59S CROSS DELAY 1 L->R Delay 2 R->L Delay 3 Feedback Level 4 Input Select 5 High Damp 6- 7- 8- 9- 10 Dry/Wet 0.1~355.0ms 0.1~355.0ms -63~+63 L,R,L&R 0.1~1.0 - - - - D63>W~D=W~D - Yamaha CVP-79A | Owner's Manual - Page 137
/ MIDI-Datenformat / Format des donées MIDI / Formato de datos MIDI OPTION EFFECT TYPE No. Parameter Data Range MIDI Value CVP-79A CVP-69/69A/59S PITCH CHANGE (CVP-79A only) 1 Pitch 2 Initial Delay 3 Fine 1 4 Fine 2 5 Feedback Gain 6- 7- 8- 9- 10 Dry/Wet -24~+24 40-88 - 0~127 0-127 - Yamaha CVP-79A | Owner's Manual - Page 138
CVP-79A CVP-69 CVP-69A CVP-59S 88 KEYS (A-1 - C7) AWM (Advanced Wave Memory) Voice Groups: PIANO, E. PIANO, HARPSICHORD, GUITAR, CLAVINOVA CVP-79A only), BASEMENT PLAY, RECORD, GUIDE 2 (6-5/16" + 2") x 2, 2" x 2 1417 mm x 590 mm x 840 mm 1417 mm x 590 mm x 848 mm (55-13/16" x 23-1/4" x 33-1/16 - Yamaha CVP-79A | Owner's Manual - Page 139
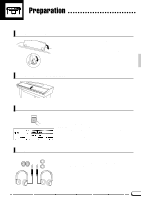
de 5 x 20 mm x 28 Tornillos de 5 x 20 mm x 28 q AC power cord q Netzkabel q Cordon d'alimentation q Cable de alimentación de CA CVP-79A: Assembly CVP-79A: Zusammenbau • We do not recommend attempting to assemble the Clavinova alone. The job can be easily accomplished, however, with only two - Yamaha CVP-79A | Owner's Manual - Page 140
tornillos en cada lado CVP-79A: Montage CVP-79A: Montaje • Nous ne vous conseillons pas d'essayer d'assembler le Clavinova seul. Toutefois, ce instrumento. ZAbra la caja y extraiga todas las partes. Al abrir la caja, encontrará las partes mostradas en la ilustración de arriba. Compruebe y - Yamaha CVP-79A | Owner's Manual - Page 141
4 Four screws on each side Jeweils vier Schrauben an Vorderund Hinterseite Quatre vis de chaque côté Cuatro tornillos en cada lado VAttach the speaker box. Remove the speaker box cover (attached with "Velcro") from the speaker box. Gently rest the speaker box onto the corresponding brackets on the - Yamaha CVP-79A | Owner's Manual - Page 142
altavoces cuando se manipule la caja de altavoces. Podrían ocasionarse daños.) Asegúrese de que el cable de altavoz se extienda desde la parte posterior de la caja del altavoz. Fije le caja de altavoces a la unidad del teclado principal usando cuatro tornillos en cada lado. Inserte el conector - Yamaha CVP-79A | Owner's Manual - Page 143
para ciertos destinos. 240 220 110 127 MVoltage Selector Before connecting the AC power cord, check the setting of the voltage selector which is provided in some the assembly instructions given above. • Vergewissern Sie sich nach Zusammenbau und Aufstellung des Clavinova noch einmal davon - Yamaha CVP-79A | Owner's Manual - Page 144
sélecteur de tension est réglé sur 240 V au départ d'usine. Une fois que vous avez réglé le sélecteur ón se ajusta a 240V cuando la unidad sale de fábrica. Después de haber seleccionado en suivant les instructions de montage données ici. • Después de haber montado la Clavinova, compruebe una vez - Yamaha CVP-79A | Owner's Manual - Page 145
E D C D q AC power cord q Netzkabel q Cordon d'alimentation CVP-69/69A: Assembly CVP-69A/69: Zusammenbau • We do not recommend attempting to assemble the Clavinova parts. On opening the box you should find the parts shown in the illustration. Check to make sure that all the required parts - Yamaha CVP-79A | Owner's Manual - Page 146
) CVP-69/69A: Montage CVP-69/69A: Montaje • Nous ne vous conseillons pas d'essayer d'assembler le Clavinova seul panneaux latéraux et la partie qui dépasse des supports inférieurs soient dirigés vers l'avant. CFixez la todas las partes. Al abrir la caja, encontrará las partes mostradas en la - Yamaha CVP-79A | Owner's Manual - Page 147
assembly and the speaker cord is extending out to the rear from the top of the speaker box (see illustration). BAttach the main keyboard unit (A). (Part 1) Gently lower the main keyboard unit (A) onto the speaker box (B) and stand assembly so that the rear of the main unit is positioned about 10cm - Yamaha CVP-79A | Owner's Manual - Page 148
(A) avec précaution sur la boîte des haut-parleurs (B) et sur les supports de manière que l'arrière du clavier dépasse de 10 cm environ derriè pedales pasa por el hueco de la parte superior del conjunto de pedales y que el cable de altavoces sale por la parte posterior de encima de la caja de - Yamaha CVP-79A | Owner's Manual - Page 149
Senkschraube (6 x 20 mm) Grosses vis de 6 x 20 mm (à tête plate) 2 A Tornillo de 6 x 20 mm (grande de cabeza plana) A C NAttach the main keyboard unit. (Part 2) With the protruding screw heads on the bottom panel of the main unit positioned behind the side-panel rear brackets, slide the main - Yamaha CVP-79A | Owner's Manual - Page 150
re à avoir un jeu identique de chaque côté, comme illustré). Fixez ensuite le clavier sur le support en vissant une grosse vis 2 de 6 x 20 mm (à tête plate) à travers la ranura de las ménsulas traseras. Alinee los orificios de la parte inferior de la unidad principal con los de las ménsulas del panel - Yamaha CVP-79A | Owner's Manual - Page 151
220 110 - Yamaha CVP-79A | Owner's Manual - Page 152
sélecteur de tension est réglé sur 240 V au départ d'usine. Une fois que vous avez réglé le sélecteur ón se ajusta a 240V cuando la unidad sale de fábrica. Después de haber seleccionado en suivant les instructions de montage données ici. • Después de haber montado la Clavinova, compruebe una vez - Yamaha CVP-79A | Owner's Manual - Page 153
mm x 6 3 Tornillos de cabeza plana de 6 x 18 mm x 6 q AC power cord q Netzkabel q Cordon d'alimentation q Cable de alimentación de CA CVP-59S: Assembly CVP-59S: Zusammenbau • We do not recommend attempting to assemble the Clavinova alone. The job can be easily accomplished, however, with - Yamaha CVP-79A | Owner's Manual - Page 154
x 4 CVP-59S: Montage CVP-59S: Montaje • Nous ne vous conseillons pas d'essayer d'assembler le Clavinova seul. Toutefois que les pédales et la partie qui dépasse des supports inférieurs soient dirigées dans le même sens. el cable enrollado unido a la parte inferior de la caja de pedales. - Yamaha CVP-79A | Owner's Manual - Page 155
4 A 6 x 18 mm flat-head screws Senkschrauben (6 x 18 mm) Vis à tête plate de 6 x 18 mm 3 Tornillos de cabeza plana de 6 x 18 mm Danger Zone Gefahrenzone Zones dangereuses Zona peligrosa A D D A VInstall the main unit (A). Gently place the main unit (A) on the side panels (D) with the screws on - Yamaha CVP-79A | Owner's Manual - Page 156
vis de chaque côté du clavier). * Lorsque vous abaissez le clavier sur son support, ne placez pas les mains dans les zones marquées "Zones dangereuses" sur de la unidad principal). * Mantenga apartados los dedos de la parte marcada con "Zona peligrosa" en las ilustraciones cuando baje la unidad - Yamaha CVP-79A | Owner's Manual - Page 157
the proper voltage has been selected connect the AC power cord. A plug adaptor may be also provided distorted sound may result. • After assembling the Clavinova, check once more to make sure that all all screws while following the assembly instructions given above. NDen Spannungswähler einstellen - Yamaha CVP-79A | Owner's Manual - Page 158
sélecteur de tension est réglé sur 240 V au départ d'usine. Une fois que vous avez réglé le sélecteur ón se ajusta a 240V cuando la unidad sale de fábrica. Después de haber seleccionado en suivant les instructions de montage données ici. • Después de haber montado la Clavinova, compruebe una vez - Yamaha CVP-79A | Owner's Manual - Page 159
- Yamaha CVP-79A | Owner's Manual - Page 160
, if not installed and used according to the instructions found in the users manual, may cause interference harmful to the operation of can not locate the appropriate retailer, please contact Yamaha Corporation of America, Electronic Service Division, 6600 Orangethorpe Ave, Buena Park, CA90620 - Yamaha CVP-79A | Owner's Manual - Page 161
damaged. 13. Do not attempt to service this product beyond that de- scribed in the user-maintenance instructions. All other servicing should be referred to qualified service personnel. 14. This product, either alone or in combination with an ampli- fier and headphones or speaker/s, may be capable of - Yamaha CVP-79A | Owner's Manual - Page 162
- Yamaha CVP-79A | Owner's Manual - Page 163
M.D.G., EMI Division © 1995 Yamaha Corporation VT47770 507POCP4.3-02B0 Printed in Japan
-
 1
1 -
 2
2 -
 3
3 -
 4
4 -
 5
5 -
 6
6 -
 7
7 -
8
-
9
-
10
-
11
-
12
-
13
-
14
-
15
-
16
-
17
-
18
-
19
-
20
-
21
-
22
-
23
-
24
-
25
-
26
-
27
-
28
-
29
-
30
-
31
-
32
-
33
-
34
-
35
-
36
-
37
-
38
-
39
-
40
-
41
-
42
-
43
-
44
-
45
-
46
-
47
-
48
-
49
-
50
-
51
-
52
-
53
-
54
-
55
-
56
-
57
-
58
-
59
-
60
-
61
-
62
-
63
-
64
-
65
-
66
-
67
-
68
-
69
-
70
-
71
-
72
-
73
-
74
-
75
-
76
-
77
-
78
-
79
-
80
-
81
-
82
-
83
-
84
-
85
-
86
-
87
-
88
-
89
-
90
-
91
-
92
-
93
-
94
-
95
-
96
-
97
-
98
-
99
-
100
-
101
-
102
-
103
-
104
-
105
-
106
-
107
-
108
-
109
-
110
-
111
-
112
-
113
-
114
-
115
-
116
-
117
-
118
-
119
-
120
-
121
-
122
-
123
-
124
-
125
-
126
-
127
-
128
-
129
-
130
-
131
-
132
-
133
-
134
-
135
-
136
-
137
-
138
-
139
-
140
-
141
-
142
-
143
-
144
-
145
-
146
-
147
-
148
-
149
-
150
-
151
-
152
-
153
-
154
-
155
-
156
-
157
-
158
-
159
-
160
-
161
-
162
-
163
 |
 |

IMPORTANT
Check Your Power Supply
Make sure that your local AC mains
voltage matches the voltage speci-
fied on the name plate on the bottom
panel. In some areas a voltage se-
lector may be provided on the bottom
panel of the main keyboard unit near
the power cord. Make sure that the
voltage selector is set for the voltage
in your area. The voltage selector is
set at 240V when the unit is initially
shipped. To change the setting use a
“minus” screwdriver to rotate the se-
lector dial so that the correct voltage
appears next to the pointer on the
panel.
WICHTIG
Netzspannung überprüfen
Vergewissern Sie sich vor dem An-
schließen an das Stromnetz, daß die
örtliche Netzspannung den Betriebs-
spannungswerten auf dem Typenschild
an der Unterseite des Instruments ent-
spricht. In bestimmten Verkaufs-
gebieten ist das Instrument mit einem
Spannungswähler an der Unterseite
neben der Netzkabeldurchführung aus-
gestattet. Falls vorhanden, muß der
Spannungswähler auf die örtliche Netz-
spannung eingestellt werden. Der
Spannungswähler wurde werkseitig auf
240 V voreingestellt. Zum Verstellen
drehen Sie den Spannungsregler mit
einem Schlitzschraubendreher, bis der
Zeiger auf den korrekten Spannungs-
wert weist
IMPORTANT
Vérifiez la source d’alimentation
Vérifiez que la tension spécifiée sur
le panneau arrière correspond à la
tension du secteur.
Dans certaines
régions, l’instrument peut être équipé
d’un sélecteur de tension situé sur
le panneau inférieur du clavier à
proximité du cordon d’alimentation.
Vérifiez que ce sélecteur est bien
réglé en fonction de la tension sec-
teur de votre région. Le sélecteur de
tension est réglé sur 240 V au dé-
part d’usine.
Pour modifier ce ré-
glage, utilisez un tournevis à lame
plate pour tourner le sélecteur afin
de mettre l’indication correspondant
à la tension de votre région vis à vis
du repère triangulaire situé sur le
panneau.
IMPORTANTE
Compruebe la alimentación de su área
Asegúrese de que tensión de alimen-
tación de CA de su área correspon-
de con la tensión especificada en la
placa de características del panel
inferior de la unidad del teclado prin-
cipal, cerca del cable de alimenta-
ción.
Asegúrese de que el selector
de tensión esté ajustado a la tensión
de su área.
El selector de tensión
se ajusta a 240V cuando la unidad
sale de fábrica.
Para cambiar el ajus-
te, emplee un destornillador de ca-
beza “recta” para girar el selector de
modo que aparezca la tensión co-
rrecta al lado del indicador del pa-
nel.