Yamaha DGX-670 DGX-670 Reference Manual - Page 86
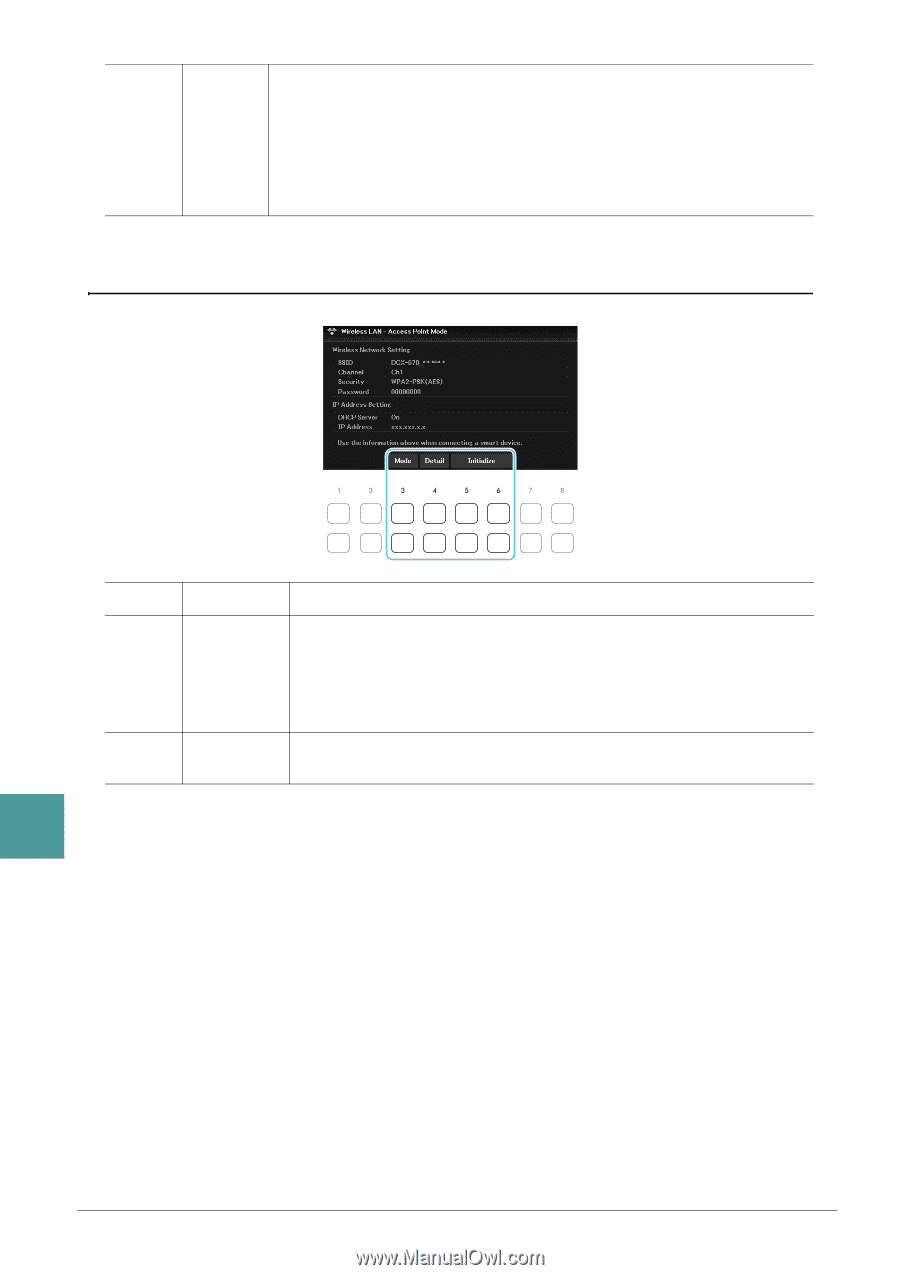
Access Point Mode, Connect, Other, Detail, Wireless Network, IP Address, Initialize
 |
View all Yamaha DGX-670 manuals
Add to My Manuals
Save this manual to your list of manuals |
Page 86 highlights
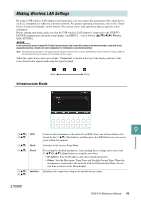
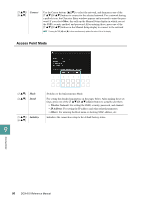
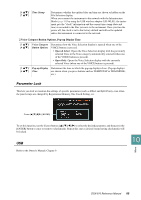
[7 ]/ Connect [8 ] Use the Cursor buttons [][] to select the network, and then press one of the [7 ]/[8 ] buttons to connect to the selected network. For a network having a padlock icon, the Character Entry window appears and you need to enter the password. If you select Other, this calls up the Manual Setup display in which you set the SSID, security method, and password. After entering those, press one of the [7 ]/[8 ] buttons in the Manual Setup display to connect to the network. NOTE Pressing the TAB [E] and [F] buttons simultaneously updates the network list on the display. Access Point Mode [3 ] Mode [4 ] Detail [5 ]/ Initialize [6 ] Switches to the Infrastructure Mode. For setting the detailed parameters on the pages below. After making these settings, press one of the [7 ]/[8 ] (Save) button to actually save them. • Wireless Network: For setting the SSID, security, password, and channel. • IP Address: For setting the IP address and other related parameters. • Others: For entering the Host name or showing MAC address, etc. Initializes the connection setup to the default factory status. 9 Connections 86 DGX-670 Reference Manual
-
 1
1 -
2
-
3
-
4
-
5
-
6
-
7
-
8
-
9
-
10
-
11
-
12
-
13
-
14
-
15
-
16
-
17
-
18
-
19
-
20
-
21
-
22
-
23
-
24
-
25
-
26
-
27
-
28
-
29
-
30
-
31
-
32
-
33
-
34
-
35
-
36
-
37
-
38
-
39
-
40
-
41
-
42
-
43
-
44
-
45
-
46
-
47
-
48
-
49
-
50
-
51
-
52
-
53
-
54
-
55
-
56
-
57
-
58
-
59
-
60
-
61
-
62
-
63
-
64
-
65
-
66
-
67
-
68
-
69
-
70
-
71
-
72
-
73
-
74
-
75
-
76
-
77
-
78
-
79
-
80
-
 81
81 -
 82
82 -
 83
83 -
 84
84 -
 85
85 -
 86
86 -
 87
87 -
 88
88 -
 89
89 -
 90
90 -
 91
91 -
92
-
93
 |
 |