Yamaha MCR-E600 MCR-E600 Owners manual DVD / VIDEO CD / CD PLAYER - Page 20
Digital Audio Setup, Equalizer (sound Mode), 3d (reverb Mode), Digital Output, Lpcm Output
 |
UPC - 027108104270
View all Yamaha MCR-E600 manuals
Add to My Manuals
Save this manual to your list of manuals |
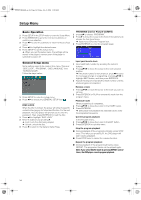
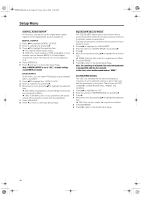
Page 20 highlights
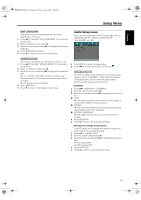
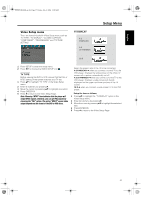
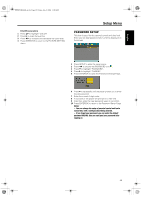
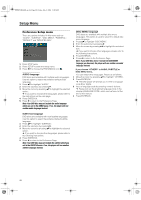
0102DVD-E600_en.fm Page 16 Friday, July 2, 2004 11:09 AM Setup Menu DIGITAL AUDIO SETUP In this menu, you can set up the digital audio output signal from the digital jacks, such as coaxial etc. DIGITAL OUTPUT 1 Press 34 to highlight DIGITAL OUTPUT. 2 Enter its submenu by pressing 2. 3 Press 34 to highlight the selected item. ➜ All: Original digital signals output. ➜ PCM Only: If your receiver is PCM-compatible, or your receiver can not decode MPEG-2 or Dolby Digital, choose this option. This feature can not be applied to DTS. 4 Press ENTER/OK. 5 Press 1 and return to the Audio Setup Page. Note: If DIGITAL OUTPUT is set to "ALL", all audio settings except MUTE are invalid. LPCM OUTPUT In this menu, you can select PCM digital output between 48kHz and 96kHz. 1 Press 34 to highlight the "LPCM OUTPUT". 2 Enter its submenu by pressing 2. 3 Move the cursor by pressing 34 to highlight the selected item. ➜ 48K: 96kHz (if available on disc) PCM data stream will be converted to 48kHz. ➜ 96K: If the 96kHz disc is copy protected, the digital output will be muted to comply with the standards. 4 Press ENTER/OK. 5 Press 1 to return to the Audio Setup Page. EQUALIZER (Sound Mode) The "EQUALIZER" allows you to select from various preset modes that control the frequency bands of sound to optimize certain musical styles. It greatly enhances the excitement and enjoyment of your favourite music. 1 Press 34 to highlight the "EQUALIZER". 2 Enter its submenu "SOUND MODE" by pressing 2. 3 Press 2. 4 Move the cursor by pressing 34 to highlight the selected item. ➜ NONE: Play the disc under the original sound effect. 5 Press ENTER/OK. 6 Press 1 to return to the Audio Setup Page. Note: The sound may be distorted if the selected sound mode is incompatible with the disc contents. In that case, select another sound mode or "NONE". 3D (REVERB MODE) The "3D" can simulate the echoes and frequency response of some particular places so as to make you feel like personally on the place. The choices are OFF, CONCERT, LIVING ROOM, HALL, ARENA, and CHURCH. 1 Press 34 to highlight the "3D". 2 Enter its submenu "REVERB MODE" by pressing 2. 3 Press 2. 4 Move the cursor by pressing 34 to highlight the selected item. ➜ OFF: Play the disc under the original sound effect. 5 Press ENTER/OK. 6 Press 1 to return to the Audio Setup Page. 16
-
 1
1 -
2
-
3
-
4
-
5
-
6
-
7
-
8
-
9
-
10
-
11
-
12
-
13
-
14
-
 15
15 -
 16
16 -
 17
17 -
 18
18 -
 19
19 -
 20
20 -
 21
21 -
 22
22 -
 23
23 -
 24
24 -
 25
25 -
26
-
27
-
28
-
29
-
30
 |
 |