Yamaha Soavo-900SW Owner's Manual
Yamaha Soavo-900SW Manual
 |
View all Yamaha Soavo-900SW manuals
Add to My Manuals
Save this manual to your list of manuals |
Yamaha Soavo-900SW manual content summary:
- Yamaha Soavo-900SW | Owner's Manual - Page 1
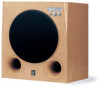
UB Soavo-900SW SUBWOOFER SYSTEM OWNER'S MANUAL - Yamaha Soavo-900SW | Owner's Manual - Page 2
Please record the serial number of this system in the space below. Model: Serial No.: The serial number is located on the rear of the main unit. Retain this Owner's Manual in a safe place for future reference. 1 Read these instructions. 2 Keep these instructions. 3 Heed all warnings. 4 Follow all - Yamaha Soavo-900SW | Owner's Manual - Page 3
instructions contained in this manual, meets FCC requirements. Modifications not expressly approved by Yamaha instructions. Failure to follow instructions could void your FCC authorization to use this product in the USA. 3 NOTE : This product has been tested problem by using Utilize power - Yamaha Soavo-900SW | Owner's Manual - Page 4
subwoofer system. CAUTION: Read this before operating your unit. Please read the following operating precautions before use. YAMAHA will not be held responsible for any damage and/or injury caused by not following the cautions below. 1 To assure the finest performance, please read this manual - Yamaha Soavo-900SW | Owner's Manual - Page 5
sound balance settings 14 Setting the sleep timer 14 Operating the power of this unit using the remote control of your amplifier 15 Frequency response 16 Advanced Yamaha Active Servo Technology II 17 TROUBLESHOOTING 18 SPECIFICATIONS 19 FOR CANADIAN CUSTOMERS To prevent electric shock, match - Yamaha Soavo-900SW | Owner's Manual - Page 6
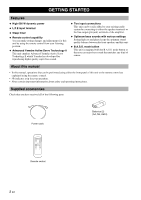
for your operation. • Notes contain important information about safety and operating instructions. Supplied accessories Check that you have received all of the following parts. Power cable POWER STANDBY SLEEP B.A.S.S. PHASE MEMORY PRESET 1 2 3 HIGH CUT VOLUME Remote control Batteries - Yamaha Soavo-900SW | Owner's Manual - Page 7
1 2 3 SUBWOOFER SYSTEM Soavo-900SW 1 2 3 1 2 3 STANDBY /ON PHASE B.A.S.S. PRESET STANDBY /ON 4 140Hz H-CUT 5 10 VOLUME 6 mode. Note In the standby mode, this unit consumes a small amount of power. 5 H-CUT control Adjusts the high frequency cut off point depending on the connected - Yamaha Soavo-900SW | Owner's Manual - Page 8
10 for connection information. 5 INPUT 1 terminals See pages 10 - 11 for connection information. 6 AC IN Connects the supplied power cable (see page 12). 7 POWER switch Switches the power the reverse position. However, according to your speaker systems or the listening condition, there may be cases - Yamaha Soavo-900SW | Owner's Manual - Page 9
Preparing the remote control ■Installing the batteries in the remote control GETTING STARTED ■Using the remote control 3 1 2 Remote control sensor Approximately 6 m (20 ft) 1 Press the mark on the battery cover and open the cover. 2 Insert the two supplied type AA, R6, UM-3 batteries following - Yamaha Soavo-900SW | Owner's Manual - Page 10
PLACEMENT The position of the subwoofer is not so critical because bass sound is not highly directional. For a sonorous sound field, the use of two subwoofers is recommended, although you can obtain a good effect with one subwoofer. ( : subwoofer, : front speaker) ■When using one subwoofer Place - Yamaha Soavo-900SW | Owner's Manual - Page 11
power cord of this unit and other components into an AC outlet until all connections between components are completed. • Be sure to connect the left channel (L), right channel (R), "+" (red) and "-" (black) properly. Also, refer to the owner's manual pages 9 - 10). • When sound. Subwoofer L MONO - Yamaha Soavo-900SW | Owner's Manual - Page 12
to an amplifier equipped with a high cut function L MONO L If your amplifier can cut off high frequencies from the signals for sending to the subwoofer, connect the amplifier to the INPUT 2 (LFE) terminal of this unit. This brings you higher sound quality R because the signal routing in this unit - Yamaha Soavo-900SW | Owner's Manual - Page 13
subwoofer (line out) terminal Connect an amplifier (and front speakers) to this unit using commercially available speaker cables. Refer to the following instructions terminal. 1 Remove approximately 10 mm (3/8") of insulation the knob clockwise to tighten. 6 Test the firmness of the connection by - Yamaha Soavo-900SW | Owner's Manual - Page 14
OOUUTTPPUUTT RR TTOO SSPPEEAAKKEERRSS LL RR IINNPPUUT T3 3 RR IINNPPUUTT2 2 RR FROMFARMOPMLIFIER LL AIMNPPLUIFTIE1R Front speaker (L) L MONO L OUTPUT R TO SPEAKERS L R INPUT 3 R INPUT 2 R FROM AMPLIFIER L INPUT 1 Subwoofer (R) Speaker terminals Amplifier Subwoofer (L) 10 En - Yamaha Soavo-900SW | Owner's Manual - Page 15
in this way, follow "When your amplifier has one set of front speaker terminals" on page 10. ■Using one subwoofer Front speaker (R) L MONO L OUTPUT R TO SPEAKERS L Front speaker (L) Subwoofer R INPUT 3 R INPUT 2 R FROM AMPLIFIER L INPUT 1 Speaker terminals Amplifier ■Using two - Yamaha Soavo-900SW | Owner's Manual - Page 16
your amplifier has no GND (ground) terminal, connect to the screw that fastens the top cover of your amplifier as shown in fig. B . Connecting the power cable Plug the supplied power cable into the AC IN of this unit after all other connections are complete, and then plug the - Yamaha Soavo-900SW | Owner's Manual - Page 17
the minimum frequency of the front speaker, refer to the owner's manual of the front speaker. 6 Press VOLUME to increase the volume gradually is played, the low- frequency effects are enhanced so that you can enjoy more powerful sound. 2: NORMAL When a music or movie etc. source is played, you can - Yamaha Soavo-900SW | Owner's Manual - Page 18
HIGH CUT VOLUME 1 Front panel STANDBY/ON indicator SUBWOOFER SYSTEM Soavo-900SW 1 2 3 1 2 3 STANDBY /ON PHASE B.A.S.S. PRESET STANDBY /ON 0 40Hz 100Hz H-CUT 10 VOLUME 1 ■Memory back-up Even if you turn off this unit by using the POWER switch on the rear panel, this unit recalls - Yamaha Soavo-900SW | Owner's Manual - Page 19
/ON switch for 3 seconds or longer. Rear panel POWER ON OFF POWER switch Front panel SUBWOOFER SYSTEM Soavo-900SW 1 2 31 2 3 STANDBY /ON PHASE B.A.S.S. PRESET STANDBY /ON 0 40Hz 100Hz H-CUT 10 VOLUME STANDBY/ON switch ■ Setting 1 Set POWER switch on the rear panel to the OFF - Yamaha Soavo-900SW | Owner's Manual - Page 20
-1 speakers as front speakers, use the following example as a reference when adjusting settings. dB (H-CUT) (VOLUME) 140Hz 0 40Hz H-CUT 10 VOLUME (PHASE) OOFER SYSTEM S 1 PHASE reverse mode (Green) 90 80 Soavo-900SW (H-CUT 60 - 70 Hz) 70 60 Front speaker 50 40 20 50 100 200 500Hz - Yamaha Soavo-900SW | Owner's Manual - Page 21
Active Servo Technology II In 1988, Yamaha brought to the speaker systems utilizing YST (Yamaha Active Servo Technology) to give powerful, high quality bass reproduction. This technology uses a direct connection between the amplifier and speaker, allowing accurate signal transmission and precise - Yamaha Soavo-900SW | Owner's Manual - Page 22
TROUBLESHOOTING Refer to the chart below when this unit does not function properly. If the problem you are experiencing is not listed below or if the instructions given below do not help, disconnect the power cord and contact your authorized Yamaha dealer or service center. Problem Power is not - Yamaha Soavo-900SW | Owner's Manual - Page 23
SPECIFICATIONS Type .... Advanced Yamaha Active Servo Technology II Power Consumption 180 W Driver 25 cm (10") cone woofer Magnetic shielding type Amplifier Output (100 Hz, 4 ohms, 10% T.H.D 600 W Standby Power Consumption 0.5 W Dimensions (W x H x D 410 mm x 457 mm x 462 mm (16-1/8" x 17" x - Yamaha Soavo-900SW | Owner's Manual - Page 24
ELECTRONIQUE FRANCE S.A. RUE AMBROISE CROIZAT BP70 CROISSY-BEAUBOURG 77312 MARNE-LA-VALLEE CEDEX02, FRANCE YAMAHA ELECTRONICS (UK) LTD. YAMAHA HOUSE, 200 RICKMANSWORTH ROAD WATFORD, HERTS WD18 7GQ, ENGLAND YAMAHA SCANDINAVIA A.B. J A WETTERGRENS GATA 1, BOX 30053, 400 43 VÄSTRA FRÖLUNDA, SWEDEN
-
 1
1 -
 2
2 -
 3
3 -
 4
4 -
 5
5 -
 6
6 -
 7
7 -
8
-
9
-
10
-
11
-
12
-
13
-
14
-
15
-
16
-
17
-
18
-
19
-
20
-
21
-
22
-
23
-
24
 |
 |

Soavo-900SW
SUBWOOFER SYSTEM
UB
OWNER’S MANUAL