Yamaha U1-SILENT Owners Manual - Page 17
Connecting the USB Memory, Saving Recorded Data to USB Memory
 |
View all Yamaha U1-SILENT manuals
Add to My Manuals
Save this manual to your list of manuals |
Page 17 highlights
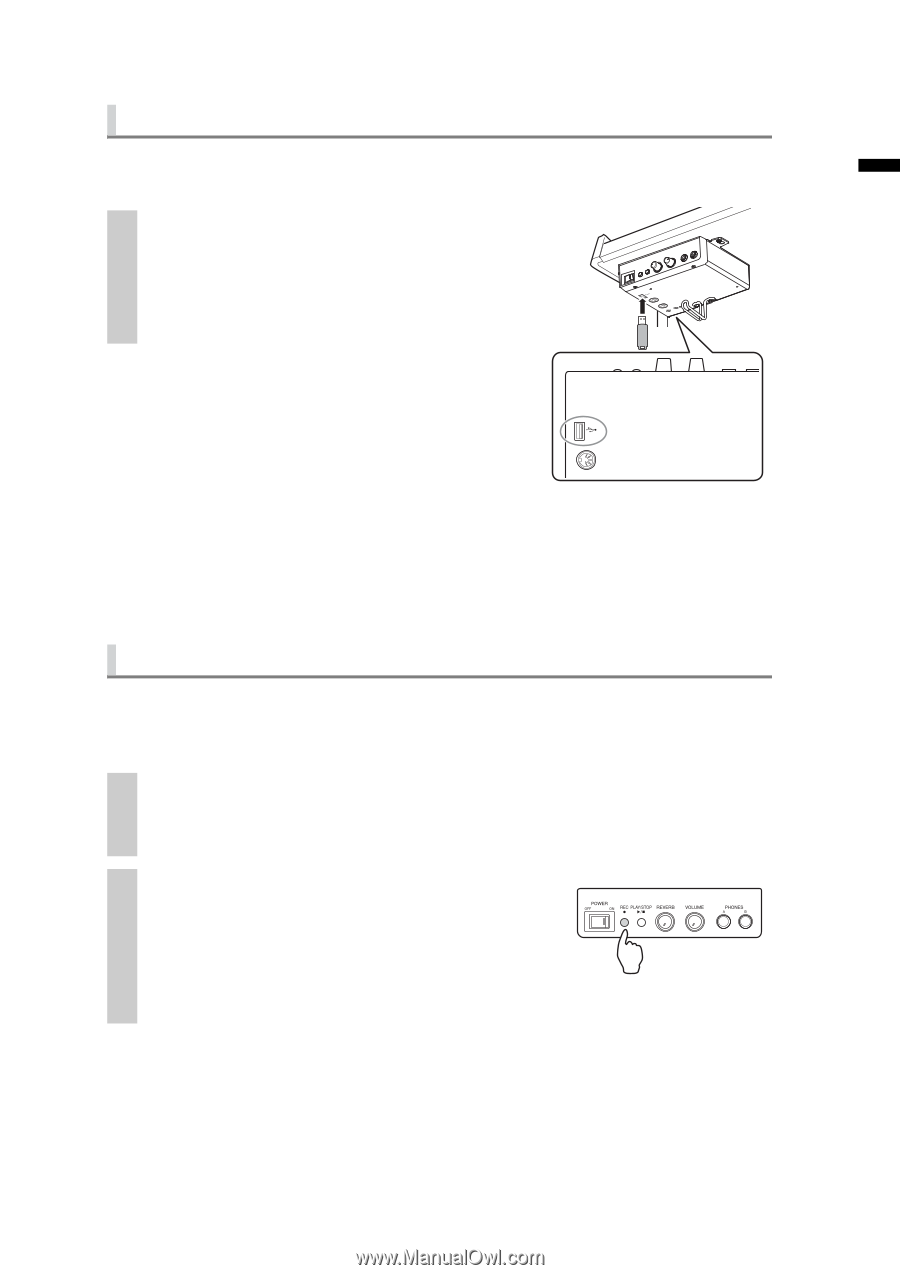
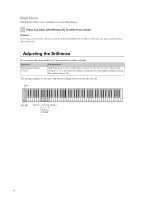
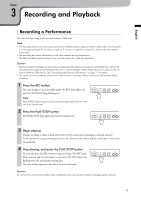
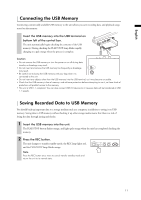
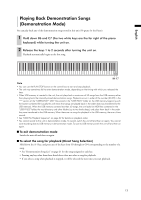
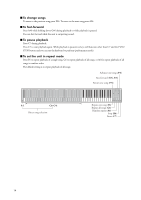
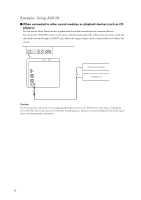
English MIDI IN USB Connecting the USB Memory Connecting commercially available USB memory to the unit allows you save recording data, and playback songs stored on the memory. Insert the USB memory into the USB terminal on bottom left of the control box. The unit automatically begins checking the contents of the USB memory. During checking the PLAY/STOP lamp blinks rapidly, changing to a pale orange when the process is complete. Caution • Do not remove the USB memory or turn the power on or off during data transfer, as breakage may result. • Do not insert and remove the USB memory too frequently as breakage may result. • Be careful not to bump the USB memory with your legs when it is connected to the unit. • Do not insert any objects other than the USB memory into the USB terminal, as it may become unusable. • Check that the USB memory is free of memory- and software protection before attempting to use it, as these kinds of protection will prohibit access to the memory. • This unit is USB 1.1 compliant. You can also connect USB 2.0 devices to it, however data will be transferred at USB 1.1 speeds. Saving Recorded Data to USB Memory You should back up important data to a storage medium such as a computer, in addition to saving it on USB memory. Saving data to USB memory without backing it up other storage media means that there is a risk of losing the data through jarring and shocks. 1 Insert the USB memory into the unit. The PLAY/STOP button flashes orange, and lights pale orange when the unit has completed checking the memory. 2 Press the REC button. The unit changes to transfer standby mode, the REC lamp lights red, and the PLAY/STOP lamp blinks orange. Note Press the REC button once more to cancel transfer standby mode and return the unit to its normal state. 11
-
 1
1 -
2
-
3
-
4
-
5
-
6
-
7
-
8
-
9
-
10
-
11
-
 12
12 -
 13
13 -
 14
14 -
 15
15 -
 16
16 -
 17
17 -
 18
18 -
 19
19 -
 20
20 -
 21
21 -
 22
22 -
23
-
24
-
25
-
26
-
27
-
28
-
29
-
30
-
31
 |
 |