Yamaha YDP-141 Owner's Manual - Page 23
Recording Your Performance, Make all initial settings., Select a part and engage Record Ready mode. - user manual
 |
View all Yamaha YDP-141 manuals
Add to My Manuals
Save this manual to your list of manuals |
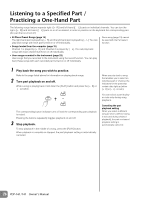
Page 23 highlights
ENGLISH Recording Your Performance Your digital piano's recording function enables you to record your performance of one song. The recorded performance is called the "user song." You can record up to two parts separately. For example, you can record the left-hand and right-hand parts separately. Or, you can create a duet piece by recording each part one at a time and then playing them together. Follow the steps below to record and play back your performance. Recording Your Performance 1 Make all initial settings. Before you begin to record, select the voice that you want to use for recording. (See page16.) Make any other desired settings (reverb, etc.) as well. Use the [MASTER VOLUME] control to adjust the volume to a comfortable listening level. You can also use the [MASTER VOLUME] control to adjust the volume level during playback. 2 Select a part and engage Record Ready mode. Hold down the [REC] button and press the [+ R] or [- L] button for the part you want to record to engage Record Ready mode. If you press the [REC] button and play both parts without specifying the recording part, the performance will automatically be recorded to the right part ([+ R]). Recording does not actually start yet. Recording the right part ([+ R]) or NOTICE Be careful not to erase the recorded data! When you finish recording your performance, the indicator for the part button ([+ R] and/or [- L]) lights up. Recording another performance while this indicator remains on will overwrite the existing recorded data. You cannot engage Record mode while a demo song is playing. The User song will not be transmitted via MIDI. Recording capacity "Recording capacity" is the maximum amount of performance data that you can record. This instrument's recording capacity is 100 KB (approximately 11,000 notes). Recording the left part ([- L]) The [REC] button indicator and the selected part button indicator will flash at the currently-selected tempo. (It may take a moment before the indicator starts to flash.) Press the [REC] button again if you wish to cancel Record mode. Turning the playback part on and off If data has already been recorded in the [+ R] and/or [- L] part, the indicator for the part(s) will light up, and the data in the part(s) will start playing back as soon as you start recording your performance. If you do not want to hear the part playback, hold down the [PLAY] button and press the button ([+ R] or [- L]) for the part you want to mute. Its indicator will turn off. Pressing the part buttons toggles part playback on and off. YDP-161/141 Owner's Manual 23
-
 1
1 -
2
-
3
-
4
-
5
-
6
-
7
-
8
-
9
-
10
-
11
-
12
-
13
-
14
-
15
-
16
-
17
-
 18
18 -
 19
19 -
 20
20 -
 21
21 -
 22
22 -
 23
23 -
 24
24 -
 25
25 -
 26
26 -
 27
27 -
 28
28 -
29
-
30
-
31
-
32
-
33
-
34
-
35
-
36
-
37
-
38
-
39
-
40
 |
 |
