Yamaha YDP-181 Owner's Manual
Yamaha YDP-181 Manual
 |
View all Yamaha YDP-181 manuals
Add to My Manuals
Save this manual to your list of manuals |
Yamaha YDP-181 manual content summary:
- Yamaha YDP-181 | Owner's Manual - Page 1
ENGLISH FRANÇAIS Owner's Manual Mode d'emploi Manual de Instrucciones ESPAÑOL For information on assembling the keyboard stand, refer to the instructions at the end of this manual. IMPORTANT - Check your power supply - Make sure that your local AC mains voltage matches the voltage specified on - Yamaha YDP-181 | Owner's Manual - Page 2
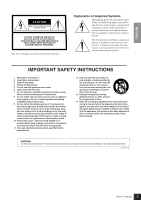
page and those indicated in the safety instruction section. CAUTION RISK OF ELECTRIC SHOCK DO NOT OPEN CAUTION: TO REDUCE THE RISK OF ELECTRIC SHOCK. DO NOT REMOVE COVER (OR BACK). NO USER-SERVICEABLE PARTS INSIDE. REFER SERVICING TO QUALIFIED SERVICE PERSONNEL. See bottom of Keyboard enclosure for - Yamaha YDP-181 | Owner's Manual - Page 3
the user electric shock to persons. The exclamation point within an equilateral triangle is intended to alert the user to the presence of important operating and maintenance (servicing) instructions use attachments/accessories specified by the manufacturer. 12 Use cart is used, use caution when - Yamaha YDP-181 | Owner's Manual - Page 4
following problems occur, immediately turn off the power switch and disconnect the electric plug from the outlet. Then have the device inspected by Yamaha service make sure that the AC outlet you are using is easily accessible. If some trouble or malfunction occurs, immediately turn off the power - Yamaha YDP-181 | Owner's Manual - Page 5
use, tighten them periodically using the included tool. Yamaha cannot be held responsible for damage caused by improper use use the instrument in the vicinity of a TV, radio, stereo equipment, mobile phone, or other electric save your important data onto two USB storage devices. The serial number of - Yamaha YDP-181 | Owner's Manual - Page 6
Digital Piano various functions. Appendix This section introduces reference material. Online Materials (Downloadable from the web) The following instructional materials are available for downloading from the Yamaha Manual Library. Access the Yamaha Manual Library, then enter your model name (YDP-181 - Yamaha YDP-181 | Owner's Manual - Page 7
samples used, the greater the resulting expressiveness of the instrument. The piano voice "Grand Piano 1" features a totally new sample recorded from a full-size concert grand piano. Each note in the sample has been adjusted meticulously so that the digital piano will play only the very best piano - Yamaha YDP-181 | Owner's Manual - Page 8
of Contents Introduction About this Owner's Manual and Data List 6 Accessories...7 Panel Controls and Terminals 10 Before Using the Digital Piano 12 Key Cover ...12 Music Rest ...12 Turning the Power On ...13 Setting the Volume ...14 Using Headphones...14 Using the Speaker Switch ...14 Reference - Yamaha YDP-181 | Owner's Manual - Page 9
54 Data Backup ...54 Initializing the data...54 Message List ...55 Troubleshooting ...56 Options ...56 Preset Voice List ...57 Demo Song List ...57 Keyboard Stand Assembly ...58 Index...62 Appendix Specifications / Caractéristiques techniques /Especificaciones 64 Factory Setting List / Liste des - Yamaha YDP-181 | Owner's Manual - Page 10
key side) MIDI PEDAL OUT IN Front ( ™ Left (lower key side) Front £ Shows the jacks as seen when viewed from below the instrument. 10 Owner's Manual - Yamaha YDP-181 | Owner's Manual - Page 11
( ). 2 [MASTER VOLUME] slider page 14 Adjust the volume level using this slider. 3 [DEMO] button page 15 Demonstration playback is available for each voice. 4 [ piano, as you press the damper pedal and play the keyboard. * USB [TO DEVICE] terminals page 51 For connecting the instrument to a USB - Yamaha YDP-181 | Owner's Manual - Page 12
ENGLISH Before Using the Digital Piano Before Using the Digital Piano Key Cover To open the key cover: Lift remove. This could cause electric shock, short circuit, fire or other serious damage to the instrument. Notice Disconnect the optional USB storage device connected to the USB [TO DEVICE] A - Yamaha YDP-181 | Owner's Manual - Page 13
Using the Digital Piano which it is to be used (voltage rating appears on the pose a shock hazard! Use only the AC power cord replaced, contact your Yamaha dealer. The use of an inappropriate replacement electrical current remains even after the [ ] switch has been turned off. If you plan not to use - Yamaha YDP-181 | Owner's Manual - Page 14
ENGLISH Before Using the Digital Piano Setting the Volume Initially set the [MASTER VOLUME] slider about halfway between the "MIN" and "MAX" settings. Then, when you start The speakers always produce sound. OFF The speakers produce no sound. OFF ON NORMAL HP. SW SPEAKER PHONES 14 Owner's Manual - Yamaha YDP-181 | Owner's Manual - Page 15
- featuring the voice normally selected by that voice button. (If you press the SONG [PLAY/PAUSE] button instead of a voice button or only waiting (not press any keys) a short while, the GRAND PIANO 1 demo tune will begin playback.) 4. Stop the Voice demo and exit from Demo mode. Press the [DEMO] or - Yamaha YDP-181 | Owner's Manual - Page 16
songs or use them for practice (page 17). You can also refer to the included "50 greats for the Piano" that contains scores for the 50 piano preset be engaged while the unit is in Demo Song mode (page 15) or during song playback (page 41), User song recording (page 27), or file . Owner's Manual 16 - Yamaha YDP-181 | Owner's Manual - Page 17
Listening to 50 Piano Preset Songs Practicing a One-Hand Part Using the 50 Preset Songs (Part Cancel Function) The 50 preset songs have separate left- and right-hand parts the SONG [PLAY/PAUSE] button. NOTE Both parts are automatically turned ON whenever a new song is selected. Owner's Manual 17 - Yamaha YDP-181 | Owner's Manual - Page 18
to 50 Piano Preset Songs A-B Repeat for 50 Preset Songs The A-B Repeat function can be used to continuously letting the song play to the end. NOTE An automatic lead-in (to help guide you into the phrase) starts at the A point of the song. 2. Stop a new song is selected. Owner's Manual 18 - Yamaha YDP-181 | Owner's Manual - Page 19
MASTER VOLUME] slider for the most comfortable listening level. NOTE To learn characteristics of the voices, listen to demo songs for each voice (page 15). Refer to "Preset Voice List" on page 57 for more information musical instruments. Refer to "Preset Voice List" on page 57. Owner's Manual 19 - Yamaha YDP-181 | Owner's Manual - Page 20
pedal functions in the same way as a damper pedal on an acoustic piano. When the damper pedal is pressed, notes sustain longer. Releasing the pedal immediately stops (damps) any sustained notes. The damper pedal also features a naturally expressive half-pedal function. When DAMPER RES. is on, the - Yamaha YDP-181 | Owner's Manual - Page 21
BRILLIANCE] This control can be used to change the tonality or you to select various digital reverb effects that would add For a "bigger" reverb sound, use the HALL 1 setting. This spacious reverb sound, use the HALL 2 setting reverb depth for the selected voice by using the [-/NO] [+/YES] buttons - Yamaha YDP-181 | Owner's Manual - Page 22
adjust the effect depth for the selected voice by using the [-/NO] and [+/YES] buttons while holding the sustain sound of the damper pedal on a grand piano, as you press the damper pedal and play the Depth You can adjust the Damper Resonance depth by using the [-/NO] and [+/YES] buttons while holding - Yamaha YDP-181 | Owner's Manual - Page 23
fixed volume can be changed. NOTE This setting does not change the weight of the keyboard. NOTE Normal setting = MEDIUM NOTE The touch sensitivity select FIXED, you can set the volume for notes played in FIXED mode by using the [-/NO] and [+/YES] buttons while you hold the [TOUCH] button 's Manual 23 - Yamaha YDP-181 | Owner's Manual - Page 24
major, and the instrument will transpose it to F major. [TRANSPOSE] button [-/NO] [+/YES] buttons Procedure Use the [-/NO] and [+/YES] button while holding the [TRANSPOSE] button to transpose down or up as required. one octave) 0: normal pitch 12: 12 semitones (up one octave) Owner's Manual 24 - Yamaha YDP-181 | Owner's Manual - Page 25
conditions, one effect type may take priority over the other. Depth will be decided according to the depth default value of the voice combination. However, using function F3 (page 46) you can adjust the depth value for each voice to your liking. Owner - Yamaha YDP-181 | Owner's Manual - Page 26
ENGLISH Selecting & Playing Voices Using the Metronome The instrument features a built-in metronome (a device that keeps tempo. Adjusting the tempo The tempo of the metronome and user song recorder playback (the recorder is described in the next section) can be 47). Owner's Manual 26 - Yamaha YDP-181 | Owner's Manual - Page 27
) to the instrument. User songs can be saved to an optional USB storage device. Recording a performance quickly This convenient and simple recording method lets you quickly record your performance without specifying the recording parts - useful, for example, in recording solo piano pieces. In this - Yamaha YDP-181 | Owner's Manual - Page 28
, select the voice you want to record (or voices if you will be using Dual). Make any other desired settings (reverb, effect, etc.) as well. , including external songs (page 40). NOTE When the instrument is in Demo Song mode or during a file operation, Record mode cannot be engaged Manual 28 - Yamaha YDP-181 | Owner's Manual - Page 29
a part or when recording to another part, do so after you engage Record Ready mode. You cannot re-record in the middle of a song. Owner's Manual 29 - Yamaha YDP-181 | Owner's Manual - Page 30
left part while playing back the right, this is useful for recording both parts of a duet. Procedure 1. . Press the [SONG SELECT] button to light "USER" indicator on, then press the [-/NO][+/YES] with another Time Signature, first save a song to USB storage (see page 34), and delete the recorded both - Yamaha YDP-181 | Owner's Manual - Page 31
ENGLISH The user song recorder records Select a song to delete. Press the [SONG SELECT] button so that the USER indicator lights, then use the [-/NO][+/YES] buttons to select a song for deleting. 2. Engage Record NOTE The entire recorded user song cannot be deleted, but only selected parts. Owner - Yamaha YDP-181 | Owner's Manual - Page 32
via the panel controls. For example, if you wish to change the recorded voice from [E. PIANO 1] to [E. PIANO 2], press the [E. PIANO 2] button. 2. Engage Record mode and select a part to change the initial settings. The selected part. 3. Press the [REC] button to exit Record mode. Owner's Manual 32 - Yamaha YDP-181 | Owner's Manual - Page 33
Load If you want to only play the song in the USB storage device, the following operation is not necessary. For instructions on playing the song, see "Playing Back User Songs from a USB Storage Device" on page 42. The Load operation can be used if you want to edit the recorded song on the instrument - Yamaha YDP-181 | Owner's Manual - Page 34
Device Saving a Song 1 23 12 Procedure 1. Select a User song to save. Select a User song to save by using the [SONG SELECT] and [-/NO][+/YES] buttons. 2. Select a song container in the device and save the User song. After making sure that the USB storage device is connected to the instrument - Yamaha YDP-181 | Owner's Manual - Page 35
TO USER LED flash stops), do NOT unplug the USB cable, do NOT remove the media from the device, and do NOT turn the power off to either devices. Doing so may corrupt the data on either or both devices. Notice Do not manually change the file name on the USB storage device by using - Yamaha YDP-181 | Owner's Manual - Page 36
or is mounting the USB storage device (shortly after the connection: until the LOAD TO USER LED flash stops), do NOT unplug the USB cable, do NOT in the display. • Protected songs (extension: Cxx, Exx or SME) • Disklavier Piano Soft songs NOTE For SMF songs (Sxx), the song numbers are fixed and not - Yamaha YDP-181 | Owner's Manual - Page 37
Storage Device Notice If data is already saved to the USB storage device, be careful not to format it. If you and Format operations) or is mounting the USB storage device (shortly after the connection: until the LOAD TO USER LED flash stops), do NOT unplug the USB cable, do NOT remove the media from - Yamaha YDP-181 | Owner's Manual - Page 38
disk drive, hard disk drive, etc.) The instrument does not necessarily support all commercially available USB devices. Yamaha cannot guarantee operation of USB devices that you purchase. Before purchasing a USB device for use with this instrument, please visit the following web page: http://music - Yamaha YDP-181 | Owner's Manual - Page 39
organize the files as desired. Simply reconnect the device as shown below. Saves internal data to a USB storage device. Instrument USB [TO DEVICE] terminal USB storage device Disconnect the USB storage device from the instrument and connect it to the computer. Backing up data to a computer and - Yamaha YDP-181 | Owner's Manual - Page 40
Demo Songs page 15 Playing the voice demo tune. • 50 Piano Preset Songs page 16 50 Piano Preset Songs in the instrument. • User songs in the instrument page 41 User songs which you recorded to the instrument by using "1&2" (page 47). NOTE For the USB storage device, folder directories on this - Yamaha YDP-181 | Owner's Manual - Page 41
USER indicator lights). Then press the [-/NO] [+/YES] buttons to select a song. The User User song name means "User NOTE User song pianos, then playing use the repeat function. ALL: Play all External songs in sequence. rnd: Play all External songs continuously in random order. NOTE For instructions - Yamaha YDP-181 | Owner's Manual - Page 42
User Songs from a USB Storage Device 21 1 ENGLISH Procedure 1. Select the desired song in the USB storage device. After making sure that the device is connected to the instrument, press the [SONG SELECT] button (the USB Back User/External Songs on the Instrument" on page 41. Useful Playback - Yamaha YDP-181 | Owner's Manual - Page 43
Settings - [FUNCTION] Detailed Settings - [FUNCTION] You can set various parameters to make the best use of instrument functions, such as fine tuning the pitch or selecting a scale, etc. The F6.6 49 - F6.7 49 - F7.1 50 * F7.2 50 * F7.3 50 * F7.4 50 * F7.5 50 * Owner's Manual 43 - Yamaha YDP-181 | Owner's Manual - Page 44
.) Desired function Sub-mode 2. Select a function. Use the [TEMPO/FUNCTION ▼, ▲] buttons to select the cannot be selected during Demo/Song Select/ file operation mode or when the user song recorder is in The [TEMPO] indicator lights. 44 Owner's Manual NOTE After you select the function, the - Yamaha YDP-181 | Owner's Manual - Page 45
Use the [-/NO] and [+/YES] buttons to lower or raise the pitch of the A3 key in approximately 0.2 Hz increments. The value appears two-digit various scales. Equal Temperament is the most common contemporary piano tuning scale. However, history has known numerous other scales Owner's Manual 45 - Yamaha YDP-181 | Owner's Manual - Page 46
the Function mode and select . 2. Press the [+/YES] button to engage the Dual mode function's sub-mode, then use the [TEMPO/FUNCTION ▼, ▲] buttons to select the desired sub-mode. Press the [-/NO] [+/ YES] button to assign /FUNCTION] button so that the TEMPO indicator lights up. 46 Owner's Manual - Yamaha YDP-181 | Owner's Manual - Page 47
Press the [+/YES] button to engage the other functions' sub-mode, then use the [TEMPO/ FUNCTION ▼, ▲] buttons to select the desired sub-mode. ALL, 1&2 Normal setting: ALL The setting here only affects Disklavier Piano Soft songs, and non-protected External songs. You can specify which 's Manual 47 - Yamaha YDP-181 | Owner's Manual - Page 48
to engage the MIDI function's sub-mode, then use the [TEMPO/ FUNCTION ▼, ▲] buttons to select the channels 3 - 16 of Disklavier Piano Soft songs, and non-protected NOTE No MIDI reception occurs when Demo mode is engaged or during yamaha.co.jp/manual/ Setting range: ON/OFF Normal setting: ON 48 Owner - Yamaha YDP-181 | Owner's Manual - Page 49
an external MIDI device. NOTE For information on control changes that can be used with the instrument, refer to the MIDI Data Format in our manual library at the following website. http://www.yamaha.co.jp/manual/ Setting range: ON/OFF Normal setting: ON F7.6 Panel/Status Transmit This function - Yamaha YDP-181 | Owner's Manual - Page 50
will be used. (The factory setting default list is found on page 65.) However, the backup settings themselves, the contents of the user song recorder MIDI functions ( settings) (expect for the and ) 50 Owner's Manual Tuning • Transpose • Tuning ( settings) • Scale (including base note - Yamaha YDP-181 | Owner's Manual - Page 51
USB Storage Device" on page 38. 2 MIDI [IN] [OUT] terminals Use MIDI cables to connect external MIDI devices to these connectors. MIDI [IN]: Receives MIDI data. MIDI [OUT]: Transmits MIDI data. About MIDI MIDI (Musical Instrument Digital Direct URL: http://www.yamaha.co.jp/manual/ Owner's Manual 51 - Yamaha YDP-181 | Owner's Manual - Page 52
Please check the following URL for the latest version. http://music.yamaha.com/download/ NOTE For information on setting up your sequence software, refer to the owner's manual of the relevant software. OUT IN USB MIDI interface Computer Using a MIDI interface and the instrument's MIDI terminals - Yamaha YDP-181 | Owner's Manual - Page 53
between the Computer and the Instrument In addition to the demo songs and the 50 piano preset songs stored in this instrument, you can play You can download free Musicsoft Downloader from the Yamaha website. NOTE Do not manually change the file name by using a computer; doing so will render the file - Yamaha YDP-181 | Owner's Manual - Page 54
contains the panel settings. Also, if you store recorded User songs and the external songs in the instrument from the computer, move the songs from "Flash Memory" under "Electronic Musical Instruments" to the computer via the MSD. For instruction on using the MSD, see the Help in the MSD. To recall - Yamaha YDP-181 | Owner's Manual - Page 55
. Indicates that the song data is too large to be loaded. Displayed when the current operation is completed. Displayed when the MIDI/USB cable is disconnected while starting Musicsoft Downloader on a computer connected to the instrument. Indicates that internal memory has been cleaned up. Recorded - Yamaha YDP-181 | Owner's Manual - Page 56
ENGLISH Troubleshooting Troubleshooting Problem Possible USB storage device once, then reconnect it. Nothing is indicated in the LED display. Press the [-/NO] or [+YES] button and try again the operation again. Options BC-100 Bench A comfortable bench styled to match your Yamaha digital piano - Yamaha YDP-181 | Owner's Manual - Page 57
other style that requires acoustic piano. GRANDPIANO 2 Spacious and clear piano with bright reverb. Good for popular music. E.PIANO 1 An electronic piano sound created by FM synthesis. Good for standard popular music. E.PIANO 2 The sound of an electric piano using hammer-struck metallic "tines - Yamaha YDP-181 | Owner's Manual - Page 58
below. • Assembly should be carried out by at least two persons. • Be sure to use only the included screws of the specified sizes. Do not use any other screws. Use of incorrect screws x 2 Headphone hanger 4 x 10 mm thin screws x 2 Headphone hanger Power cord Adjuster (x 1) 58 Owner's Manual - Yamaha YDP-181 | Owner's Manual - Page 59
-tightening the long screws (6 x 20mm). 2-2 E D C 3. Attach B. Keyboard Stand Assembly 3-1 Place the lower side of B on each foot of D and E, then attach the each other, secure the bottom of B at each end using two tapping screws (4 x 20mm). 3-4 Insert the other two D B E C 4 Owner's Manual 59 - Yamaha YDP-181 | Owner's Manual - Page 60
ENGLISH Keyboard Stand Assembly 5. Mount A. Place your hands at least 10 cm from then clip the cord into the holders. 7-3 Use a vinyl tie to bundle the pedal cord. 7-4 For models that feature a voltage selector: Set the voltage selector to INLET. 7-1 A 7-3 6-2 7-2 7-5 7-4 60 Owner's Manual - Yamaha YDP-181 | Owner's Manual - Page 61
Keyboard Stand Assembly After completing the assembly, please check the following. • Are there any parts left over? Review the assembly procedure and , refer to the assembly diagrams and retighten all screws. 9. Attach the headphone hanger. Install the headphone hanger using included two screws (4 - Yamaha YDP-181 | Owner's Manual - Page 62
Piano 16 50 Piano Preset Songs 16 A A-B Repeat 18 Adjust Tempo (50 Piano Preset Songs 16 Tempo (Recorded Songs 41 Volume (50 Piano Preset Songs 16 Volume (Metronome 47 ALL (LED display 16, 42 Assembly Resonance 22 Delete (USB 37 Delete (User song 31 [DEMO] button 15 Demo Song List 57 - Yamaha YDP-181 | Owner's Manual - Page 63
, 41 [SPEAKER] switch 14 Specifications 64 Sync (Synchronized 42 Sync Start 17 Index T [TEMPO/FUNCTION] button 26 [TOUCH] button 23 Touch Sensitivity 23 Transporting 7 [TRANSPOSE] button 24 Transposition 24 Troubleshooting 56 U USB Storage Device 37 USB [TO DEVICE] terminal 51 V Voice - Yamaha YDP-181 | Owner's Manual - Page 64
0 & 1) SMF (Format 0) Yes 32-280 -12 to 0, 0 to +12 Yes 7 types User songs 300KB, External songs 639KB Optional 2 [IN][OUT] 1 20W x 2 16cm x 2 Owner's Manual, "50 greats for the Piano" Score Collection, My Yamaha Product User Registration, Bench (included or optional depending on locale) 64 Owner - Yamaha YDP-181 | Owner's Manual - Page 65
Yamaha le plus proche. * Las especificaciones y descripciones de este manual del propietario tienen sólo el propósito de servir como información. Yamaha DAMPER RES. Depth Metronome Metronome Time Signature Tempo Transpose Default GRAND PIANO 1 OFF NORMAL Preset for each voice Preset for each voice - Yamaha YDP-181 | Owner's Manual - Page 66
des informations plus détaillées sur la garantie de ce produit Yamaha et sur le service de garantie applicable dans l'ensemble de l'EEE ainsi qu'en ţei Yamaha din ţara dumneavoastră (pagina următoare). * SEE: Spaţiul Economic European URL_2 66 Owner's Manual http://europe.yamaha.com/warranty/ - Yamaha YDP-181 | Owner's Manual - Page 67
Yamaha Representative Offices in Europe e_list_2 Owner's Manual 67 - Yamaha YDP-181 | Owner's Manual - Page 68
will not result in harmful interference with other electronic devices. This equipment generates/uses radio frequencies and, if not installed and used according to the instructions found in the users manual, may cause interference harmful to the operation of other electronic devices. Compliance with - Yamaha YDP-181 | Owner's Manual - Page 69
Users on Collection and Disposal of Old Equipment This symbol on the products, packaging, and/or accompanying documents means that used electrical and disposal service or the point of sale where you purchased the items. [For business users in the European Union] If you wish to discard electrical and - Yamaha YDP-181 | Owner's Manual - Page 70
-8650 Tel: +81-53-460-3273 Yamaha Home Keyboards Home Page http://music.yamaha.com/homekeyboard/ Yamaha Manual Library http://www.yamaha.co.jp/manual/ U.R.G., Pro Audio & Digital Musical Instrument Division, Yamaha Corporation © 2010 Yamaha Corporation WT54870 002MWAP*.*-01A0 Printed in Vietnam
-
 1
1 -
 2
2 -
 3
3 -
 4
4 -
 5
5 -
 6
6 -
 7
7 -
8
-
9
-
10
-
11
-
12
-
13
-
14
-
15
-
16
-
17
-
18
-
19
-
20
-
21
-
22
-
23
-
24
-
25
-
26
-
27
-
28
-
29
-
30
-
31
-
32
-
33
-
34
-
35
-
36
-
37
-
38
-
39
-
40
-
41
-
42
-
43
-
44
-
45
-
46
-
47
-
48
-
49
-
50
-
51
-
52
-
53
-
54
-
55
-
56
-
57
-
58
-
59
-
60
-
61
-
62
-
63
-
64
-
65
-
66
-
67
-
68
-
69
-
70
 |
 |
Pour obtenir des informations sur l'assemblage du support du clavier, reportez-vous aux instructions
à la fin de ce manuel.
IMPORTANT
— Contrôler la source d'alimentation —
Vérifiez que la tension spécifiée sur le panneau inférieur correspond à la tension du secteur. Dans certaines
régions, l'instrument peut être équipé d'un sélecteur de tension situé sur le panneau inférieur du clavier à
proximité du cordon d'alimentation.
Vérifiez que ce sélecteur est bien réglé en fonction de la tension secteur de votre région. Le sélecteur de tension
est réglé sur 240 V au départ d'usine. Pour modifier ce réglage, utilisez un tournevis à lame plate pour tourner le
sélecteur afin de mettre l'indication correspondant à la tension de votre région vis à vis du repère triangulaire
situé sur le panneau.
Para información sobre el montaje del soporte del teclado, consulte las instrucciones al final de este
manual.
IMPORTANTE
— Verifique la alimentación de corriente —
Asegúrese de que tensión de alimentación de CA de su área corresponde con la tensión especificada en la
placa de características del panel inferior. En algunas zonas puede haberse incorporado un selector de tensión
en el panel inferior de la unidad del teclado principal, cerca del cable de alimentación. Asegúrese de que el
selector de tensión esté ajustado a la tensión de su área. El selector de tensión se ajusta a 240V cuando la
unidad sale de fábrica. Para cambiar el ajuste, emplee un destornillador de cabeza "recta" para girar el selector
de modo que aparezca la tensión correcta al lado del indicador del panel.
For information on assembling the keyboard stand, refer to the instructions at the end of this manual.
IMPORTANT
— Check your power supply —
Make sure that your local AC mains voltage matches the voltage specified on the name plate on the bottom
panel. In some areas a voltage selector may be provided on the bottom panel of the main keyboard unit near the
power cord. Make sure that the voltage selector is set for the voltage in your area. The voltage selector is set at
240V when the unit is initially shipped.
To change the setting use a "minus" screwdriver to rotate the selector dial so that the correct voltage appears
next to the pointer on the panel.
ES
FR
EN
Owner’s Manual
Mode d’emploi
Manual de Instrucciones
ENGLISH
FRANÇAIS
ESPAÑOL