Yamaha YDP-223 Owner's Manual
Yamaha YDP-223 Manual
 |
View all Yamaha YDP-223 manuals
Add to My Manuals
Save this manual to your list of manuals |
Yamaha YDP-223 manual content summary:
- Yamaha YDP-223 | Owner's Manual - Page 1
YDP-223 Digital piano Owner's Manual Bedienungsanleitung Mode d'emploi Manual de instrucciones Before using the YDP-223, be sure to read "Precautions„ on pages 6 -7. Achten Sie darauf, vor Einsatz des YDP-223 die "Vorsichtsmassnahmen„ auf Seite 6 -7 durchzulesen. Avant d'utiliser le YDP-223, lire - Yamaha YDP-223 | Owner's Manual - Page 2
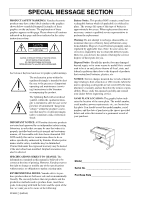
indicated in the safety instruction section. CAUTION RISK OF ELECTRIC SHOCK DO NOT OPEN CAUTION: TO REDUCE THE RISK OF ELECTRIC SHOCK. DO NOT REMOVE COVER (OR BACK). NO USER-SERVICEABLE PARTS INSIDE. REFER SERVICING TO QUALIFIED SERVICE PERSONNEL. See bottom of Keyboard enclosure for graphic symbol - Yamaha YDP-223 | Owner's Manual - Page 3
ENGLISH Thank you for purchasing the Yamaha YDP-223 Digital Piano! We recommend that you read this manual carefully so that you can fully take advantage of the advanced and convenient functions of the YDP-223. We also recommend that you keep this manual in a safe and handy place for future - Yamaha YDP-223 | Owner's Manual - Page 4
46 Connecting a Personal Computer 48 Troubleshooting 52 Options & Expander Modules 52 Keyboard Stand Assembly 53 Preset Voice List 56 Demo Song List 56 Index 57 Appendix Factory Setting List 60 MIDI Data Format 61 MIDI Implementation Chart 65 Specifications 66 4 YDP-223 Table of Contents - Yamaha YDP-223 | Owner's Manual - Page 5
..."AUX OUT jacks" on page 46 Outputting other instruments' sound from the YDP-223 AUX IN jacks" on page 47 Connecting a computer Connecting a Personal Computer" on page 48 Assembling Assembling and disassembling the YDP-223 Keyboard Stand Assembly" on pages page 53-55 YDP-223 Application Index 5 - Yamaha YDP-223 | Owner's Manual - Page 6
use of the instrument, or if any unusual smells or smoke should appear to be caused by it, immediately turn off the power switch, disconnect the electric plug from the outlet, and have the instrument inspected by qualified Yamaha service the instrument overheating. 6 YDP-223 PRECAUTIONS (1)B-7 1/2 - Yamaha YDP-223 | Owner's Manual - Page 7
or other objects into the gaps on the key cover, panel or keyboard. If this happens, turn off the power immediately and unplug the power cord from the AC outlet. Then have the instrument inspected by qualified Yamaha service personnel. ● Do not place vinyl, plastic or rubber objects on the instrument - Yamaha YDP-223 | Owner's Manual - Page 8
ENGLISH Accessories • "50 Greats for the Piano" (Music Book) • Owner's Manual This manual contains complete instructions for operating your YDP-223. • Bench A bench may be included or optional, depending on your locale. Maintenance Clean the instrument using a dry or slightly damp soft cloth (wring - Yamaha YDP-223 | Owner's Manual - Page 9
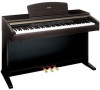
ENGLISH Features The Yamaha YDP-223 Digital Piano offers unmatched sonic realism and natural grand-piano type playability as well as Yamaha's original "AWM Stereo Sampling" tone-generation technology for rich, musical voices, and a special "Graded Hammer" keyboard that provides graded key weight - Yamaha YDP-223 | Owner's Manual - Page 10
remove. This could cause electric shock, short circuit, fi . 2. Raise the two metal supports (at the rear of the use the music rest in a half-raised position. When lowering the music rest, do not release your hands from the music rest until it is all the way down. 10 YDP-223 Before Using the YDP-223 - Yamaha YDP-223 | Owner's Manual - Page 11
Turning the Power On 1. Connect the power cord. Insert the plugs at the ends of the cord, one into the AC INLET on the YDP-223, and use the YDP-223 at a high volume level for a long period of time, or your hearing may be damaged. TERMINOLOGY MASTER VOLUME: The volume level of the entire keyboard - Yamaha YDP-223 | Owner's Manual - Page 12
OFF ON NORMAL HP. SW SPEAKER PHONES standard stereo phone plug Using the Headphone Hanger A headphone hanger is included in the YDP-223 package so that you can hang the headphones on the YDP-223. Install the headphone hanger using included two screws (4 × 10mm) as shown in the figure. CAUTION Do - Yamaha YDP-223 | Owner's Manual - Page 13
Song Part Cancel Volume 40 F7. MIDI Functions 41 F8. Backup Functions 44 About MIDI 45 Connections 46 Connectors 46 Connecting a Personal Computer 48 Troubleshooting 52 Options & Expander Modules 52 Keyboard Stand Assembly 53 Preset Voice List 56 Demo Song List 56 Index 57 YDP-223 13 - Yamaha YDP-223 | Owner's Manual - Page 14
PIANO 2 E.PIANO 1 E.PIANO 2 HARPSI- HARPSICHORD 1 CHORD 2 VIBRAPHONE CHURCH CHURCH ORGAN 1 ORGAN 2 JAZZ ORGAN STRINGS STRINGS 1 2 CHOIR GUITAR VOICE ROOM CHORUS HALL 1 PHASER HARD HALL 2 TREMOLO MEDIUM STAGE DELAY SOFT ON REVERB EFFECT TOUCH TRANSPOSE POWER YDP-223 Part Names - Yamaha YDP-223 | Owner's Manual - Page 15
OUT D L/L+R R L/L+R AUX IN E MIDI THRU OUT IN Mac MIDI PC-1 PC-2 TO HOST HOST SELECT FG H PEDAL I ENGLISH L M N G HOST SELECT P45-51 H MIDI [IN] [OUT] [THRU P45-51 I indication) A song number of "50 Greats for the Piano" Function number Parameter value YDP-223 Part Names 15 - Yamaha YDP-223 | Owner's Manual - Page 16
each of the YDP-223's voices. 25 4 3 MIN MAX MASTER VOLUME MELLOW BRIGHT START/STOP TEMPO FUNCTION BRILLIANCE DEMO METRONOME TEMPO / FUNCTION TEMPO/ OTHER VALUE - /NO +/ YES PRESET TRACK 1 TRACK START/STOP REC 2 SONG GRAND PIANO 1 GRAND E.PIANO E.PIANO HARPSI- HARPSI - Yamaha YDP-223 | Owner's Manual - Page 17
back (page 32), or when the user song recorder (page 28) is in use. TERMINOLOGY Song: On the YDP-223, performance data is called a "Song." This includes demonstration tunes and piano preset tunes. TIP You can play the keyboard along with the preset song. You can change the voice playing on the - Yamaha YDP-223 | Owner's Manual - Page 18
18-20. NOTE MIDI reception is not possible in Piano Song mode. Piano song data is not transmitted via the MIDI connectors. Practicing a One-Hand Part Using 50 Preset Songs (Part (factory setting) obtained when you first turn on the power to the YDP223. 18 YDP-223 Listening to 50 Piano Preset Songs - Yamaha YDP-223 | Owner's Manual - Page 19
keyboard. Left Pedal Start/Stop The left pedal can be assigned to start and stop preset song playback via the "Left Pedal Mode" function described on page 40. 3. Stop playback. When playback is complete, it automatically stops and the YDP-223 ENGLISH YDP-223 Listening to 50 Piano Preset Songs 19 - Yamaha YDP-223 | Owner's Manual - Page 20
cannot be used during " guide you into the phrase) starts at the A point of the song. However, when the A point is set at the beginning of the song, the automatic lead-in is not played. NOTE The A and B points are automatically canceled when a new song is selected. 20 YDP-223 Listening to 50 Piano - Yamaha YDP-223 | Owner's Manual - Page 21
level. Using the Pedals The YDP-223 has three foot pedals that produce a range of expressive effects similar to those produced by the pedals on an acoustic piano. Damper work, make sure that the pedal cord is properly plugged into the main unit (page 54). YDP-223 Selecting & Playing Voices 21 - Yamaha YDP-223 | Owner's Manual - Page 22
play a note or chord on the keyboard and press the sostenuto pedal while the effect will be applied when the GRAND PIANO 1 voice is selected. Adjusting Reverb Depth Adjust the reverb depth for the selected voice by using the [-/NO] [+/YES] buttons while voice. 22 YDP-223 Selecting & Playing Voices - Yamaha YDP-223 | Owner's Manual - Page 23
all indicators are off. Adjusting Effect Depth You can adjust the effect depth for the selected voice by using the [-/NO] and [+/YES] buttons while holding the [EFFECT] button. The depth range is from TIP Default depth settings are different for each voice. YDP-223 Selecting & Playing Voices 23 - Yamaha YDP-223 | Owner's Manual - Page 24
voices that are not normally responsive to keyboard dynamics. (Refer to the "Preset Voice SONG GRAND PIANO 1 GRAND E.PIANO E.PIANO HARPSI- HARPSI- VIBRA- PIANO 2 1 the volume for notes played in FIXED mode by using the [-/NO] and [+/YES] buttons while you hold YDP-223 Selecting & Playing Voices - Yamaha YDP-223 | Owner's Manual - Page 25
after that switches the transpose function ON or OFF. TERMINOLOGY Transpose: Changing the key signature of a song. On the YDP-223, transposing shifts the pitch of the entire keyboard. TIP The transposition range: -12: -12 semitones (down one octave) 0: normal pitch 12: 12 semitones (up one octave - Yamaha YDP-223 | Owner's Manual - Page 26
range of the keyboard. In this PIANO 1 GRAND E.PIANO E.PIANO HARPSI- HARPSI- VIBRA- PIANO 2 1 2 CHORD1 CHORD2 PHONE CHURCH CHURCH ORGAN1 ORGAN2 JAZZ STRINGS STRINGS ORGAN 1 2 CHOIR GUITAR VOICE 8 9 10 11 12 13 14 The YDP-223 the voice combination. However, using function F3 (page 39) - Yamaha YDP-223 | Owner's Manual - Page 27
ENGLISH Using the Metronome The YDP-223 features a built-in metronome (a device that keeps an accurate tempo) that +/ YES PRESET TRACK 1 TRACK START/STOP REC 2 SONG GRAND PIANO 1 GRAND PIANO 2 E.PIANO E.PIANO 1 2 HARPSI- HARPSICHORD1 CHORD2 VIBRAPHONE CHURCH CHURCH ORGAN1 ORGAN2 JAZZ - Yamaha YDP-223 | Owner's Manual - Page 28
YDP-223 keyboard YDP-223. A cassette tape records audio signals. The YDP223 PIANO 1 GRAND E.PIANO E.PIANO HARPSI- HARPSI- PIANO power on for a few minutes at least once a week. It is also possible to store the data to an external MIDI storage device such as the Y amaha MIDI Data Filer MDF3 by using - Yamaha YDP-223 | Owner's Manual - Page 29
red. 4. Start recording. Recording will begin automatically as soon as you play a note on the keyboard or press the SONG [START/STOP] button. The current measure number will appear on the display while (step 2). NOTE You cannot re-record in the middle of a song. YDP-223 Recording Your Performance 29 - Yamaha YDP-223 | Owner's Manual - Page 30
in red. 3. Select a recording track. Select a track that you have not already used for recording. The selected track's indicator lights up red. (The indicator of a track that Time signature (beat) • [REVERB] type (including OFF) • [EFFECT] type (including OFF) 30 YDP-223 Recording Your Performance - Yamaha YDP-223 | Owner's Manual - Page 31
change the recorded voice from [E. PIANO 1] to [E. PIANO 2], press the [E. PIANO 2] button. Be careful not to press the SONG [START/STOP] button or a key on the keyboard, either of which will start made to the data shared by two tracks are also canceled.) YDP-223 Recording Your Performance 31 - Yamaha YDP-223 | Owner's Manual - Page 32
You can use the [TEMPO/FUNCTION# ▼, ▲] buttons to adjust the playback tempo as required before or during playback. The default tempo (the song's original tempo) is set when you press the [▼] and [▲] buttons simultaneously. 2. Stop playback. When playback is complete, the YDP-223 automatically stops - Yamaha YDP-223 | Owner's Manual - Page 33
YDP-223 is playing or stopped, pressing these track buttons turns off the indicators, and the data on those tracks is not played. Pressing the track buttons toggles track playback on and off. Starting playback automatically when you start playing the keyboard keyboard. This function is useful Piano" - Yamaha YDP-223 | Owner's Manual - Page 34
best use of YDP-223 functions, such as fine tuning the pitch, selecting a voice for the metronome, repeating playback, etc. The following parameters are available. The YDP-223 Mode Soft Pedal Effect Depth - - MIDI Transmit Channel Selection MIDI Receive Channel Selection Local Control ON/OFF Program - Yamaha YDP-223 | Owner's Manual - Page 35
TRACK 1 TRACK START/STOP REC 2 SONG GRAND PIANO 1 GRAND PIANO 2 E.PIANO E.PIANO 1 2 HARPSI- HARPSICHORD1 CHORD2 VIBRAPHONE CHURCH CHURCH Depending on the setting, the default setting (which is used when you first turn on the power to the YDP-223) is recalled by pressing the [-/NO] and [+/ - Yamaha YDP-223 | Owner's Manual - Page 36
the respective sub-mode. - /NO +/ YES Select a desired sub-mode. LCD indication Change the value. 5. Do the following when you finish using the func- tion. To exit Function mode, press the [TEMPO/FUNCTION#] button so that its [TEMPO] indicator lights. 36 YDP-223 Detailed Settings - [FUNCTION] - Yamaha YDP-223 | Owner's Manual - Page 37
. This function is useful when you play the YDP-223 along with other instruments or CD music. 1. Engage Function mode and select . 2. Use the [-/NO] and of times a sound wave vibrates in a second. TIP You can also use the keyboard to set the pitch (in any mode other than Function mode). To tune - Yamaha YDP-223 | Owner's Manual - Page 38
genres of music. You can experience these tunings with the YDP-223. Equal One octave is divided into twelve equal intervals. Currently the most popular piano tuning scale. PureMajor/PureMinor Based on natural overtones, three major chords using these scales produce a beautiful, pure sound. They are - Yamaha YDP-223 | Owner's Manual - Page 39
mode and select . 2. Press the [+/YES] button to engage the Dual mode function's sub-mode, then use the [TEMPO/FUNCTION# ▼, ▲] buttons to select the desired sub-mode. Press the [-/NO] [+/ YES] FUNCTION#] button so that the TEMPO indicator lights up. YDP-223 Detailed Settings - [FUNCTION] 39 - Yamaha YDP-223 | Owner's Manual - Page 40
the other functions' sub-mode, then use the [TEMPO/ FUNCTION# ▼, ▲] buttons use the "canceled" part as a guide with which to play along. 1. Engage Function mode and select . 2. Use the [-/NO] and [+/YES] buttons to set the volume as required. Setting range: 0 - 20 Normal setting: 5 40 YDP-223 - Yamaha YDP-223 | Owner's Manual - Page 41
mode and select . 2. Press the [+/YES] button to engage the MIDI function's sub-mode, then use the [TEMPO/ FUNCTION# ▼, ▲] buttons to select the desired sub- received will not affect the YDP-223's panel settings or the notes you play on the keyboard. NOTE No MIDI reception occurs when Demo/Preset - Yamaha YDP-223 | Owner's Manual - Page 42
.) to be transmitted via the MIDI OUT terminal. This is particularly useful if you will be recording performances to a MIDI sequence recorder, such as the Yamaha MIDI Data Filer MDF3, which will be used to control the YDP-223 on playback. By transmitting the YDP-223 panel settings and recording them - Yamaha YDP-223 | Owner's Manual - Page 43
data to be accepted, the YDP-223 that receives the data should be the same model as the one from which the data was once transmitted to the MIDI data filer.) NOTE The reload bulk data via MIDI, refer to the owner's manual for the connected MIDI device. YDP-223 Detailed Settings - [FUNCTION] 43 - Yamaha YDP-223 | Owner's Manual - Page 44
use MIDI The MIDI original factory preset values by holding the C7 key (right-most key on the keyboard) while turning the [POWER] button ON. This also erases all user song recorder data, and sets all backup on/off settings (F8) to "OFF". (The factory setting list is found on page 60.) 44 YDP-223 - Yamaha YDP-223 | Owner's Manual - Page 45
MIDI MIDI (Musical Instrument Digital Interface) is a standard format for data transmission/reception. It enables the transfer of performance data and commands between MIDI devices and personal computers. Using MIDI, you can control a connected MIDI device from the YDP223, or control the YDP-223 - Yamaha YDP-223 | Owner's Manual - Page 46
ENGLISH Connections Connectors CAUTION Before connecting the YDP-223 to other electronic components, turn off the power to all the components. Before turning the power on or off to all components, set all volume levels to minimum (0). Otherwise, electrical shock or damage to the components may - Yamaha YDP-223 | Owner's Manual - Page 47
external MIDI devices to these connectors. Make sure you set the HOST SELECT switch to MIDI when you use these connectors. (Refer to "About MIDI" on page 45 for more information.) 6 PEDAL jack Connect the pedal cord from the pedal box. (Refer to "Keyboard Stand Assembly" on pages 53-55.) YDP-223 - Yamaha YDP-223 | Owner's Manual - Page 48
, it applies equally to the YDP-223 digital piano). The document is available as a PDF file (in English) at the following Internet address: Clavinova Web site (English only): http://www.yamahaclavinova.com/ Yamaha Manual Library: http://www2.yamaha.co.jp/manual/english/ There are three methods - Yamaha YDP-223 | Owner's Manual - Page 49
) RS-232C (D-sub 25-pin) modem port Note for Windows users (regarding the MIDI driver) To transfer data via the computer's serial port and the YDP-223's TO HOST jack, you need to install a specific MIDI driver (the Yamaha CBX driver for Windows). You can download this driver from the following XG - Yamaha YDP-223 | Owner's Manual - Page 50
manual and set the HOST SELECT switch to the proper data transfer rate. (Data transfer rate of "PC-1" is 31,250bps.) 2. Using a MIDI interface and the YDP-223's MIDI connectors Connection Use a MIDI interface device to connect a computer to the YDP-223 using special MIDI cables. YDP-223 MIDI - Yamaha YDP-223 | Owner's Manual - Page 51
) on the computer, and connect the USB interface to the YDP-223 using a serial cable or MIDI cables. For more information, refer to the instruction manual for the USB interface. An example of connecting the USB interface to the YDP-223 using a serial cable computer USB cable PC-1 or Mac TO HOST - Yamaha YDP-223 | Owner's Manual - Page 52
is heard when the power is turned on or off. This is normal when electrical current is being applied to the instrument. Noise is heard from the speakers or headphones. The noise may be due to interference caused by the use of a mobile phone in close proximity to the YDP-223. Turn off the mobile - Yamaha YDP-223 | Owner's Manual - Page 53
Pedal box Bundled pedal cord inside AC power cord TIP A headphone hanger is included in the YDP-223 package. You can attach a headphone hanger on the YDP-223 to hang the headphones (page 12). the rear panel to the pedal box using four 4×20 mm tapping screws 4. YDP-223 Keyboard Stand Assembly 53 - Yamaha YDP-223 | Owner's Manual - Page 54
right sides. 6. Set the voltage selector and connect the power cord. 220 (2) Use 6x16 mm short screws 2 to secure the main unit from the front. 54 YDP-223 Keyboard Stand Assembly 240 Voltage Selector Before connecting the AC power cord, check the setting of the voltage selector which is provided - Yamaha YDP-223 | Owner's Manual - Page 55
it is set firmly against the floor. • Are the pedal and power cords inserted securely into the sockets? ➝ Check the connection. • If the main unit creaks or is otherwise unsteady when you play on the keyboard, refer to the assembly diagrams and retighten all screws. When moving the instrument after - Yamaha YDP-223 | Owner's Manual - Page 56
Composer GRAND PIANO1 Consolation No.3 F. Liszt HARPSICHORD1 HARPSICHORD2 Gavotte Invention No.1 J.S. Bach The demonstration pieces listed above are short rearranged excerpts the original compositions. All other songs are original (©2002 Yamaha Corporation). 56 YDP-223 Preset Voice List - Yamaha YDP-223 | Owner's Manual - Page 57
14, 27 Metronome Volume 40 MIDI 45 MIDI [IN] [OUT] [THRU 15, 47 MIDI cables 45, 50, 51 MIDI connectors 45, 50 MIDI Data Format 61 MIDI driver 49 MIDI Functions 41 Music Rest 10 P PEDAL jack 14, 47 PHONES 12, 15 Pitch ➝ Fine Tuning of the Pitch 37 POWER 11, 14 YDP-223 Index 57 ENGLISH - Yamaha YDP-223 | Owner's Manual - Page 58
Piano Preset Songs 17 Demonstration Tunes 16 Recorded Songs 32 Useful Playback Functions 33 Start/Stop recording 29 Synchro Start 50 Piano Off 33 TRACK1/2 (50 Piano Preset Songs 18 TRACK1/2 (Recording 29 58 YDP-223 Index Transporting 8 TRANSPOSE 14, 25 Troubleshooting 52 Tuning ➝ Fine - Yamaha YDP-223 | Owner's Manual - Page 59
Format / MIDI-Datenformat / Format des données MIDI / Formato de datos MIDI 61 MIDI Implementation Chart / MIDI Implementierung stabelle / Feuille d'implantation MIDI / Gráfica de implementación MIDI 65 Specifications / Technische Daten / Caractéristiques techniques / Especificaciones 66 YDP-223 59 - Yamaha YDP-223 | Owner's Manual - Page 60
Cancel Volume MIDI Transmit Channel MIDI Receive Channel Local Control Program Change Send & Receive Control Change Send & Receive MIDI Transmit Transpose Backup Default GRAND PIANO 1 OFF 0 All OFF Backup Group F8.3 F8.1 F8.4 F8.1 F8.2 Always backed up 60 YDP-223 Appendix/Anhang/Annexe/Apéndice - Yamaha YDP-223 | Owner's Manual - Page 61
MIDI / Formato de datos MIDI If you're already very familiar with MIDI, or are using a computer to control your music hardware with computergener-ated MIDI messages, the data provided in this section can help you to control the YDP-223. Falls Sie bereits mit MIDI exceeds the supported range for - Yamaha YDP-223 | Owner's Manual - Page 62
number GRANDPIANO 1 GRANDPIANO 2 E.PIANO 1 E.PIANO 2 HARPSICHORD 1 HARPSICHORD 2 occurs. 6. SYSTEM EXCLUSIVE MESSAGES (Yamaha MIDI Format) Panel Data Transmit Data 43H, 4CH, 20H, 20H (Model Name) 43H, 4CH, 50H, 27H, 30H, 32H (Model Name) 30H, 30H (version x, YDP-223 Appendix/Anhang/Annexe/Apéndice - Yamaha YDP-223 | Owner's Manual - Page 63
Exclusive status 43H = YAMAHA ID 1nH = When received, n=0~F. When transmitted, n=0. 4CH = Model ID of XG hhH Yamaha ID 73H = Digital Piano ID 01H = Product ID (YDP common) or 7F= Extended Product ID xxH = Product ID (YDP-223: 25H) nnH = Substatus nn Control 02H Internal MIDI clock 03H External MIDI - Yamaha YDP-223 | Owner's Manual - Page 64
1 01H 10H HALL 2 01H 11H STAGE 03H 10H Sound board 03H 12H Refer to Effect MIDI Map 00 : basic type 00(=Effect off) 00 Description 0 - 127 Default value (H) 7F EFFECT MSB LSB CHORUS 42H 10H PHASER 48H 10H TREMOLO 46H 10H DELAY 05H 10H 64 YDP-223 Appendix/Anhang/Annexe/Apéndice - Yamaha YDP-223 | Owner's Manual - Page 65
Implementation Chart YAMAHA [Digital Piano] Model: YDP-223 MIDI Implementation Chart Function 94 1 1 - 16 3 X 9 - 120 O 9nH, v=1 - 127 O 9nH, v=0 X X X O O O O O O O O Date: 10 May, 2002 Version: 1.0 Recognized Remarks 1 1 - 16 1 *1 X Poly Mode only X 0 - 127 0 - 127 O 9nH, v=1 - - Yamaha YDP-223 | Owner's Manual - Page 66
Keyboard Dimensions (W × D × H) (with music rest) 1370mm × 518mm × 850mm [53 15/16" × 20 3/8" × 33 7/16"] (1370mm × 518mm × 1022mm) [53 15/16" × 220 3/8" × 40 1/4"] Weight 51kg (112lbs., 7oz) Accessories Owner's Manual, "50 greats for the Piano Yamaha. 66 YDP-223 Appendix/Anhang/Annexe/Apéndice - Yamaha YDP-223 | Owner's Manual - Page 67
MEMO YDP-223 67 - Yamaha YDP-223 | Owner's Manual - Page 68
MEMO 68 YDP-223 - Yamaha YDP-223 | Owner's Manual - Page 69
, Spe- cial Message Section items, and any Assembly Instructions found in this manual BEFORE making any connections, including connection to the main supply. 2. Main Power Supply Verification: Yamaha products are 8. This product was NOT designed for use in wet/damp loca- tions and should not - Yamaha YDP-223 | Owner's Manual - Page 70
instructions contained in this manual, meets FCC requirements. Modifications not expressly approved by Yamaha may void your authority, granted by the FCC, to use eliminate the problem by using one of the following distributed by Yamaha-Kemble Music (U.K.) Ltd. CAUTION: TO PREVENT ELECTRIC SHOCK, - Yamaha YDP-223 | Owner's Manual - Page 71
Yamaha Yamaha SWEDEN Yamaha av Yamaha Scandinavia Yamaha Europa GmbH. Siemensstraße 22-34, 25462 Rellingen, Germany Tel: 04101-3030 AFRICA Yamaha Yamaha Europa GmbH. Siemensstraße 22-34, 25462 Rellingen, Germany Tel: 04101-3030 OTHER COUNTRIES Yamaha Yamaha Yamaha Yamaha Corporation, Asia Yamaha Yamaha - Yamaha YDP-223 | Owner's Manual - Page 72
Yamaha Manual Library http://www2.yamaha.co.jp/manual/english/ M.D.G., Pro Audio & Digital Musical Instrument Division, Yamaha Corporation ©2002 Yamaha Corporation V966830 20?AP???.?-01A0 Printed in Indonesia
-
 1
1 -
 2
2 -
 3
3 -
 4
4 -
 5
5 -
 6
6 -
 7
7 -
8
-
9
-
10
-
11
-
12
-
13
-
14
-
15
-
16
-
17
-
18
-
19
-
20
-
21
-
22
-
23
-
24
-
25
-
26
-
27
-
28
-
29
-
30
-
31
-
32
-
33
-
34
-
35
-
36
-
37
-
38
-
39
-
40
-
41
-
42
-
43
-
44
-
45
-
46
-
47
-
48
-
49
-
50
-
51
-
52
-
53
-
54
-
55
-
56
-
57
-
58
-
59
-
60
-
61
-
62
-
63
-
64
-
65
-
66
-
67
-
68
-
69
-
70
-
71
-
72
 |
 |
YDP-223
Digital piano
Owner's Manual
Bedienungsanleitung
Mode d'emploi
Manual de instrucciones
Before using the YDP-223, be sure to read
“
Precautions
„
on pages 6-7.
Achten Sie darauf, vor Einsatz des YDP-223 die
“
Vorsichtsmassnahmen
„
auf Seite 6-7 durchzulesen.
Avant d'utiliser le YDP-223, lire attentivement la section
«
Precautions
d'usage
»
aux pages 6-7.
Antes de utilizar el YDP-223, lea las
“
Precauciones
„
que debe tener en
cuenta en las páginas 6-7.
IMPORTANT
Check your power supply
Make sure that your local AC mains voltage matches the voltage specified
on the name plate on the bottom panel. In some areas a voltage selector
may be provided on the bottom panel of the main keyboard unit near the
power cord. Make sure that the voltage selector is set for the voltage in
your area. The voltage selector is set at 240V when the unit is initially
shipped. To change the setting use a "minus" screwdriver to rotate the
selector dial so that the correct voltage appears next to the pointer on the
panel.
WICHTIG
Überprüfung der Stromversorgung
Vergewissern Sie sich vor dem Anschließen an das Stromnetz, daß die
örtliche Netzspannung den Betriebsspannungswerten auf dem Typenschild
an der Unterseite des Instruments entspricht. In bestimmten
Verkaufsgebieten ist das Instrument mit einem Spannungswähler an der
Unterseite neben der Netzkabeldurchführung ausgestattet. Falls vorhanden,
muß der Spannungswähler auf die örtliche Netzspannung eingestellt
werden. Der Spannungswähler wurde werkseitig auf 240 V voreingestellt.
Zum Verstellen drehen Sie den Spannungsregler mit einem
Schlitzschraubendreher, bis der Zeiger auf den korrekten Spannungswert
weist.
IMPORTANT
Contrôler la source d'alimentation
Vérifiez que la tension spécifiée sur le panneau inférieur correspond
à la
tension du secteur. Dans certaines régions, l'instrument peut être équipé
d'un sélecteur de tension situé sur le panneau inférieur du clavier à
proximité du cordon d'alimentation.
Vérifiez que ce selécteur est bien réglé en fonction de la tension secteur de
votre région. Le sélecteur de tension est réglé sur 240 V au départ d'usine.
Pour modifier ce réglage, utilisez un tournevis à lame plate pour tourner le
sélecteur afin de mettre l'indication correspondant à la tension de votre
région vis à vis du repère triangulaire situé sur le panneau.
IMPORTANTE
Verifique la alimentación de corriente
Asegúrese de que tensión de alimentación de CA de su área corresponde
con la tensión especificada en la placa de características del panel inferior.
En algunas zonas puede haberse incorporado un selector de tensión en el
panel inferior de la unidad del teclado principal, cerca del cable de
alimentación. Asegúrese de que el selector de tensión esté ajustado a la
tensión de su área. El selector de tensión se ajusta a 240V cuando la unidad
sale de fábrica. Para cambiar el ajuste, emplee un destornillador de cabeza
"recta" para girar el selector de modo que aparezca la tensión correcta al
lado del indicador del panel.