Yamaha YSP-3050 Owner's Manual - Page 86
Input Menu
 |
UPC - 027108930282
View all Yamaha YSP-3050 manuals
Add to My Manuals
Save this manual to your list of manuals |
Page 86 highlights
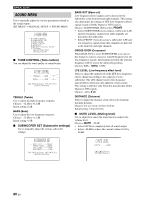
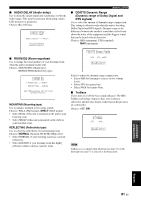
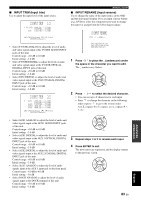
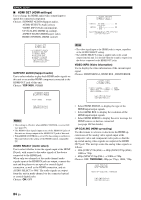
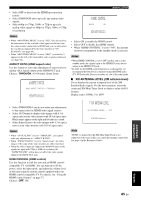
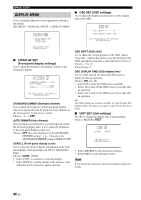
p p p p MANUAL SETUP INPUT MENU Use to manually adjust the various parameters related to the audio and video input. SET MENU → MANUAL SETUP → INPUT MENU 3)INPUT MENU . A)INPUT ASSIGNMENT B)INPUT MODE C)INPUT TRIM D)INPUT RENAME E)HDMI SET F)XM ANTENNA LEVEL [ ]/[ ]:Up/Down [ENTER]:Enter ■ INPUT ASSIGNMENT (Input assignment) Use to assign the HDMI IN jacks of this unit to other components if the initial settings of this unit do not correspond to your needs. By assigning other components to the HDMI IN jacks of this unit, you can display the names of the connected components in the front panel display and OSD and operate the components with the input selector buttons of the same name. If you connect a component to one of the HDMI IN jacks of this unit and do not assign a name to it, the default component name for HDMI IN jack is displayed in the front panel and OSD when selected. • Select HDMI1 to assign a component to the HDMI AUX 1 IN jack of this unit. Choices: TV/STB, DVD, AUX1, AUX2 • Select HDMI2 to assign a component to the HDMI DVD IN jack of this unit. Choices: DVD, AUX1, AUX2, TV/STB • A)INPUT ASSIGNMENT 1/3 HDMI . HDMI1;;;; TV/STB ( TV/STB ) HDMI2;;;; DVD ( DVD ) p [ ]/[ ]:Up/Down [ ]/[ ]:Sel [ENTER]:Return p p p p p p p • Select COMPONENT to assign a component to the COMPONENT VIDEO INPUT jack of this unit. Choices: DVD, AUX1, AUX2, TV/STB • A)INPUT ASSIGNMENT 2/3 COMPONENT . Line1;;;; DVD ( DVD ) p [ ]/[ ]:Up/Down [ ]/[ ]:Sel [ENTER]:Return • • Select COMPOSITE to assign a component to the VIDEO INPUT jack of this unit. Choices: TV/STB, DVD, AUX1, AUX2 A)INPUT ASSIGNMENT 3/3 COMPOSITE . Line2;;;; TV/STB ( TV/STB ) p [ ]/[ ]:Up/Down [ ]/[ ]:Sel [ENTER]:Return p p ■ INPUT MODE (Input mode) Use to designate the input mode for the input sources connected to the DIGITAL INPUT jacks when you turn on the power of this unit. For information on the types of audio signals that can be output by this unit, see "Selecting the input mode" on page 90. Choices: AUTO, LAST B)INPUT MODE AUTO LAST p [ ]/[ ]:Select [ENTER]:Return • Select AUTO to set this unit to automatically detect the • type of input signals and select the appropriate input mode. • Select LAST to set this unit to automatically select the last input mode used for that input source. If the type of input signals is different from the setting, no sounds will be produced. 82 En
-
 1
1 -
2
-
3
-
4
-
5
-
6
-
7
-
8
-
9
-
10
-
11
-
12
-
13
-
14
-
15
-
16
-
17
-
18
-
19
-
20
-
21
-
22
-
23
-
24
-
25
-
26
-
27
-
28
-
29
-
30
-
31
-
32
-
33
-
34
-
35
-
36
-
37
-
38
-
39
-
40
-
41
-
42
-
43
-
44
-
45
-
46
-
47
-
48
-
49
-
50
-
51
-
52
-
53
-
54
-
55
-
56
-
57
-
58
-
59
-
60
-
61
-
62
-
63
-
64
-
65
-
66
-
67
-
68
-
69
-
70
-
71
-
72
-
73
-
74
-
75
-
76
-
77
-
78
-
79
-
80
-
 81
81 -
 82
82 -
 83
83 -
 84
84 -
 85
85 -
 86
86 -
 87
87 -
 88
88 -
 89
89 -
 90
90 -
 91
91 -
92
-
93
-
94
-
95
-
96
-
97
-
98
-
99
-
100
-
101
-
102
-
103
-
104
-
105
-
106
-
107
-
108
-
109
-
110
-
111
-
112
-
113
-
114
-
115
-
116
-
117
-
118
 |
 |