Zenith DVR313 Operating Guide - Page 24
Recording, Before Operation Continued
 |
UPC - 044642302436
View all Zenith DVR313 manuals
Add to My Manuals
Save this manual to your list of manuals |
Page 24 highlights
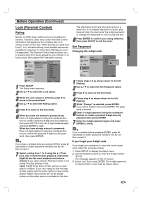
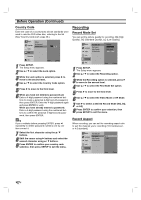
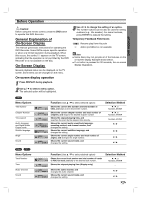
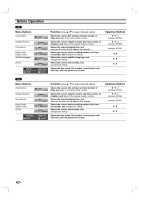
Before Operation (Continued) Country Code Enter the code of a country/area whose standards were used to rate the DVD video disc, referring to the list (See "Country Code List", page 48.). Setup Language Audio Rating Set Password Country Code Lock Recording Disc US Prev. Select 1 Press SETUP. The Setup menu appears. 2 Use v / V to select the Lock option. 3 While the Lock option is selected, press B to move to the second level. 4 Use v / V to select the Country Code option. 5 Press B to move to the third level. 6 When you have not entered a password yet. Enter a 4-digit password using the numbered buttons to create a personal 4-digit security password, then press ENTER. Enter the 4-digit password again and press ENTER to verify. When you have already entered a password; Enter a 4-digit password using the numbered buttons to confirm the personal 4-digit security password, then press ENTER. ip If you a mistake before pressing ENTER, press b repeatedly to delete password numbers one by one then correct it. 7 Select the first character using the v / V buttons. 8 Shift the cursor using B buttons and select the second character using v / V buttons. 9 Press ENTER to confirm your country code selection, then press SETUP to exit the menu. Recording Record Mode Set You can set the picture quality for recording; HQ (High Quality), SQ (Standard Quality), LQ (Low Quality). Setup Language Audio Rec Mode Set Rec Aspect Auto Chapter DV Rec Audio Lock Recording Disc VR Mode SQ Video Mode SQ Prev. Select 1 Press SETUP. The Setup menu appears. 2 Use v / V to select the Recording option. 3 While the Recording option is selected, press B to move to the second level. 4 Use v / V to select the Rec Mode Set option. 5 Press B to move to the third level. 6 Use v / V to select the Video Mode or VR Mode. 7 Use B to select a desired Record Mode (HQ, SQ, or LQ) 8 Press ENTER to confirm your selection, then press SETUP to exit the menu. Record Aspect When recording, you can set the recording aspect ratio to suit the material you're recording (16:9 widescreen, or 4:3 standard). Setup Language Audio Rec Mode Set Rec Aspect Auto Chapter DV Rec Audio Lock Recording Disc 4:3 16:9 Prev. Select 24
-
 1
1 -
2
-
3
-
4
-
5
-
6
-
7
-
8
-
9
-
10
-
11
-
12
-
13
-
14
-
15
-
16
-
17
-
18
-
 19
19 -
 20
20 -
 21
21 -
 22
22 -
 23
23 -
 24
24 -
 25
25 -
 26
26 -
 27
27 -
 28
28 -
 29
29 -
30
-
31
-
32
-
33
-
34
-
35
-
36
-
37
-
38
-
39
-
40
-
41
-
42
-
43
-
44
-
45
-
46
-
47
-
48
-
49
-
50
-
51
-
52
 |
 |
