Zenith SL-6199-B User Guide - Page 3
Code and Tune Settings
 |
UPC - 016963619906
View all Zenith SL-6199-B manuals
Add to My Manuals
Save this manual to your list of manuals |
Page 3 highlights
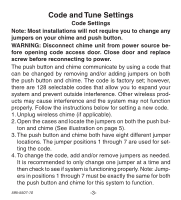
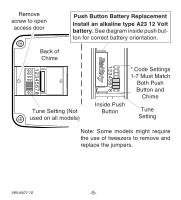
Code and Tune Settings Code Settings Note: Most installations will not require you to change any jumpers on your chime and push button. WARNING: Disconnect chime unit from power source before opening code access door. Close door and replace screw before reconnecting to power. The push button and chime communicate by using a code that can be changed by removing and/or adding jumpers on both the push button and chime. The code is factory set; however, there are 128 selectable codes that allow you to expand your system and prevent outside interference. Other wireless products may cause interference and the system may not function properly. Follow the instructions below for setting a new code. 1. Unplug wireless chime (if applicable). 2. Open the cases and locate the jumpers on both the push but- ton and chime (See illustration on page 5). 3. The push button and chime both have eight different jumper locations. The jumper positions 1 through 7 are used for setting the code. 4. To change the code, add and/or remove jumpers as needed. It is recommended to only change one jumper at a time and then check to see if system is functioning properly. Note: Jumpers in positions 1 through 7 must be exactly the same for both the push button and chime for this system to function. 595-5507-10 -3-
-
 1
1 -
 2
2 -
 3
3 -
 4
4 -
 5
5 -
 6
6 -
 7
7 -
 8
8 -
 9
9 -
10
-
11
-
12
-
13
-
14
-
15
-
16
-
17
-
18
-
19
-
20
-
21
-
22
-
23
-
24
 |
 |
