2011 Chrysler Town & Country User Guide - Page 69
2011 Chrysler Town & Country Manual

Page 69 highlights
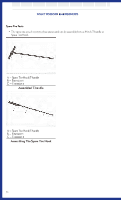
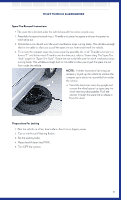
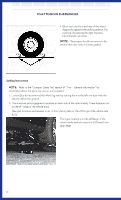
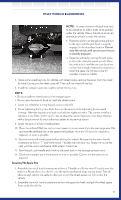
WHAT TO DO IN EMERGENCIES NOTE: In some situations the jack may need to be placed on its side in order to be pushed under the vehicle. Return the jack to its correct orientation once it is under the vehicle. 3. Place the wrench on the jack screw and turn to the right until the jack head is properly engaged in the described location. Do not raise the vehicle until you are sure the jack is securely engaged. 4. Raise the vehicle by turning the jack screw to the right, using the swivel wrench. Raise the vehicle only until the tire just clears the surface and enough clearance is obtained to install the spare tire. Minimum tire lift provides maximum stability. 5. Remove the wheel lug nuts, for vehicles with wheel covers, remove the cover from the wheel by hand. Do not pry the wheel cover off. Then pull the wheel off the hub. 6. Install the compact spare tire. Lightly tighten the lug nuts. NOTE: • Do not install the wheel cover on the compact spare. • Do not use a hammer or force to install the wheel covers. 7. Lower the vehicle by turning the jack screw to the left. 8. Finish tightening the lug nuts. Push down on the wrench while tightening for increased leverage. Alternate lug nuts until each nut has been tightened twice. The correct wheel nut tightness is 102 ft lbs (138 N·m). If in doubt about the correct tightness, have them checked with a torque wrench by your authorized dealer or at a service station. 9. Lower the jack to its fully-closed position. 10. Place the deflated (flat) tire and compact spare tire cover assembly in the rear cargo area. Do not stow the deflated tire in the spare tire location. Have the full-sized tire repaired or replaced, as soon as possible. 11. Stow the cable and wheel spacer before driving the vehicle. Reassemble the winch handle extensions to form a "T" and fit the winch T-handle over the drive nut. Rotate the nut to the right until the winch mechanism clicks at least three times. 12. Stow the jack, jack handle and winch handle tools back in the stowage compartment. 13. Check the compact spare tire pressure as soon as possible. Correct the tire pressure, as required. Securing The Spare Tire 1. Assemble the winch handle extensions to form a T-handle and fit the winch T-handle over the drive nut. Rotate the nut to the left until the winch mechanism stops turning freely. This will allow enough slack in the cable to allow you to pull the wheel spacer out from under the vehicle. 2. Assemble the winch handle extensions to form the spare tire hook, and pull the wheel spacer from under the vehicle. 67
-
 1
1 -
2
-
3
-
4
-
5
-
6
-
7
-
8
-
9
-
10
-
11
-
12
-
13
-
14
-
15
-
16
-
17
-
18
-
19
-
20
-
21
-
22
-
23
-
24
-
25
-
26
-
27
-
28
-
29
-
30
-
31
-
32
-
33
-
34
-
35
-
36
-
37
-
38
-
39
-
40
-
41
-
42
-
43
-
44
-
45
-
46
-
47
-
48
-
49
-
50
-
51
-
52
-
53
-
54
-
55
-
56
-
57
-
58
-
59
-
60
-
61
-
62
-
63
-
 64
64 -
 65
65 -
 66
66 -
 67
67 -
 68
68 -
 69
69 -
 70
70 -
 71
71 -
 72
72 -
 73
73 -
 74
74 -
75
-
76
-
77
-
78
-
79
-
80
-
81
-
82
-
83
-
84
-
85
-
86
-
87
-
88
-
89
-
90
-
91
-
92
-
93
-
94
-
95
-
96
-
97
-
98
-
99
-
100
 |
 |
