2008 Ford Taurus X Owner's Manual - Page 113
2008 Ford Taurus X Manual
Page 113 highlights
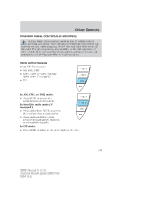
Driver Controls Retain the original transmitter for use in other vehicles as well as for future programming procedures (i.e. new HomeLink equipped vehicle purchase). It is also suggested that upon the sale of the vehicle, the programmed Homelink buttons be erased for security purposes, refer to Programming in this section. Programming Do not program HomeLink with the vehicle parked in the garage. Note: Your vehicle may require the ignition switch to be turned to the ACC position for programming and/or operation of the HomeLink . It is also recommended that a new battery be placed in the hand-held transmitter of the device being programmed to HomeLink for quicker training and accurate transmission of the radio-frequency signal. 1. Position the end of your hand-held transmitter 1-3 inches (2-8 cm) away from the HomeLink button you wish to program (located on your visor) while keeping the indicator light in view. 2. Simultaneously press and hold both the chosen HomeLink and hand-held transmitter buttons until the HomeLink indicator light changes from a slow to a rapidly blinking light. Now you may release both the HomeLink and hand-held transmitter buttons. Note: Some entry gates and garage door openers may require you to replace Step 2 with procedures noted in the "Gate Operator and Canadian Programming" in this section for Canadian residents. 3. Firmly press, hold for five seconds and release the programmed HomeLink button up to two separate times to activate the door. If the door does not activate, press and hold the just-trained HomeLink button and observe the indicator light. • If the indicator light stays on constantly, programming is complete and your device should activate when the HomeLink button is pressed and released. • If the indicator light blinks rapidly for two seconds and then turns to a constant light continue with "Programming" Steps 4 through 6 to complete programming of a rolling code equipped device (most commonly a garage door opener). 4. At the garage door opener receiver (motor-head unit) in the garage, locate the "learn" or "smart" button (usually near where the hanging antenna wire is attached to the unit). 113 2008 Taurus X (219) Owners Guide (post-2002-fmt) USA (fus)
-
 1
1 -
2
-
3
-
4
-
5
-
6
-
7
-
8
-
9
-
10
-
11
-
12
-
13
-
14
-
15
-
16
-
17
-
18
-
19
-
20
-
21
-
22
-
23
-
24
-
25
-
26
-
27
-
28
-
29
-
30
-
31
-
32
-
33
-
34
-
35
-
36
-
37
-
38
-
39
-
40
-
41
-
42
-
43
-
44
-
45
-
46
-
47
-
48
-
49
-
50
-
51
-
52
-
53
-
54
-
55
-
56
-
57
-
58
-
59
-
60
-
61
-
62
-
63
-
64
-
65
-
66
-
67
-
68
-
69
-
70
-
71
-
72
-
73
-
74
-
75
-
76
-
77
-
78
-
79
-
80
-
81
-
82
-
83
-
84
-
85
-
86
-
87
-
88
-
89
-
90
-
91
-
92
-
93
-
94
-
95
-
96
-
97
-
98
-
99
-
100
-
101
-
102
-
103
-
104
-
105
-
106
-
107
-
 108
108 -
 109
109 -
 110
110 -
 111
111 -
 112
112 -
 113
113 -
 114
114 -
 115
115 -
 116
116 -
 117
117 -
 118
118 -
119
-
120
-
121
-
122
-
123
-
124
-
125
-
126
-
127
-
128
-
129
-
130
-
131
-
132
-
133
-
134
-
135
-
136
-
137
-
138
-
139
-
140
-
141
-
142
-
143
-
144
-
145
-
146
-
147
-
148
-
149
-
150
-
151
-
152
-
153
-
154
-
155
-
156
-
157
-
158
-
159
-
160
-
161
-
162
-
163
-
164
-
165
-
166
-
167
-
168
-
169
-
170
-
171
-
172
-
173
-
174
-
175
-
176
-
177
-
178
-
179
-
180
-
181
-
182
-
183
-
184
-
185
-
186
-
187
-
188
-
189
-
190
-
191
-
192
-
193
-
194
-
195
-
196
-
197
-
198
-
199
-
200
-
201
-
202
-
203
-
204
-
205
-
206
-
207
-
208
-
209
-
210
-
211
-
212
-
213
-
214
-
215
-
216
-
217
-
218
-
219
-
220
-
221
-
222
-
223
-
224
-
225
-
226
-
227
-
228
-
229
-
230
-
231
-
232
-
233
-
234
-
235
-
236
-
237
-
238
-
239
-
240
-
241
-
242
-
243
-
244
-
245
-
246
-
247
-
248
-
249
-
250
-
251
-
252
-
253
-
254
-
255
-
256
-
257
-
258
-
259
-
260
-
261
-
262
-
263
-
264
-
265
-
266
-
267
-
268
-
269
-
270
-
271
-
272
-
273
-
274
-
275
-
276
-
277
-
278
-
279
-
280
-
281
-
282
-
283
-
284
-
285
-
286
-
287
-
288
-
289
-
290
-
291
-
292
-
293
-
294
-
295
-
296
-
297
-
298
-
299
-
300
-
301
-
302
-
303
-
304
-
305
-
306
-
307
-
308
-
309
-
310
-
311
-
312
-
313
-
314
-
315
-
316
-
317
-
318
-
319
-
320
-
321
-
322
-
323
-
324
-
325
-
326
-
327
-
328
-
329
-
330
-
331
-
332
-
333
-
334
-
335
-
336
-
337
-
338
-
339
-
340
-
341
-
342
-
343
-
344
-
345
-
346
-
347
-
348
-
349
-
350
-
351
-
352
 |
 |
