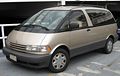
1996 Toyota Previa Owners Manual
1996 Toyota Previa Manual
1996 Toyota Previa manual content summary:
- 1996 Toyota Previa | Owners Manual - Page 1
quality maintenance and any other assistance you may require. Please leave this Owner's Manual in this vehicle at the time of resale. The next owner will need this information also. All information and specifications in this manual are current at the time of printing. However, because of Toyota - 1996 Toyota Previa | Owners Manual - Page 2
covered by the following Toyota limited warranties: S New vehicle warranty S Emission control systems warranty S Others For further information, please refer to the separate "Owner's Guide", "Owner's Manual Supplement" or "Warranty Booklet". Accessories, spare parts and modification of your Toyota - 1996 Toyota Previa | Owners Manual - Page 3
system in your vehicle could affect electronic systems such as multiport fuel injection system/sequential multiport fuel injection system, cruise control system, anti-lock brake system and SRS airbag system, be sure to check with your Toyota dealer for precautionary measures or special instructions - 1996 Toyota Previa | Owners Manual - Page 4
- 1996 Toyota Previa | Owners Manual - Page 5
...140 D If you have a flat tire ...141 D If your vehicle needs to be towed ...148 D Tips for driving during break- in period ...117 D How to start the engine ...127 D General maintenance ...158 D Complete index ...209 −9 Gas station information Fuel selection: UNLEADED gasoline, Research Octane - 1996 Toyota Previa | Owners Manual - Page 6
Part 1 OPERATION OF INSTRUMENTS AND CONTROLS- Chapter 1-1 Overview of instruments and controls S Instrument panel overview S Instrument cluster overview S Indicator symbols on the instrument panel 1 - 1996 Toyota Previa | Owners Manual - Page 7
Instrument panel overview 2 - 1996 Toyota Previa | Owners Manual - Page 8
3 - 1996 Toyota Previa | Owners Manual - Page 9
Instrument cluster overview 4 - 1996 Toyota Previa | Owners Manual - Page 10
door warning light*1 Brake system warning light *1 Automatic transmission fluid temperature warning light*1 Seat belt reminder light*1 Discharge warning light*1 Headlight high beam indicator light Low oil pressure warning light*1 OIL LEVEL Low engine oil level warning light*1 Malfunction indicator - 1996 Toyota Previa | Owners Manual - Page 11
6 - 1996 Toyota Previa | Owners Manual - Page 12
Part 1 OPERATION OF INSTRUMENTS AND CONTROLS- Chapter 1-2 Keys and Doors S S S S S S S S S S S Keys Front doors and sliding door Power windows Side windows Back door Hood Engine access hole cover Theft deterrent system Fuel by a Toyota dealer using the key number. You should also put a - 1996 Toyota Previa | Owners Manual - Page 13
simultaneously, turn the key twice in succession (driver's door lock) or once (passenger's door lock). On vehicles with a theft deterrent system, locking and unlocking the sliding door also controls the front and back doors. LOCKING WITH INSIDE LOCK KNOB Front doors-Turns the lock knob forward to - 1996 Toyota Previa | Owners Manual - Page 14
driving, be sure that the doors are closed and locked, especially when small children are in the vehicle. Along with the proper use of seat belts, locking the doors helps prevent the driver and passengers from being thrown out from the vehicle during an accident. It also helps prevent the doors - 1996 Toyota Previa | Owners Manual - Page 15
causing injury. NOTICE Do not close the sliding door by applying the brakes. Doing so could cause the door to be damaged. The windows can Normal operation: The window moves as long as you hold the switch. To open: Lightly push down the switch. To close: Pull up the switch. Automatic operation (to - 1996 Toyota Previa | Owners Manual - Page 16
on the passenger's door. The driver's door also has a switch that controls the passenger's window. The window moves as long as you hold the , you must do the following. S Always make sure the head, hands and other parts of the body of all occupants are kept completely inside the vehicle before you - 1996 Toyota Previa | Owners Manual - Page 17
On vehicles with a theft deterrent system and power door lock system, the back door will be controlled by operating the power door lock switch. ! CAUTION Keep the back door closed while driving. This not only keeps the luggage from being thrown out but also prevents exhaust gases from entering the - 1996 Toyota Previa | Owners Manual - Page 18
catch lever and lift the hood. Then hold the hood open by inserting the support rod into the slot. Before closing the hood, check to see that you have not forgotten any tools, rags, etc. and return the support rod to its clipthis prevents rattles. Then lower the hood and make sure it - 1996 Toyota Previa | Owners Manual - Page 19
to unlock and pull out the engine access hole cover. Before closing the engine access hole cover, check to see that you have not forgotten any tools, rags, etc. ! CAUTION S Make sure the engine access hole cover is tightened securely. S After returning the driver's seat, make sure it is securely - 1996 Toyota Previa | Owners Manual - Page 20
back doors or hood is forcibly unlocked or the battery terminal is disconnected and then reconnected when the vehicle is locked. The alarm blows the horn intermittently and flashes the headlights, tail lights, and other exterior lights. The engine cannot be started because the starter circuit will - 1996 Toyota Previa | Owners Manual - Page 21
Once set, the system automatically resets the alarm each time the front, sliding and back doors and hood are closed after the alarm stops. The alarm will be activated again under the following conditions: S If any of the front, sliding or back doors or hood is opened S If the battery terminal is - 1996 Toyota Previa | Owners Manual - Page 22
for the other doors and hood. When testing on the hood, also check that the system is activated when the battery terminal is disconnected and then reconnected. If the system does not work properly, have it checked by your Toyota dealer. 1. To open the fuel filler door, pull the lever up. ! CAUTION - 1996 Toyota Previa | Owners Manual - Page 23
Front moon roof To tilt up the rear end of the moon roof, pull the sunshade back and turn the lever to open position and push it up. To lower it, pull the lever down and turn the lever to close position. To protect things in the vehicle, be careful no to forget to close it before leaving your - 1996 Toyota Previa | Owners Manual - Page 24
be opened or closed manually. However, if you open the moon roof, the sunshade will be opened together with the moon roof. ! CAUTION To avoid serious personal injury, you must do the following. S While the vehicle is moving, always keep the head, hands and other parts of the body of all occupants - 1996 Toyota Previa | Owners Manual - Page 25
20 - 1996 Toyota Previa | Owners Manual - Page 26
Part 1 OPERATION OF INSTRUMENTS AND CONTROLS- Chapter 1-3 Seats, Seat belts, Steering wheel and Mirrors Front seats Rear seats Head restraints Front armrests Seat belts SRS airbags Child restraint Tilt steering wheel Outside rear view mirrors Anti-glare inside rear view mirror S Vanity mirror S S S - 1996 Toyota Previa | Owners Manual - Page 27
sure it is locked in position. S After adjusting the seatback, exert body pressure to make sure it is locked in position. S When returning seats to their original position: Make sure the seat belts are not twisted or caught under the seat and are arranged in their proper position for ready use. Make - 1996 Toyota Previa | Owners Manual - Page 28
seat to the desired position with slight body pressure and release the lever. Do not place anything under the seat. It might interfere with the seat of sliding under the lap belt during a collision, avoid reclining the seatback any more than needed. The seat belts provide maximum protection when the - 1996 Toyota Previa | Owners Manual - Page 29
during a collision, avoid reclining the seatback any more than needed. The seat belts provide maximum protection when the the passengers are sitting up straight and well back in the seats. If you are reclined, the lap belt may slide past your hips and apply restraint forces directly to the abdomen - 1996 Toyota Previa | Owners Manual - Page 30
-Removing second seat (two-seated bench type) ! CAUTION Do not install the seat facing backward. In an accident, passengers facing backward are more likely to be seriously injured because bench type second seat has no seat belts for passengers facing rearward. -Swiveling second seats (swivel type) - 1996 Toyota Previa | Owners Manual - Page 31
up Push the lock release knob and turn the seat clockwise for the right seat and counterclockwise for the left seat. Hold the lock release lever until you have moved the seat slightly. To return the seat, rotate the seat in the reverse direction. Head restraints (type A) ! CAUTION S Do not set the - 1996 Toyota Previa | Owners Manual - Page 32
pull it up. To lower it, press the lock release button and push the head restraint down. To move it forward or backward, pull or push the head restraint. The head restraint is most effective when it is close to your head. Therefore, using a cushion on the seatback is not recommended. To adjust the - 1996 Toyota Previa | Owners Manual - Page 33
position. (See the seat adjustment instructions.) S Be careful not to damage the belt webbing or hardware. Take care that they do not get caught or pinched in the seat or doors. S Inspect the belt system periodically. Check for cuts, fraying, and loose parts. Damaged parts should be replaced. Do - 1996 Toyota Previa | Owners Manual - Page 34
locks into the buckle. The seat belt length automatically adjusts to your size and the seat position. The retractor will lock the belt during a sudden stop or buckle. S If the seat belt does not function normally, immediately contact your Toyota dealer. S Replace the belt if the warning label under - 1996 Toyota Previa | Owners Manual - Page 35
passes over the top of the outside armrest and the lap portion of the belt passes under the outside armrest as shown. Seat belts with an adjustable shoulder anchor- Adjust the shoulder anchor position to your size. To adjust the anchor position, pull the knob out and slide it up or down. Release - 1996 Toyota Previa | Owners Manual - Page 36
latching the tab and buckle. S If the seat belt does not function normally, immediately contact your Toyota dealer. To release the belt, press the bucklerelease button and allow the belt to retract. If the belt does not retract smoothly, pull it out and check for kinks or twists. Then make sure it - 1996 Toyota Previa | Owners Manual - Page 37
retract, pull it out and check for kinks or twists. Then make sure that it remains untwisted as it retracts. ! CAUTION High-positioned and loose-fitting lap belts could increase the chance of injury due to sliding under the lap belt during an accident. Sit well back in the seat and straight up. To - 1996 Toyota Previa | Owners Manual - Page 38
properly latching the tab and buckle. S If the seat belt does not function normally, immediately contact your Toyota dealer. Remove excess length of the belt and adjust the belt position. To shorten the belt, pull the free end of the belt. Position the lap belt as low as possible on your hips-not - 1996 Toyota Previa | Owners Manual - Page 39
information is available at your Toyota dealer. To release the belt, press the bucklerelease button. ! CAUTION When using the seat belt extender, observe the following. Failure to follow these instructions could result in less effectiveness of the seat belt restraint system in case of vehicle - 1996 Toyota Previa | Owners Manual - Page 40
buckle. S If the seat belt does not function normally, immediately contact your Toyota dealer. The SRS (Supplemental Restraint System) airbags are designed the seat belt to prevent or reduce injury by inflating, in order to decrease the likelihood of the driver's or front passenger's head or face - 1996 Toyota Previa | Owners Manual - Page 41
The SRS airbag system is designed to activate in response to a severe frontal impact within only one of your vehicle's two airbags will deploy. For your safety, be sure to always wear your seat belts. The SRS airbags are not designed to inflate if the vehicle is subjected to a side or rear impact, - 1996 Toyota Previa | Owners Manual - Page 42
belts; when sudden braking or a collision occurs, they may be thrown forward. To obtain maximum protection in an accident, the driver and all passengers in the vehicle should always wear their seat belts when driving. For instructions and precautions concerning the seat belt system, see "Seat belts - 1996 Toyota Previa | Owners Manual - Page 43
can cause severe injury to the child. S When using a forward-facing child restraint system in the front seat, the seat must be moved as far back as possible. For instructions concerning the installation of a child restraint system, see "Child restraint" in this chapter. S Do not sit on the edge of - 1996 Toyota Previa | Owners Manual - Page 44
changes without consulting your Toyota dealer. Such changes can interfere with proper operation of the SRS airbag system in your arms. Use a child restraint system in the rear seat. For instructions concerning the installation of a child restraint system, see "Child restraint" in this chapter - 1996 Toyota Previa | Owners Manual - Page 45
damaged. This SRS airbag system has a service reminder indicator to inform the driver of operating problems. If either of the following conditions occurs, this indicates a malfunction of the airbags. Contact your Toyota dealer as soon as possible to service the vehicle. S The light does not come on - 1996 Toyota Previa | Owners Manual - Page 46
the anchor nuts. For instructions about how to install the anchor bracket, see "(c) TOP STRAP ANCHORS AND LOCATIONS". If your child restraint system does not provide any of the necessary parts, you can purchase the following items from your Toyota dealer. S CRS installation kit (Part No. 04731-22012 - 1996 Toyota Previa | Owners Manual - Page 47
with the lock mechanism of the front seats. This may cause severe injury to the child and front passengers in case of sudden braking or a collision. (A)INSTALLATION WITH A 3-POINT TYPE SEAT BELT When installing a rear-facing child restraint system, follow the same procedure to install a forward - 1996 Toyota Previa | Owners Manual - Page 48
and shoulder belt over the child restraint system following the instructions provided by its manufacturer. Keep the lap portion of the belt tight. 2. Fully extend the shoulder belt to put the tab and buckle. S If the seat belt does not function normally, immediately contact your Toyota dealer. 43 - 1996 Toyota Previa | Owners Manual - Page 49
vehicle seatback and the child restraint system and allow it to retract. To hold the child restraint system securely, let the shoulder belt retract as far as it will go while firmly pushing down the child restraint system. 4. For second seat left side (two-seated bench type and swivel type [facing - 1996 Toyota Previa | Owners Manual - Page 50
the top strap. (B)INSTALLATION WITH A 2-POINT TYPE SEAT BELT When installing a rear-facing child restraint system, follow the same procedure to install a forward-facing child restraint system. ! CAUTION Do not use a rear-facing child restraint system in the rear seat if it interferes with the lock - 1996 Toyota Previa | Owners Manual - Page 51
this may prevent you from properly latching the tab and buckle. S If the seat belt does not function normally, immediately contact your Toyota dealer. 3. Second seat right side (two-seated bench type) only: If your child restraint system requires the use of a top strap, latch the hook onto the tab - 1996 Toyota Previa | Owners Manual - Page 52
secure. 4. To remove the child restraint system, press the buckle-release button and unhook the top strap. (C)TOP STRAP ANCHORS AND LOCATIONS All models-On the floor behind the seat a. Using the illustration as a guide, cut out the carpet on the floor behind the seat. The anchor holes are plugged - 1996 Toyota Previa | Owners Manual - Page 53
shown in the illustration. If you remove the anchor brackets when the child restraint system is necessary no longer, replace the seals in the holes to prevent entry of exhaust emissions, water or dirt. To change the steering wheel angle, hold the steering wheel, pull up the lock release lever - 1996 Toyota Previa | Owners Manual - Page 54
shown in the illustration. If you remove the anchor brackets when the child restraint system is necessary no longer, replace the seals in the holes to prevent entry of exhaust emissions, water or dirt. To change the steering wheel angle, hold the steering wheel, pull up the lock release lever - 1996 Toyota Previa | Owners Manual - Page 55
Outside rear view mirrors- -Power rear view mirror control Anti-glare inside rear view mirror Adjust the mirror so you can see the side of your vehicle in the mirror. Be careful when judging the size or distance of any object seen in the outside rear view mirror on the passenger's side. It is - 1996 Toyota Previa | Owners Manual - Page 56
Vanity mirror To use the vanity mirror, swing down the sun visor and open the cover. The vanity light comes on when you open the cover. 50 - 1996 Toyota Previa | Owners Manual - Page 57
on, twist the knob on the end of the lever. Daytime running light system (Canada only)-The headlights turn on when the parking brake is released with the engine started, even with the light switch in the "OFF" position. They will not go off until the ignition switch is turned off. To turn on the - 1996 Toyota Previa | Owners Manual - Page 58
cancel it by hand. You can also signal a lane change by moving the turn signal lever partway and holding it there. If the green light in the instrument panel flashes faster than normal, it indicates that the front or rear turn signal bulb has burned out. To turn on the emergency flashers, push - 1996 Toyota Previa | Owners Manual - Page 59
Instrument panel light control Front fog lights Front interior light To adjust the brightness of the instrument panel lights, turn the dial. To turn on the front fog lights, push the switch. They will come on when the headlights are on low beam. To turn on the front interior light, push the - 1996 Toyota Previa | Owners Manual - Page 60
and push the switch. Closing the doors will turn the light off. With the switch is in the ON position, the light comes on when the back door or sliding door is opened Also, the wipers will automatically operate a couple of times after the washer squirts even with the lever in the "OFF" position. 54 - 1996 Toyota Previa | Owners Manual - Page 61
is released. If the washer does not work, check to see whether the washer tank is empty. will quickly clear the surface. An indicator light will illuminate to indicate the defogger is operating Leaving the defogger on for a long time could cause the battery to discharge, especially during stop-andgo - 1996 Toyota Previa | Owners Manual - Page 62
NOTICE zTo prevent the battery from being discharged, turn the switch on when the engine is running. zWhen cleaning the inside of the rear window, be careful not to scratch or damage the heater wires. 56 - 1996 Toyota Previa | Owners Manual - Page 63
Part 1 OPERATION OF INSTRUMENTS AND CONTROLS- Chapter 1-5 Gauges, Meters and Service reminder indicators S Fuel gauge S Engine coolant temperature gauge S Odometer and trip meter S Service reminder indicators and warning buzzers Fuel gauge If the fuel tank is completely empty, the malfunction - 1996 Toyota Previa | Owners Manual - Page 64
cooling system as this may cause the engine to overheat. The thermostat is designed to control the flow of coolant to keep the temperature of the engine within the specified operating range. zDo not continue driving with an overheated engine. See "If your vehicle overheats" in Part 4. The gauge - 1996 Toyota Previa | Owners Manual - Page 65
be a problem somewhere in the brake system. Check the fluid level of the see-through reservoir. To make sure the parking brake has not caused the warning light to come on, check to see that the parking brake is fully released. If the brake fluid level is low...At a safe place, test your brakes by - 1996 Toyota Previa | Owners Manual - Page 66
a problem somewhere in the charging system. The engine ignition will continue to operate, however, until the battery is discharged. Turn off the air conditioning, blower, radio, etc., and drive directly to the nearest Toyota dealer or repair shop. (d) Low Oil Pressure Warning Light This light warns - 1996 Toyota Previa | Owners Manual - Page 67
or remains on. S The light comes on while driving. (h) "ABS" Warning Light This light warns that there is a problem somewhere in your anti-lock brake system. If the light comes on while you are driving, have your vehicle checked by your Toyota dealer as soon as possible. The light will come on when - 1996 Toyota Previa | Owners Manual - Page 68
62 - 1996 Toyota Previa | Owners Manual - Page 69
the key in the "ON" position if the engine is not running. The battery will discharge and the ignition could be damaged. "START"-Starter motor on. The key will return to the "ON" position when released. For starting tips, see Part 3. "ON"-Engine on and all accessories on. This is the normal driving - 1996 Toyota Previa | Owners Manual - Page 70
Automatic transmission 64 - 1996 Toyota Previa | Owners Manual - Page 71
the engine as instructed in "How to start the engine" in Part 3. The transmission must be in "P" or "N". 2. With your foot holding down the brake pedal, shift the selector lever to "D". In "D" position, the automatic transmission system will select the most suitable gear for running conditions such - 1996 Toyota Previa | Owners Manual - Page 72
your foot on the brake pedal while stopped with the engine running. This prevents the vehicle from creeping. ! CAUTION While the vehicle is moving, never attempt to move the selector lever into "P" position under any circumstances. Serious mechanical damage and loss of vehicle control may result - 1996 Toyota Previa | Owners Manual - Page 73
in relation to the cruise control set speed, cancel the cruise control then downshift the transmission to use engine braking to slow down. TURNING ON THE SYSTEM To operate the cruise control, push the "CRUISE ON-OFF" button. This turns the system on. The indicator light in the instrument panel shows - 1996 Toyota Previa | Owners Manual - Page 74
depress the brake pedal and then press the control lever conditions then occurs, there is some trouble in the cruise control system. S The indicator light does not come on. S The indicator light flashes again. S The indicator light goes out after it comes on. If this is the case, contact your Toyota - 1996 Toyota Previa | Owners Manual - Page 75
tape player and Compact Disc player S Air conditioning controls S Heater controls S Rear cooler controls S Side vents S Center vents Car audio system operating tips You can listen to the car audio system when the ignition key is at "ON" or "ACC". However, if the engine is not running, the key must - 1996 Toyota Previa | Owners Manual - Page 76
time longer than 90 minutes. Using damaged tapes will cause trouble with head, capstan and pinch roller clean. Remove tape coating residue accumulated on the head, oil any part of the player unit. Do not insert any object other than a Disc into the slot. Remember there are no user-serviceable parts - 1996 Toyota Previa | Owners Manual - Page 77
radially out from the center. Do not use a conventional record cleaner or anti-static record preservative. A new Disc may have rough edges on its inner the signal side of the Disc and cause sound skipping or other problems. ! CAUTION Compact Disc players use invisible laser beam which could - 1996 Toyota Previa | Owners Manual - Page 78
AM-FM radio with electronic tuner 72 - 1996 Toyota Previa | Owners Manual - Page 79
SCAN" button again. Manual tuning Push either side of the "TUNE" button for less than 0.5 second. Each time you push the change the preset station to a different one, follow the same procedure. The preset station will be cancelled when the power source is severed (battery disconnected, burnt fuse - 1996 Toyota Previa | Owners Manual - Page 80
AM-FM radio with electronic tuner and cassette tape player (type A) 74 - 1996 Toyota Previa | Owners Manual - Page 81
75 - 1996 Toyota Previa | Owners Manual - Page 82
the "PWR VOL" knob if the radio was on when the system was turned off. 2. Turn the "PWR⋅VOL" knob to change automatically to stereo reception when an FM stereo broadcast is being received. At the same time Manual tuning Push the "TUNE (REW FF)" button on either side for less than 0.5 second. Each time - 1996 Toyota Previa | Owners Manual - Page 83
is severed (battery disconnected, burnt fuse, etc.).. with the tape side to the right and lightly push it in. The tape player will push the "TAPE" button. At this time, "PLAY" will appear on the display. display will indicate that the Dolby noise reduction system is on. The Dolby NR mode reduces - 1996 Toyota Previa | Owners Manual - Page 84
AM-FM radio with electronic tuner and cassette tape player (type B) 78 - 1996 Toyota Previa | Owners Manual - Page 85
79 - 1996 Toyota Previa | Owners Manual - Page 86
the "PWR VOL" knob if the radio was on when the system was turned off. 2. Turn the "PWR⋅VOL" knob to change automatically to stereo reception when an FM stereo broadcast is being received. At the same time Manual tuning Push the "TUNE (REW FF)" button on either side for less than 0.5 second. Each time - 1996 Toyota Previa | Owners Manual - Page 87
FM station, check which selection you change the preset station to a different one, follow the same procedure. The preset station will be cancelled when the power source is severed (battery disconnected, burnt fuse right and lightly push it At this time, "PLAY Dolby noise reduction system is operating. - 1996 Toyota Previa | Owners Manual - Page 88
You can eject the cassette only once after the system is turned off. (g) Selecting a program 1. Push the played using either of the following methods. Manual program selection Push the "REW FF (TUNE)" button on either side to rewind or fast forward the tape. At this time, "REW" or "FF" will appear - 1996 Toyota Previa | Owners Manual - Page 89
will change the radio mode and automatically receive the last station which was set. At the time, the received station condition appears on the display. The system will be cancelled out when the power source is severed (battery disconnected, burnt fuse etc.). (i) Anti-theft system To deter theft of - 1996 Toyota Previa | Owners Manual - Page 90
step 3. Once the system is set, the indicator light turns on and off with the ignition switch in "OFF" and "SEC" will appear each time the key is turned to the "ACC" position. To change the identification number for some reason, cancel the system (See "Cancelling the anti-theft system") and set it - 1996 Toyota Previa | Owners Manual - Page 91
error will activate the antitheft system and "HELP" will appear on the display. The audio system will be completely inoperable. At this time, the indicator light also comes on. If this occurs, contact your Toyota dealer. At the time of resale of your vehicle, cancel the system for the new owner. 85 - 1996 Toyota Previa | Owners Manual - Page 92
will be operable if you give it the correct identification number. 1. Follow the steps 3 and 4 described in "Setting the anti-theft system". 2. With your identification number appearing on the display, press the "SCAN" button and hold it in until "SEC" appears on the display. "SEC" will go - 1996 Toyota Previa | Owners Manual - Page 93
AM-FM radio with electronic tuner, cassette tape player and Compact Disc player 87 - 1996 Toyota Previa | Owners Manual - Page 94
88 - 1996 Toyota Previa | Owners Manual - Page 95
89 - 1996 Toyota Previa | Owners Manual - Page 96
90 - 1996 Toyota Previa | Owners Manual - Page 97
the "PWR VOL" knob if the radio was on when the system was turned off. 2. Turn the "PWR⋅VOL" knob to change automatically to stereo reception when an FM stereo broadcast is being received. At the same time . Manual tuning Push the "TUNE" button on either side for less than 0.5 second. Each time you - 1996 Toyota Previa | Owners Manual - Page 98
an FM station, check which selection you have controls the tone in accordance with the selected pattern. To change the preset mode, adjust the manual tone control knobs as you like. (See the following "Manual right and lightly push it . At this time, "PLAY" Dolby noise reduction system is operating. The - 1996 Toyota Previa | Owners Manual - Page 99
push the "PWR VOL" knob. You can eject the cassette only once after the system is turned off. (g) Selecting a program 1. Push the "PROG" button to 2. Have a desired program played using either of the following methods. Manual program selection Push the FAST FORWARD button to fast forward the tape. - 1996 Toyota Previa | Owners Manual - Page 100
system will change the radio mode and automatically receive the last station which was set. At the time, the received station condition appears on the display. The system will be cancelled out when the power source is severed (battery disconnected, burnt fuse label side u and lightly push it in. The - 1996 Toyota Previa | Owners Manual - Page 101
system is turned off. When ejecting a 8 cm (3.2 in.) Disc, do not put a 12 cm (4.7 in.) Disc into the slot until the "DISC" light from the beginning. Manual program selection: Push buttons on the anti-theft system, the following messages system is completely inoperable. Contact your Toyota dealer. 95 - 1996 Toyota Previa | Owners Manual - Page 102
Setting the anti-theft system 1. Make sure the radio unit is turned off with the ignition switch in 3 button for the last digit. For example, if your number is 210, press the 1 button three times, the 2 button twice and the 3 button once. If the display returns to "---" while inputting, try again - 1996 Toyota Previa | Owners Manual - Page 103
step 3. Once the system is set, the indicator light turns on and off with the ignition switch in "OFF" and "SEC" will appear each time the key is turned to the "ACC" position. To change the identification number for some reason, cancel the system (See "Cancelling the anti-theft system") and set it - 1996 Toyota Previa | Owners Manual - Page 104
. At this time, the indicator light also comes on. If this occurs, contact your Toyota dealer. At the time of resale of your vehicle, cancel the system for the new owner. If the anti-theft system is activated The audio system made inoperable by the activated anti-theft system will be operable - 1996 Toyota Previa | Owners Manual - Page 105
Air conditioning controls 99 - 1996 Toyota Previa | Owners Manual - Page 106
100 - 1996 Toyota Previa | Owners Manual - Page 107
lever to the FLOOR/WINDSHIELD position. 4. Move the rear air flow control lever anywhere. For detailed information on air flow control including other settings, see "(f) Air flow selection". 5. Move the fan speed control lever anywhere except the "OFF" position. 6. Leave the air conditioning on-off - 1996 Toyota Previa | Owners Manual - Page 108
flow to the windshield as well as the floor and rear area. WINDSHIELD position-This position directs the air flow mostly to the windshield and front side windows. Moving the air flow control lever to this position turns on the air conditioning. This is to clear up the front view more quickly. Moving - 1996 Toyota Previa | Owners Manual - Page 109
tips S If air control is not satisfactory, check the dashboard vents. (See "Side vents" and "Center vents" after "Rear cooler controls".) S To help in windy and dusty conditions, it is recommended that the air intake control lever be temporarily set to the RECIRCULATED AIR position, which will close - 1996 Toyota Previa | Owners Manual - Page 110
Heater controls 104 - 1996 Toyota Previa | Owners Manual - Page 111
105 - 1996 Toyota Previa | Owners Manual - Page 112
up easily, move the lever to the FLOOR/WINDSHIELD position. 4. Move the rear air flow control lever anywhere. For detailed information on air flow control including other settings, see "(e) Air flow selection". 5. Move the fan speed control lever anywhere except the "OFF" position. (c) Ventilation - 1996 Toyota Previa | Owners Manual - Page 113
position-This position directs the air flow to the windshield as well as the floor and rear area. WINDSHIELD position-This position directs the air flow mostly to the windshield and front side windows. (f) Operating tips S If air control is not satisfactory, check the dashboard vents. (See "Side - 1996 Toyota Previa | Owners Manual - Page 114
Rear cooler controls 108 - 1996 Toyota Previa | Owners Manual - Page 115
Side vents Center vents Air flow may be directed left or right, or up or down as shown. Air flow may be directed forward or backward, or up or down as shown. 109 - 1996 Toyota Previa | Owners Manual - Page 116
110 - 1996 Toyota Previa | Owners Manual - Page 117
Part 1 OPERATION OF INSTRUMENTS AND CONTROLS- Chapter 1-8 Other equipment S S S S S S S S S Clock Cigarette lighter and ashtray Glovebox Miscellany holder Cool box Cup holder Roof luggage carrier Luggage covers Floor mat Clock Cigarette lighter and ashtray The digital clock indicates the time - 1996 Toyota Previa | Owners Manual - Page 118
Glovebox To open the glovebox door, compress the lock release button. To lock the glovebox door, insert the master key and turn it clockwise. Miscellany holder ! CAUTION To reduce the chance of injury in case of an accident or sudden stop, always keep the glovebox door closed while driving. To - 1996 Toyota Previa | Owners Manual - Page 119
on. Remember using the cool box will lower the air conditioning efficiency. To use the cup holder, push it To use the cup holder, unfold the cover. The cup holder is designed for holding cups and possibly injure people in the vehicle during sudden braking or an accident. S Keep the cup holder shut - 1996 Toyota Previa | Owners Manual - Page 120
the genuine Toyota roof rails with two or more crossrails or their equivalent. Follow the manufacturer's instructions and weight is distributed evenly between the front and rear axles. zIf loading long or wide cargo, never exceed the vehicle overall length or width. (See "Dimensions" in Part - 1996 Toyota Previa | Owners Manual - Page 121
Floor mat Use a floor mat of the correct size. If the floor mat has a hole, then it is designed for use with a locking clip. Fix the floor mat and locking clip into the hole in the floor carpet. ! CAUTION Make sure the floor mat is properly placed on the floor carpet. If the floor mat slips and - 1996 Toyota Previa | Owners Manual - Page 122
116 - 1996 Toyota Previa | Owners Manual - Page 123
Part 2 INFORMATION BEFORE DRIVING YOUR TOYOTA S S S S S S S S S S Break-in period Fuel Operation in foreign countries Three-way catalytic converters Engine exhaust cautions Facts about engine oil consumption Brake system Brake pad wear limit indicators Luggage stowage precautions Your Toyota's - 1996 Toyota Previa | Owners Manual - Page 124
If your engine knocks...If you detect heavy knocking even when using the recommended fuel, or if you hear steady knocking while holding a steady speed on level roads, consult your Toyota dealer. However, now and then, you may notice light knocking for a short time while accelerating or driving up - 1996 Toyota Previa | Owners Manual - Page 125
. Remember, your Toyota dealer knows your vehicle and its three-way catalytic converter. The three-way catalytic converter is an emission control device installed in the exhaust system. It looks somewhat like a muffler, but its purpose is to reduce pollutants in the exhaust gas. ! CAUTION S Keep - 1996 Toyota Previa | Owners Manual - Page 126
Engine exhaust cautions zTo ensure that the three-way catalytic converter and the entire emission control system operate properly, your vehicle must receive the periodic inspections required by the Toyota Maintenance Schedule. For scheduled maintenance information, refer to the separate "Owner's - 1996 Toyota Previa | Owners Manual - Page 127
vehicle maintenance is to keep the engine oil at the optimum level so that oil function will not be impaired. If the low engine oil level warning light comes on and stays on, check the engine oil level and add the oil to the engine and reservoir tank. (For detailed information, see "Service reminder - 1996 Toyota Previa | Owners Manual - Page 128
than normal. And your braking distance will be longer. ANTI-LOCK BRAKE SYSTEM (with "ABS" warning light) The anti-lock brake system is designed to prevent lock-up of the wheels during sudden braking or braking on slippery road surfaces. This assists the driver in controlling the vehicle under these - 1996 Toyota Previa | Owners Manual - Page 129
in the parts monitored by the warning light system. Contact your Toyota dealer as soon as possible to service the vehicle. S The light does not come on as described above, or remains on. S The light comes on while driving. Even if the anti-lock brake system should fail, the brake system will still - 1996 Toyota Previa | Owners Manual - Page 130
forward as possible helps maintain this. S For better fuel economy, do not carry unneeded weight. S Do not place anything on the filler panel or luggage cover. Such items may be thrown about and possibly injure people in the vehicle during sudden braking or an accident. (Secure all items in a safe - 1996 Toyota Previa | Owners Manual - Page 131
The engine number is stamped on the engine block as shown. 125 - 1996 Toyota Previa | Owners Manual - Page 132
126 - 1996 Toyota Previa | Owners Manual - Page 133
seat position, seatback angle, head restraint height and steering wheel angle. 3. Adjust inside and outside rear view mirrors. 4. Lock all doors. 5. Fasten seat belts. How to start the engine- (a) Before cranking 1. Apply the parking brake firmly. 2. Turn off unnecessary lights and accessories - 1996 Toyota Previa | Owners Manual - Page 134
at a time. This may overheat the starter and wiring systems. zDo not race a cold engine. zIf the engine becomes difficult to start or stalls frequently, have the engine checked immediately. S Always slow down in gusty crosswinds. This will allow you much better control. Drive slowly onto curbs and - 1996 Toyota Previa | Owners Manual - Page 135
. For scheduled maintenance information, refer to the separate "Owner's Manual Supplement/ Maintenance Schedule". S Before driving off, make sure that the parking brake is fully released and the parking brake reminder light is off. S Do not leave your vehicle unattended while the engine is running - 1996 Toyota Previa | Owners Manual - Page 136
is available at your Toyota dealer and most auto parts stores. Follow the battery. Your Toyota dealer and most service stations will be pleased to check the level of charge. Make sure the engine oil the parking brake, or snow or water accumulated in and around the parking brake mechanism may - 1996 Toyota Previa | Owners Manual - Page 137
have an adverse effect on handling, performance, braking, durability and driving economy (fuel consumption, etc.). Your safety and satisfaction Toyota dealer for further details before towing. WEIGHT LIMITS Before towing, make sure the total trailer weight, gross vehicle weight, gross axle weight - 1996 Toyota Previa | Owners Manual - Page 138
weight requirement. S Follow the directions supplied by the hitch manufacturer. Lubricate the hitch ball with a light coat of grease. S Toyota removing the hitch, seal any mounting holes in the vehicle body to prevent entry of pollutants such as exhaust fumes, dirt, water, etc. S A safety chain - 1996 Toyota Previa | Owners Manual - Page 139
system and cause a malfunction of your lights. BREAK-IN SCHEDULE S Toyota recommends that you do not tow a trailer with a new vehicle or a vehicle with any new power train component (engine, transmission, differential, wheel bearing, etc.) for the first 800 km (500 miles) of driving. MAINTENANCE - 1996 Toyota Previa | Owners Manual - Page 140
check operation of the lights and all vehicle-trailer connections. After driving a short distance, stop and recheck the lights little at a time, avoiding sharp or prolonged turning. Have someone guide you when changing lanes. In order to maintain efficient engine braking, do not use overdrive. 134 - 1996 Toyota Previa | Owners Manual - Page 141
are some specific tips on how to save money on both fuel and repairs: S Keep your tires inflated at the correct pressure. Underinflation causes tire wear and wastes fuel. See Chapter 7-2 for instructions. S Do not carry unneeded weight in your vehicle. Excess weight puts a heavier load on the engine - 1996 Toyota Previa | Owners Manual - Page 142
in top shape. A dirty air cleaner, improper valve clearance, dirty plugs, dirty oil and grease, brakes not adjusted, etc. all lower engine performance and contribute to poor fuel economy. For longer life of all parts and lower operating costs, keep all maintenance work on schedule, and if you often - 1996 Toyota Previa | Owners Manual - Page 143
in "How to start the engine" in Part 3 and that you have sufficient fuel. If the engine is not turning over or is turning over too slowly- 1. Check that the battery terminals are tight and clean. 2. If the battery terminals are O.K., switch on the interior light. 3. If the light is out, dim or goes - 1996 Toyota Previa | Owners Manual - Page 144
engine still will not start, it needs adjustment or repair. Call a Toyota dealer or qualified repair shop for assistance. (c) Jump starting NOTICE Do not crank for more than 15 seconds at a time. This may overheat the starter and wiring systems The gas normally produced by a battery will explode - 1996 Toyota Previa | Owners Manual - Page 145
near any part that moves when the engine is cranked. 7. Carefully dispose of the battery cover cloths-they may contain sulfuric acid. 8. If removed, replace all the battery vent plugs. If the cause of your battery discharging is not apparent (for example, lights left on), you should have it checked - 1996 Toyota Previa | Owners Manual - Page 146
is a sign of very high pressure. 3. Visually check to see if the engine drive belt (fan belt) is broken or loose. Look for obvious coolant leaks from the radiator, hoses, and under the vehicle. However, note that water draining from the air conditioning is normal if it has been used. ! CAUTION - 1996 Toyota Previa | Owners Manual - Page 147
fuel economy for its lighter weight and permits easier installation in case of a flat tire. ! CAUTION When jacking, be sure to observe the following to reduce the possibility of personal injury: S Follow jacking instructions. S Use the jack only for lifting your vehicle during wheel changing - 1996 Toyota Previa | Owners Manual - Page 148
times, if necessary. It has tread life of up to 4800 km (3000 miles) depending on road conditions and your driving habits. When tread wear indicators appear on the tire, replace the tire. See also the tire section in Chapter 7-2 for details on the tread wear indicators and other service information - 1996 Toyota Previa | Owners Manual - Page 149
order to prevent it from flying forward during a collision or sudden braking. If you put a compact spare tire into the tire holder for a standard tire, you will need a stopper to keep the tire firmly in place. Contact your Toyota dealer for details. 2. Block the wheel diagonally opposite the flat - 1996 Toyota Previa | Owners Manual - Page 150
-Removing wheel ornament -Loosening wheel nuts 3. Remove the wheel ornament. Pry off the wheel ornament, using the beveled end of the wheel nut wrench as shown. ! CAUTION Do not try to pull the ornament by hand. Take due care in handling the ornament to avoid unexpected personal injury. 4. - 1996 Toyota Previa | Owners Manual - Page 151
it is supported by the tire. To raise the vehicle, insert the jack handle extension into the jack (it is a loose fit) and turn it clockwise with the handle, making sure the handle remains firmly fitted onto the jack handle extension. As the jack touches the vehicle and begins to lift, double-check - 1996 Toyota Previa | Owners Manual - Page 152
wheel nuts 7. Remove the wheel nuts and change tires. Lift the flat tire straight off and put it aside. Roll the cause a wheel to come off while driving. Therefore after the first 1600 km (1000 miles), check to see that the wheel nuts are tight. 8. Reinstall all the wheel nuts finger tight. - 1996 Toyota Previa | Owners Manual - Page 153
Make sure the wrench is securely engaged over the nut. Tighten each nut a little at a time in the order shown. Repeat the process until all the nuts are tight. 10.Reinstall the on the compact spare tire. ! CAUTION Take due care in handling the ornament to avoid unexpected personal injury. 147 - 1996 Toyota Previa | Owners Manual - Page 154
-After changing wheels 11.Check the air pressure of the replaced tire. Adjust the air pressure to the specification designated in Part 8. If the pressure is lower, drive slowly to the nearest service station and fill to the correct pressure. Do not forget to reinstall the tire inflation valve cap as - 1996 Toyota Previa | Owners Manual - Page 155
good condition. If they are damaged, use a towing dolly. All-T rac/4WD models- (a) Using flat bed truck Toyota recommends this as the best method for your vehicle. (b) Towing with wheel lift type truck Use a towing dolly under the wheels not lifted by the truck. Except All-Trac/4WD models(a) Using - 1996 Toyota Previa | Owners Manual - Page 156
only on hard-surfaced roads for a short distance and at low speeds. Also, the wheels, axles, drive train, steering and brakes must all be in good condition. Before towing, release the parking brake and put the transmission in "N". The key must be in "ACC" (engine off) or "ON" (engine running). 150 - 1996 Toyota Previa | Owners Manual - Page 157
the key number. See the suggestion given in "Keys" in Chapter 1-2. If your keys are locked in the vehicle and you cannot get a duplicate, many Toyota dealers can still open the door for you, using their special tools. If you must break a window to get in, we suggest breaking the smallest - 1996 Toyota Previa | Owners Manual - Page 158
152 - 1996 Toyota Previa | Owners Manual - Page 159
environmental conditions: S Road salt or dust control chemicals will accelerate corrosion, as will the presence of salt in the air near the as possible and to repair any damage to paint or protective coatings as soon as possible. To help prevent corrosion on your Toyota, follow these guidelines: - 1996 Toyota Previa | Owners Manual - Page 160
your Toyota" for more tips. Check the condition of body shop make the repair. Check the interior of your vehicle. Water and dirt can accumulate under the floor mats and could cause corrosion. Occasionally check under the mats garage, or if you drive it in covered with water or snow, your garage may - 1996 Toyota Previa | Owners Manual - Page 161
your Toyota Polishing and waxing is recommended to maintain the original beauty of your Toyota's finish a separate wax. Carefully follow the manufacturer's instructions and precautions. Be sure to polish and up paint Touch-up paint may be used to cover small chips or scratches. Apply the paint soon - 1996 Toyota Previa | Owners Manual - Page 162
scratch or damage the heater wires on the rear window. Air conditioning control panel, car audio, instrument panel, console panel, and switches Use a soft damp cloth for cleaning. Soak a clean soft cloth in water or lukewarm water then lightly wipe off any dirt. NOTICE zDo not use organic substances - 1996 Toyota Previa | Owners Manual - Page 163
at regular intervals. For details of your maintenance Schedule, read the separate "Owner's Manual Supplement/Maintenance Schedule". It is recommended that any replacement parts used for maintenance or for the repair of the emission control system be Toyota supplied. The owner may elect to use non - 1996 Toyota Previa | Owners Manual - Page 164
tools. Simple instructions for how to perform them are presented in Part 7. If you are a skilled do-it-yourself mechanic, the Toyota service manuals are recommended. Please be aware that doit-yourself maintenance can affect your warranty coverage. See Owner's Guide, Owner's Manual Supplement or - 1996 Toyota Previa | Owners Manual - Page 165
all service reminder indicators and warning buzzers function properly. Steering wheel Be alert for changes in steering condition, such as hard steering or strange noise. Engine access hole cover Make sure the engine access hole cover latches secure the cover. Seats Check that all seat controls such - 1996 Toyota Previa | Owners Manual - Page 166
, water dripping from the air conditioning after use is normal.) S Change in exhaust sound (This may indicate a dangerous carbon monoxide leak. Drive with the windows open and have the exhaust system checked immediately.) S Flat-looking tire; excessive tire squeal when cornering; uneven tire wear - 1996 Toyota Previa | Owners Manual - Page 167
If you notice any of these clues, take your vehicle to your Toyota dealer as soon as possible. It probably needs adjustment or repair. ! CAUTION Do not continue driving with the vehicle unchecked. It could result in serious vehicle damage and possibly personal injury. 161 - 1996 Toyota Previa | Owners Manual - Page 168
162 - 1996 Toyota Previa | Owners Manual - Page 169
Part 7 DO-IT-YOURSELF MAINTENANCE- Chapter 7-1 Introduction S Front compartment overview S Engine compartment overview S Fuse and circuit breaker locations S Do-it-yourself service precautions S Parts and tools 163 - 1996 Toyota Previa | Owners Manual - Page 170
Front compartment overview 164 - 1996 Toyota Previa | Owners Manual - Page 171
Engine compartment overview 165 - 1996 Toyota Previa | Owners Manual - Page 172
Fuse and circuit breaker locations 166 - 1996 Toyota Previa | Owners Manual - Page 173
in operating problems. Performing do-it-yourself maintenance during the warranty period may affect your warranty coverage. Read the separate Toyota Warranty statement for details and suggestions. This part gives instructions only for those items that are relatively easy for an owner to perform - 1996 Toyota Previa | Owners Manual - Page 174
and tools you will need on performing do-it-yourself maintenance. Remember all Toyota parts are designed in metric sizes, so your tools must be metric. Checking the engine oil level Parts (if level is low): S Engine oil API SH, "Energy-Conserving II" multigrade or ILSAC multigrade having viscosity - 1996 Toyota Previa | Owners Manual - Page 175
screw behind the cool box) Checking the circuit breaker Tools: S Toothpick, needle or safety pin Adding washer fluid Parts: S Water S Washer fluid containing antifreeze (for winter use) Tools: S Funnel (use the washer fluid tank cap.) Replacing light bulbs Parts: S Bulb with same number and wattage - 1996 Toyota Previa | Owners Manual - Page 176
170 - 1996 Toyota Previa | Owners Manual - Page 177
Part 7 DO-IT-YOURSELF MAINTENANCE- Chapter 7-2 Engine and Chassis S Checking the engine oil level S Checking the engine coolant level S Checking brake fluid S Checking power steering fluid S Checking tire pressure S Checking and replacing tires S Rotating tires S Installing snow tires and chains S - 1996 Toyota Previa | Owners Manual - Page 178
dipstick is slightly above the "L" mark, the low oil level warning light may come on and stay on. Then, add oil in the engine and reservoir tank to the correct level. With the engine at operating temperature and turn off, check the oil level in the engine with the dipstick. 1. After turning off the - 1996 Toyota Previa | Owners Manual - Page 179
Committee) Certification Mark is displayed on the front of the container. SAE 5W-30 is the best choice for your vehicle, for good fuel economy and good starting in cold weather. If you use SAE 10W-30 engine oil in extremely low temperatures, the engine may become difficult to start, so SAE 5W-30 - 1996 Toyota Previa | Owners Manual - Page 180
drops within a short time after replenishing, there may be a leak in the system. Visually check the radiator, hoses, radiator cap and drain cock and water pump. If you can find no leak, have your Toyota dealer test the cap pressure and check for leaks in the cooling system. Coolant type selection - 1996 Toyota Previa | Owners Manual - Page 181
, visually check the steering box case, vane pump and hose connections for leaks or damage. ! CAUTION Take care when filling the reservoir because brake fluid can ). You may also check the level when the fluid is cold (about room temperature, 10_C-30 _C or 50_F-85 _F) if the engine has not been run - 1996 Toyota Previa | Owners Manual - Page 182
produces a harsh ride, handling problems, excessive wear at the center of the tire tread, and a greater possibility of tire damage from road hazards. If a tire frequently needs refilling, have it checked by your Toyota dealer. The following instructions for checking tire pressure should be observed - 1996 Toyota Previa | Owners Manual - Page 183
belted, or bias-ply tires on your vehicle. It can cause dangerous handling characteristics, resulting in loss of control. Toyota recommends all four tires, or at least both of the front or rear tires be replaced at a time as a set. See "If you have a flat tire" in Part 4 for tire change procedure - 1996 Toyota Previa | Owners Manual - Page 184
All-Trac/4WD models or approximately every 12000 km (7500 miles) for others. However, the most appropriate timing for tire rotation may vary according to your driving habits and road surface conditions. See "If you have a flat tire" in Part 4 for tire change procedure. When rotating tires, check for - 1996 Toyota Previa | Owners Manual - Page 185
traction than snow tires. SNOW TIRE SELECTION If you need snow tires, select the same size, construction and load capacity as the original tires on your Toyota. Do not use tires other than those mentioned above. Do not install studded tires without first checking local regulations for possible - 1996 Toyota Previa | Owners Manual - Page 186
at your Toyota dealer. A wheel of a different size or type may adversely affect handling, wheel and bearing life, brake cooling, speedometer/ odometer calibration, stopping ability, headlight aim, bumper height, vehicle ground clearance, and tire or snow chain clearance to the body and chassis - 1996 Toyota Previa | Owners Manual - Page 187
Before storing radial, snow or studded tires, mark the direction of rotation and be sure to install in the same direction when replacing. Turning direction indicator means "L" mark is for the left-side wheel or "R" mark is for the right-side wheel. 181 - 1996 Toyota Previa | Owners Manual - Page 188
182 - 1996 Toyota Previa | Owners Manual - Page 189
S S S Checking battery condition Battery recharging precautions Checking and replacing fuses Checking the circuit breaker Adding washer fluid Replacing light bulbs Checking battery condition- -Precautions ! CAUTION BATTERY PRECAUTIONS The battery produces flammable and explosive hydrogen gas. S Do - 1996 Toyota Previa | Owners Manual - Page 190
exterior NOTICE zBe sure the engine and all accessories are off before performing maintenance. zWhen checking the battery, remove the ground cable from the negative terminal ("-" mark) first and reinstall it last. zBe careful not to cause a short circuit with tools. zTake care - 1996 Toyota Previa | Owners Manual - Page 191
color Type A GREEN DARK CLEAR or LIGHT YELLOW Type B BLUE WHITE Condition Good Charging necessary. Have battery checked by your Toyota dealer. Have battery checked by your Toyota dealer. RED NOTICE CHECKING BY THE FLUID LEVEL LINES (MAINTENANCE TYPE BATTERY ONLY) The fluid (electrolyte) level must - 1996 Toyota Previa | Owners Manual - Page 192
fluid. If the side of your battery is covered, check the water level by looking down directly above the cell as illustrated above. 3. Retighten the vent plugs securely. NOTICE Never recharge the battery while the engine is running. Also, be sure all accessories are turned off. ! CAUTION S Always - 1996 Toyota Previa | Owners Manual - Page 193
vehicle for emergencies. If the new fuse immediately blows out, there is a problem with the electrical system. Have your Toyota dealer correct it as soon as possible. If the headlights or other electrical components do not work, check the fuses. If any of the fuses are blown, they must be replaced - 1996 Toyota Previa | Owners Manual - Page 194
event that the environmental control system or air conditioning system does not operate, check the circuit breaker (C.B). See "Fuse and circuit breaker locations" Toyota dealer and most auto parts stores. Follow the manufacturer's directions for how much to mix with water. NOTICE Do not use engine - 1996 Toyota Previa | Owners Manual - Page 195
bulbs have pressurized gas inside and require special handling. They can burst or shatter if scratched or dropped. Hold a bulb only by its plastic or metal case. Do not touch the glass part of a bulb with bare hands. NOTICE Only use a bulb of the listed type. Light Bulbs Headlights Front fog lights - 1996 Toyota Previa | Owners Manual - Page 196
spring and remove the bulb. Install a new bulb and the bulb retaining spring. To install a bulb, align the tabs of the bulb with the cutout of the mounting hole. 4. Install the rubber cover and snuggle on the boss. Make sure the rubber cover fits snugly on the connector and the headlight body. 190 - 1996 Toyota Previa | Owners Manual - Page 197
adjustment is necessary, contact your Toyota dealer. 1. LEFT SIDE FRONT FOG LIGHT -Remove the air inlet duct. 2. Turn the cover counterclockwise, remove it and disconnect the cords. Before replacement, make sure both the front fog light switch and the headlight switch are off. If the connector - 1996 Toyota Previa | Owners Manual - Page 198
install a bulb, align the cutouts of the bulb with the protrusions of the mounting hole. 4. Connect the cords and install the cover by turning it clockwise. Make sure the cover fits snugly on the mounting body. LEFT SIDE FRONT FOG LIGHT-Install the air inlet duct. Use a Phillips-head screwdriver - 1996 Toyota Previa | Owners Manual - Page 199
-Stop and tail, and rear side marker lights, and rear turn signal lights Use a Phillips-head screwdriver. a: Stop and tail, and rear side marker light b: Rear turn signal light 193 - 1996 Toyota Previa | Owners Manual - Page 200
-Stop and tail, and back-up lights Use a wrench. Remove and install the cover clips as shown in the following illustrations. a: Stop and tail light b: Back-up light 194 - 1996 Toyota Previa | Owners Manual - Page 201
-License plate lights -High mounted stoplight (type A) Use a Phillips-head screwdriver. Remove and install the cover clip as shown in the following illustrations. 195 - 1996 Toyota Previa | Owners Manual - Page 202
-High mounted stoplight (type B) Remove and install the cover clip as shown in the following illustrations. 196 - 1996 Toyota Previa | Owners Manual - Page 203
197 - 1996 Toyota Previa | Owners Manual - Page 204
198 - 1996 Toyota Previa | Owners Manual - Page 205
Part 8 SPECIFICATIONS S S S S S S Dimensions and weight Engine Fuel Service specifications Tires Fuses and circuit breaker Dimensions and weight mm (in.) 4750 (187) mm (in.) 1800 (70.9) mm (in.) 1775 (69.9)*1*4 1745 (68.7)*2*4 1755 (69.1)*3 Wheelbase mm (in.) 2865 (112.8) Front tread mm (in.) - 1996 Toyota Previa | Owners Manual - Page 206
), lbf: Generator and power steering pump belt 125 ± 10 Air conditioning compressor belt 100 ± 20 Supercharger belt 125 ± 10 ENGINE LUBRICATION Oil capacity (drain and refill), L (qt., Imp. qt.): With filter 5.8 (6.1, 5.1) Without filter 5.5 (5.8, 4.8) Reservoir tank oil capacity, L (qt., Imp. qt - 1996 Toyota Previa | Owners Manual - Page 207
checked 20 minutes after the key is removed with all the lights turned off Charging rates: Non-maintenance battery 5 A max. Maintenance type battery Quick charge 15 A max. Slow charge 5 A max. TRANSFER (All-Trac/4WD models) Oil (in.): 1.0 (0.04) Parking brake adjustment: 45 clicks Fluid type: SAE - 1996 Toyota Previa | Owners Manual - Page 208
Tires Tire size and pressure, and wheel size: Tire size P215/65R15 95H T145/80D16 Tire pressure kPa (kgf/cm2 or bar, psi) 240 (2.4, 35) 420 (4.2, 60) Wheel size 15 x 6JJ 16 x 4T Wheel nut torque, N⋅m (kgf⋅m, ft⋅lbf) 103 (10.5, 76) 202 - 1996 Toyota Previa | Owners Manual - Page 209
Fuses and circuit breaker 203 - 1996 Toyota Previa | Owners Manual - Page 210
22.ENGINE OIL 15 A: Engine oil autofeed system 23.RR-WIPER 15 A: Rear window wiper and washer 24.A/C 15 A: Air conditioning cooling system, cool box 25.ECU-IG 15 A: Cruise control system, electronically controlled automatic transmission system, anti-lock brake system, theft deterrent system 26 - 1996 Toyota Previa | Owners Manual - Page 211
warning light, emission control system, multiport fuel injection system/ sequential multiport fuel injection system Fuses (type B) 31.DOOR 30 A: Power door lock system, theft deterrent system 32.POWER 30 A: Electric rear sun roof, power windows Fuses (type C) 33.ABS 60 A: Anti-lock brake system 34 - 1996 Toyota Previa | Owners Manual - Page 212
206 - 1996 Toyota Previa | Owners Manual - Page 213
rate of the tire when tested under controlled conditions on a specified government test course. For example, a tire graded 150 would wear one and a half (1-1/2) times as well on the government course as a tire graded 100. The relative performance of tires depends upon the actual conditions of their - 1996 Toyota Previa | Owners Manual - Page 214
as measured under controlled conditions on specified government test surfaces of asphalt and concrete. A tire marked C may have poor traction performance. Warning: The traction grade assigned to this tire is based on braking (straight ahead) traction tests and does not include cornering (turning