3Com 3C905-TX Installation Guide - Page 13
C:\i386 - windows 7 driver
 |
View all 3Com 3C905-TX manuals
Add to My Manuals
Save this manual to your list of manuals |
Page 13 highlights
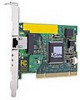
CAUTION HP 10/100 3Com 3C905B-TX Network Interface Card Installation Guide Software Installation Procedure 6 When prompted to start searching for a network adapter, click on Select from List... 7 In the Select Network Adapter window, click on Have Disk... 8 Insert EtherDisk® diskette #1 in your drive and type A:\ at the prompt, then press ENTER. 9 In the OEM Option window, highlight 3Com Fast Etherlink/Etherlink XL PCI BusMaster NIC and click on OK, then click on Next. If you are in the Network control panel window, click on Close and follow the instructions from step 14 onwards. 10 Select the Network Protocols that are used by your LAN and click on Next. 11 Select the Network Services that should be used by your PC when connected to your LAN and click on Next. 12 Click on Next to begin the software installation with the settings you have provided. 13 Follow the onscreen instructions, if you are prompted for network information, enter the information supplied by your MIS department. 14 Enter the location of the Windows NT 4.0 files (CAB files) when prompted, then click on OK. On HP Windows NT 4.0 preloaded systems, the path is C:\i386. 15 When prompted to reboot, remove your driver diskette and click on Yes. The driver and network software installation is complete. If a service pack was already installed on the PC before the network interface card was installed, the service pack must be reinstalled. This will overcome the At Least One Service Failed to Start error when Windows NT is started. On some platforms you also need to reinstall certain drivers after installing the Service Pack. Refer to your PC documentation for more information. English 13
-
 1
1 -
2
-
3
-
4
-
5
-
6
-
7
-
 8
8 -
 9
9 -
 10
10 -
 11
11 -
 12
12 -
 13
13 -
 14
14 -
 15
15 -
 16
16 -
 17
17 -
 18
18 -
19
-
20
-
21
-
22
-
23
-
24
-
25
-
26
 |
 |
