3M DB565 Safety Guide - Page 5
Installation - digital board
 |
View all 3M DB565 manuals
Add to My Manuals
Save this manual to your list of manuals |
Page 5 highlights
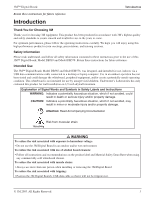
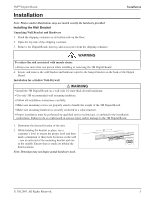
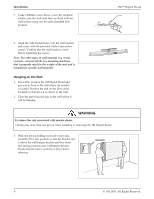
3M™ Digital Board Installation Note: Photos and/or illustrations may not match exactly the hardware provided. Installing the Wall Bracket Unpacking Wall Bracket and Hardware 1. Stand the shipping container on its bottom side on the floor. 2. Open the top side of the shipping container. 3. Remove the Digital Board, pen tray and accessories from the shipping container. Installation WARNING To reduce the risk associated with muscle strain: • Always use more than one person when installing or removing the 3M Digital Board 4. Locate and remove the wall bracket and hardware taped to the hanger bracket on the back of the Digital Board. Installation for a Hollow Wall-Drywall WARNING • Install the 3M Digital Board on a wall with 1/2-inch-thick drywall minimum. • Use only 3M recommended wall mounting hardware. • Follow all installation instructions carefully. • Make sure mounting screws are properly sized to handle the weight of the 3M Digital Board. • Make sure mounting hardware is securely anchored to a solid structure. • Proper installation must be performed by qualified service technicians, as outlined in the installation instructions. Failure to do so could result in serious injury and/or damage to the 3M Digital Board. 1. Determine the desired location of the unit. 2. While holding the bracket in place, use a carpenter's level to ensure the proper level and then mark a minimum of three hole locations on the wall - one at each end of the mounting bracket and one in the middle. Ensure that no studs are behind the hole locations. Note: Drawings may not depict actual hardware used. © 3M 2005. All Rights Reserved. 5
-
 1
1 -
 2
2 -
 3
3 -
 4
4 -
 5
5 -
 6
6 -
 7
7 -
 8
8
 |
 |
