3M DB565 Safety Guide - Page 6
Warning - drivers
 |
View all 3M DB565 manuals
Add to My Manuals
Save this manual to your list of manuals |
Page 6 highlights
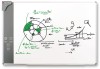
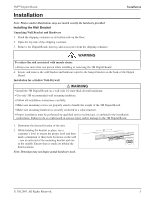
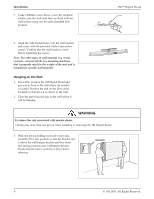
Installation 3. Using a Phillips screw driver, screw the supplied anchors into the wall until they are flush with the wall surface using one for each identified hole location. 3M™ Digital Board 4. Align the wall bracket holes over the wall anchors and secure with the provided washer and anchor screws. Confirm that the wall bracket is level before tightening the screws. Note: For other types of wall material (e.g. wood, concrete, concrete block) use mounting hardware that is properly rated for the weight of the unit and is intended for specific wall material. Hanging on the Wall 1. If possible, position the 3M Digital Board and pen tray in front of the wall where the bracket is located. Position the unit on the floor on its backside so that the top is closest to the wall. 2. Clear the path from the unit to the wall where it will be hanging. WARNING To reduce the risk associated with muscle strain: • Always use more than one person when installing or removing the 3M Digital Board 3. With one person holding each side of the unit, carefully lift it into position so that the bracket slot is above the wall hanger bracket and then lower into mating position onto wall hanger bracket. Ensure that the unit is securely in place before releasing. 6 © 3M 2005. All Rights Reserved.
-
 1
1 -
 2
2 -
 3
3 -
 4
4 -
 5
5 -
 6
6 -
 7
7 -
 8
8
 |
 |
