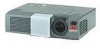
3M MP8747 Operation Guide
3M MP8747 - MP SXGA LCD Projector Manual
 |
View all 3M MP8747 manuals
Add to My Manuals
Save this manual to your list of manuals |
3M MP8747 manual content summary:
- 3M MP8747 | Operation Guide - Page 1
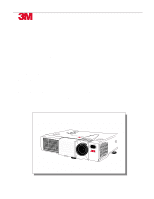
MP8746/MP8747 Personal Projector Operator's Guide MP8746/MP8747 Projecteur personnel Guide de l'opérateur MP8746/MP8747 Personal Projektor - Benutzerhandbuch MP8746/MP8747 Guía del usuario del proyector personal MP8746/MP8747 Guida dell'operatore per il Proiettore personale MP8746/MP8747 - 3M MP8747 | Operation Guide - Page 2
(This page intentionally left blank for printed version.) 2 3M™ Personal Projector MP8746/MP8747 © 3M IPC 2000 - 3M MP8747 | Operation Guide - Page 3
7: Troubleshooting Symptoms/Solutions Table 27 Messages/Solutions Table 28 Indicator Lights Table 29 Service Information 30 Section 8: Accessories 30 The Technical Appendix is in English only. Please click here (on the CD-ROM) to read it. © 3M IPC 2000 3M™ Personal Projector MP8746/MP8747 3 - 3M MP8747 | Operation Guide - Page 4
manual thoroughly. The 3M™ Personal Projector MP8746/MP8747 was designed, built, and tested for use indoors, using 3M lamps, 3M ceiling mount hardware, and nominal local voltages. The use of other replacement lamps from electrical outlet before cleaning and servicing and when not in use. Grasp - 3M MP8747 | Operation Guide - Page 5
12 6 When replacing lamp, turn off and unplub unit, wait 45 minutes to let lamp cool. High-pressure lamp when hot, Instructions The information contained in this manual will help you operate and maintain your 3M™ MP8746/MP8747 Personal Projector. © 3M IPC 2000 3M™ Personal Projector MP8746/MP8747 - 3M MP8747 | Operation Guide - Page 6
. In the event this product is found to be defective within the warranty period, 3M's only obligation and your exclusive remedy shall be replacement of any defective parts (labor included). To obtain warranty service, immediately notify the dealer from which you purchased the product of any defects - 3M MP8747 | Operation Guide - Page 7
the event the MP8746/MP8747 should require shipping to a 3M Service Center for repair. What's Next? After you have unpacked the MP8746/MP8747 and identified all the parts, you are ready to set up the projector. Please read this guide thoroughly before operating your new projector. Be sure to check - 3M MP8747 | Operation Guide - Page 8
) projection lamp • XGA resolution (3 separate 1024 x 768 LCD panels are used for the R, G and B signals) • Intelligent SXGA, VGA, and SVGA scaling • Compact size, lightweight for portability • RGB (computer video) output terminal • Manual zoom and focus functions • 4x digital magnification • Easy - 3M MP8747 | Operation Guide - Page 9
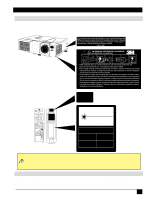
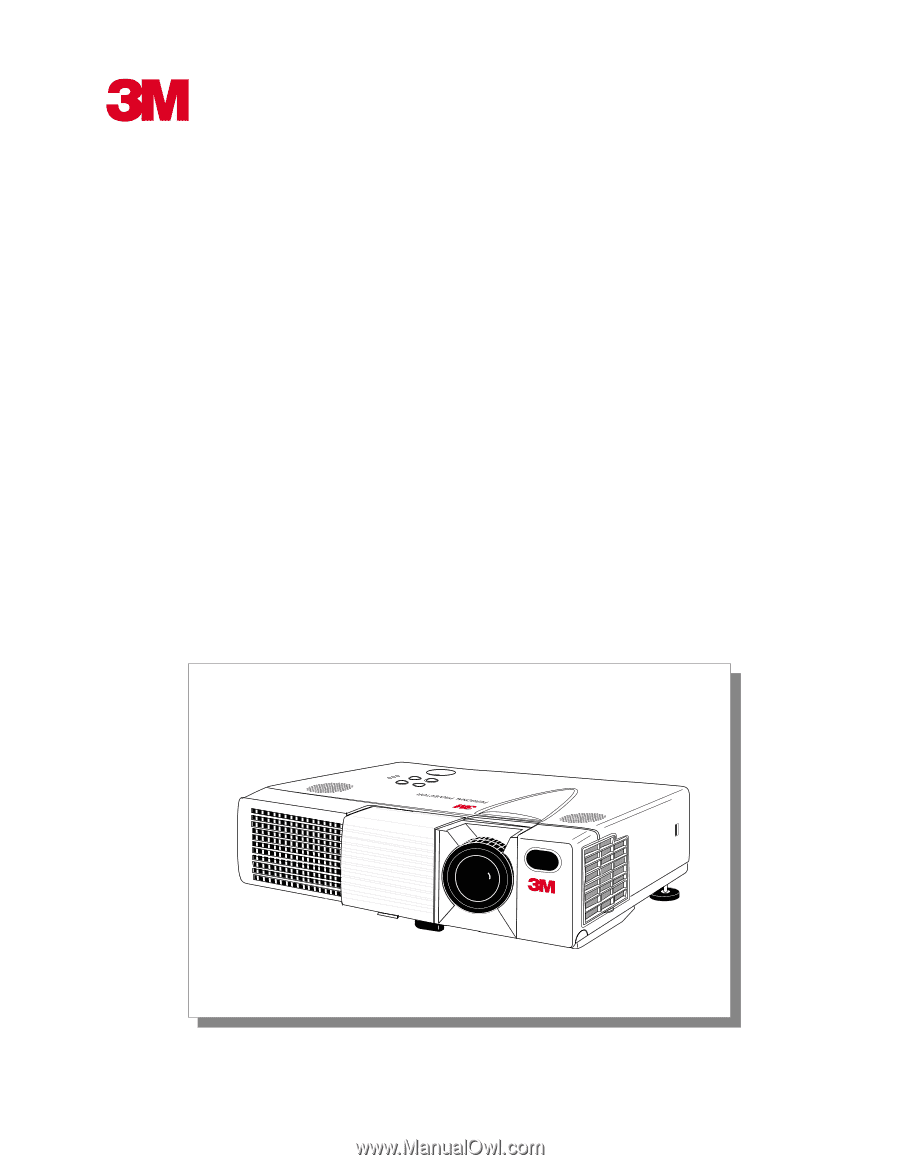
MP8747 Parts 1. Remote control transmitter 2. Control panel keypad (see below) a) STANDBY/ON button b) ON, LAMP on top of the projector. • Press the STANDBY/ON button to turn the projector off and on. on. • Press the RESET button to return the projector to its default settings. • Press the MENU DISK - 3M MP8747 | Operation Guide - Page 10
MP8746/MP8747 must be powered down when making connections. The mouse emulation may not work if the unit is not powered down before the mouse cable connections are made. • Do not use place projector on its side or tilt at an angle greater than 20°. 10 3M™ Personal Projector MP8746/MP8747 © 3M IPC - 3M MP8747 | Operation Guide - Page 11
information. Caution • Use only the cables which are included with the projector or are specified. • Incorrect connection could result in fire or electrical shock. • Please review this manual and its safety precautions before connecting. © 3M IPC 2000 3M™ Personal Projector MP8746/MP8747 11 - 3M MP8747 | Operation Guide - Page 12
/ON Press STANDBY/ON button to begin projection mode (lamp on) or press and hold button for one second to switch to standby mode (lamp off). STANDBY/ON VIDEO LASER BLANK RGB VIDEO and darker due to automatic adjustment of signal level. 12 3M™ Personal Projector MP8746/MP8747 © 3M IPC 2000 - 3M MP8747 | Operation Guide - Page 13
indicated and lift up to remove it. 3. Lift old batteries out of compartment. 4. Replace with two AA batteries. Make sure the positive (+) and negative (-) terminals are correctly IBM PS/2." USB mouse emulation is not supported in Windows™3.1. © 3M IPC 2000 3M™ Personal Projector MP8746/MP8747 13 - 3M MP8747 | Operation Guide - Page 14
. Restart the com puter after changing the BIOS setting. Refer to the computer manual for more information on this setting. • Some computers may not have the utility program to operate a mouse. Refer to the computer hardware manual. 14 3M™ Personal Projector MP8746/MP8747 © 3M IPC 2000 - 3M MP8747 | Operation Guide - Page 15
projector is dropped, take it to a service center for inspection and repair before using again. Using a dropped projector can cause malfunctions that could result in fire and electrical shock. • Do not swing or hang the projector by the handle. © 3M IPC 2000 3M™ Personal Projector MP8746/MP8747 - 3M MP8747 | Operation Guide - Page 16
projector. The ON indicator will light up orange. 3. Press the STANDBY/ON button . The ON indicator will blink green during warm-up and lamp . 6. Press the INPUT button on the projector or the INPUT SELECT (VIDEO or RGB) to Caution • cool the projector. If the projector is connected to a computer - 3M MP8747 | Operation Guide - Page 17
projector. Caution Do not unlock the foot adjuster if the projector is not supported 203.2 cm 332.7 cm 398.8 cm LAMP TEMP POWER (64 in.) (48 in Projector to Screen Calculator on the 3M web site (www.3m.com/meetings/screen/ a 7630_calc.html). © 3M IPC 2000 3M™ Personal Projector MP8746/MP8747 - 3M MP8747 | Operation Guide - Page 18
user to connect various peripheral equipment successfully without having to adjust settings manually. The equipment and projector exchange this information automatically. This projector is button may also operate as a mouse control button. 18 3M™ Personal Projector MP8746/MP8747 © 3M IPC 2000 - 3M MP8747 | Operation Guide - Page 19
item (Bright, Contrast...). 2. Press the RESET button. Only the selected item resets. SETUP INPUT BRIGHT CONTRAST SHARPNESS COLOR TINT COLOR BAL R COLOR BAL B IMAGE OPT. © 3M IPC 2000 3M™ Personal Projector MP8746/MP8747 Figure 4.5 Default Settings 19 - 3M MP8747 | Operation Guide - Page 20
the automatic sync function. The message "AUTO IN PROGRESS" will display for several seconds as the projector adjusts the V. POSIT, H.POSIT., H.PHASE, and H. SIZE settings. Auto Sync can also will cancel the Magnify and Freeze functions. 20. 3M™ Personal Projector MP8746/MP8747 © 3M IPC 2000 - 3M MP8747 | Operation Guide - Page 21
: vertical sync frequency Selects the VIDEO signal format Auto, NTSC, PAL, SECAM, NTSC 4.43, M-PAL, N-PAL Selects EXECUTE or CANCEL for Auto signal input detection. © 3M IPC 2000 3M™ Personal Projector MP8746/MP8747 21 - 3M MP8747 | Operation Guide - Page 22
Inverts the picture vertically. H&V: INVERT Inverts the picture horizontally and vertically. Enable / Disable startup screen. When canceled, the background color will change to blue. 22 3M™ Personal Projector MP8746/MP8747 © 3M IPC 2000 - 3M MP8747 | Operation Guide - Page 23
timer ( 0-15 minutes). Selects the language on-screen menu. (English, French, German, Spanish, Italian, Norwegian, Netherlands, Japanese, and Portuguese) Selects how long projector will stay on in minutes, if no input is detected. Select 0 to disable this function. Sets the SYNC on G function to ON - 3M MP8747 | Operation Guide - Page 24
projector may overheat and shut down automatically. Turn off the MAIN POWER SWITCH of the projector and pull out power cord. Let cool for 20 minutes. Vacuum dust and dirt from filter. If the filter cannot be cleaned and needs to be replaced the Projector Case not use projector without air - 3M MP8747 | Operation Guide - Page 25
on the remote while the lamp hours are displayed. The lamp hour reset message will display. Use the left-arrow button on the remote control or the Menu Disk Pad button on the projector to select 0, and wait until the timer display has cleared. © 3M IPC 2000 3M™ Personal Projector MP8746/MP8747 25 - 3M MP8747 | Operation Guide - Page 26
. Lamp Access Door Retaining Screws Lamp Module Retaining Screws Figure 6.1 Changing Lamp Module Retaining Wire Caution This lamp contains mercury. Consult your local hazardous waste regulations and dispose of this lamp in the proper manner. 26 3M™ Personal Projector MP8746/MP8747 © 3M IPC - 3M MP8747 | Operation Guide - Page 27
• Check and clean air filter. • Lamp access door on bottom of case is open. • The lamp usage has reached maximun operating hours. • Ensure lamp access door is closed. • Replace the lamp. • Cooling fan not operating. • Contact your dealer. © 3M IPC 2000 3M™ Personal Projector MP8746/MP8747 27 - 3M MP8747 | Operation Guide - Page 28
of input signal ON ** exceeds projector capability. Switch projector to correct resolution. See Appendix. CHANGE THE LAMP. AFTER REPLACING LAMP, RESET THE LAMP TIME. Nearing end of normal lamp operating time. Change the projector lamp and reset the lamp operation hours to zero. The message - 3M MP8747 | Operation Guide - Page 29
on power again. If indicator still lights, the lamp may have failed. Replace lamp. A lamp has not been inserted or the lamp cover is missing. Turn off projector, disconnect power and wait 45 minutes for projector and lamp to fully cool. Replace lamp and/or lamp cover door, then re-connect power and - 3M MP8747 | Operation Guide - Page 30
other rights that may arise out of the information contained in this manual. Reproduction of this manual in any form without prior permission is strictly prohibited. 3M will replace the manual if any pages are missing or collated incorrectly. 30 3M™ Personal Projector MP8746/MP8747 © 3M IPC 2000 - 3M MP8747 | Operation Guide - Page 31
Technical Appendix Dimension Diagram 228 mm (8.9 in.) K MENU STANDBY/ON MUTE INPUT RESET LAMP TEMP POWER 76 mm (2.9 in.) 298 mm (11.7 in.) 94.6 mm (3.7 in 76.5 mm (3.0 in.) 54 3 21 10 9 8 7 6 15 14 13 12 11 1 2 3 4 mini DIN 4-pin © 3M IPC 2000 3M™ Personal Projector MP8746/MP8747 31 - 3M MP8747 | Operation Guide - Page 32
Be sure to check jack type, signal level, timing and resolution before connecting this projector to a computer. • Depending on the input signal, full-size display may not be possible in some cases. Refer to the number of display pixels above. 32 3M™ Personal Projector MP8746/MP8747 © 3M IPC 2000 - 3M MP8747 | Operation Guide - Page 33
768 1 XGA (85Hz) 3 36 768 1 1152 x 864 (75Hz) 3 32 864 1 1280 x 960 (60Hz) 3 36 960 1 1280 x 1024 (60Hz) 3 38 1024 1 1280 x 1024 (75Hz) 3 38 1024 1 © 3M IPC 2000 3M™ Personal Projector MP8746/MP8747 33 - 3M MP8747 | Operation Guide - Page 34
read the instruction manuals of the manual for details. PS/2 Mouse CONTROL Terminal D-sub 15-pin shrink jack 54 3 21 10 9 8 7 6 15 14 13 12 11 34 Projector 1 CLK 2 DATA 3 4 5 SELO 6 RTS 7 8 +5V 9 GND 10 11 12 13 14 15 Computer 1 DATA 2 3 GND 4 +5V 5 CLK 6 3M™ Personal Projector MP8746/MP8747 - 3M MP8747 | Operation Guide - Page 35
7 RTS 8 CTS 9 RI Mouse jack Mini DIN 4-pin 4 3 2 1 Mouse jack D-sub 9-pin 1 23 45 67 89 USB Mouse USB jack (B type) 21 34 © 3M IPC 2000 Projector +5V 1 -DATA 2 +DATA 3 GND 4 Computer 1 +5V 2 -DATA 3 +DATA 4 GND USB Cable 3M™ Personal Projector MP8746/MP8747 USB jack (A type) 1 23 4 35 - 3M MP8747 | Operation Guide - Page 36
Setting Code low high Action 1 2 4 5 6 Classification SET GET INCREMENT DECREMENT EXECUTE Content Change setting to desired value. Read projector internal setup value. Increment setup value by 1 Decrement setup value by 1 Run a command. 36 3M™ Personal Projector MP8746/MP8747 © 3M IPC 2000 - 3M MP8747 | Operation Guide - Page 37
Provide an interval of at least 40µs between the response code and any other code. • The projector outputs test data when the power supply is switched ON, and when the lamp is lit. Ignore this data. • Commands are not accepted during warm-up. © 3M IPC 2000 3M™ Personal Projector MP8746/MP8747 37 - 3M MP8747 | Operation Guide - Page 38
05 30 04 00 05 30 05 00 05 30 06 00 05 30 07 00 05 30 08 00 05 30 00 00 38 3M™ Personal Projector MP8746/MP8747 © 3M IPC 2000 - 3M MP8747 | Operation Guide - Page 39
D9 D8 02 00 20 60 off Set (Example of Return) on 00 00 01 00 02 00 03 00 (Normal) (Cover-error) (Fan-error) (Lamp-error) Get 04 00 05 00 06 00 (Temp-error) (Air flow-error) (Lamp-Time-over) 00 00 © 3M IPC 2000 3M™ Personal Projector MP8746/MP8747 39 - 3M MP8747 | Operation Guide - Page 40
08 20 02 00 08 20 00 00 09 20 00 00 09 20 01 00 09 20 02 00 09 20 00 00 40 3M™ Personal Projector MP8746/MP8747 © 3M IPC 2000 - 3M MP8747 | Operation Guide - Page 41
00 00 22 05 00 00 22 09 00 00 22 02 00 00 22 08 00 00 22 07 00 00 22 00 00 © 3M IPC 2000 3M™ Personal Projector MP8746/MP8747 41 - 3M MP8747 | Operation Guide - Page 42
(This page intentionally left blank for printed version.) 42 3M™ Personal Projector MP8746/MP8747 © 3M IPC 2000 - 3M MP8747 | Operation Guide - Page 43
within the warranty period stated above, your exclusive remedy shall be, at 3M's option, to replace or repair the 3M product or refund the purchase price of the 3M product. Limitation of Liability. Except where prohibited by law, 3M will not be liable for any loss or damage arising from this - 3M MP8747 | Operation Guide - Page 44
-
 1
1 -
 2
2 -
 3
3 -
 4
4 -
 5
5 -
 6
6 -
 7
7 -
8
-
9
-
10
-
11
-
12
-
13
-
14
-
15
-
16
-
17
-
18
-
19
-
20
-
21
-
22
-
23
-
24
-
25
-
26
-
27
-
28
-
29
-
30
-
31
-
32
-
33
-
34
-
35
-
36
-
37
-
38
-
39
-
40
-
41
-
42
-
43
-
44
 |
 |
MP8746/MP8747
Personal Projector
Operator’s Guide
MP8746/MP8747 Projecteur personnel Guide de l’opérateur
MP8746/MP8747 Personal Projektor - Benutzerhandbuch
MP8746/MP8747 Guía del usuario del proyector personal
MP8746/MP8747 Guida dell’operatore per il Proiettore personale
MP8746/MP8747 Bruksanvisning för Personlig projektor
MP8746/MP8747 Personal Projector – gebruiksaanwijzing