3M MP8747 Operation Guide - Page 16
Basic Operations
 |
View all 3M MP8747 manuals
Add to My Manuals
Save this manual to your list of manuals |
Page 16 highlights
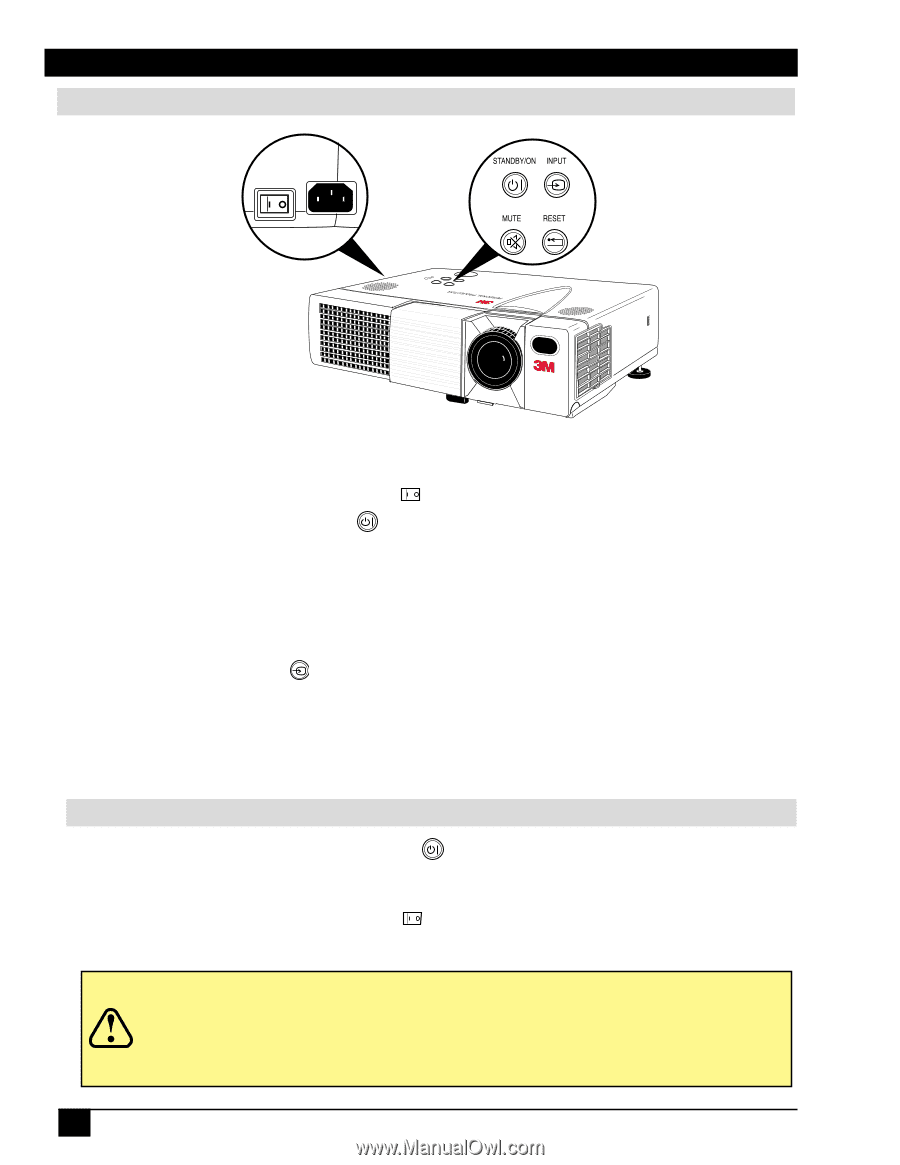
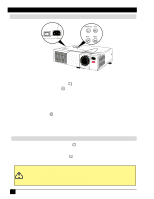
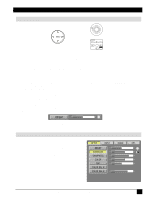
Section 3: Basic Operations Projector Start-up STANDBY/ON INPUT MUTE RESET Figure 3.1 Projector Controls 1. Make all equipment and cable connections with the power off. 2. Turn on the MAIN POWER SWITCH of the projector. The ON indicator will light up orange. 3. Press the STANDBY/ON button . The ON indicator will blink green during warm-up and lamp ignition, then stay green to indicate correct operation. When power is turned off, there is a 60-second reset period before the STANDBY/ON button will function again. 4. Turn on all connected equipment. (Refer to "System Set-up-Connecting to Various Equipment," page 10.) 5. Open sliding lens door. 6. Press the INPUT button on the projector or the INPUT SELECT (VIDEO or RGB) button on the remote control transmitter to select the source of the signal to be projected on the screen. The selected signal input is displayed at the bottom right of the screen. The display will show the last selected input source before power was turned off. 7. Adjust picture size using the projection lens Zoom knob. Adjust focus using the projection lens Focus ring. Projector Shutdown 1. Press and hold the STANDBY/ON button for approximately two seconds. The ON indicator blinks orange and the lamp turns off. After approximately one minute, the fan stops and the indicator stays orange. 2. Turn off the MAIN POWER SWITCH. 3. Close the sliding lens door. • Do not turn off the POWER SWITCH before pressing the STANDBY/ON button. After the STANDBY/ON button is pressed, the fan rotates for about one minute to Caution • cool the projector. If the projector is connected to a computer or video device, turn computer or video device off before turning the projectr on or off. • If using RS-232C connection, turn on the computer before turning on the projector. 16 3M™ Personal Projector MP8746/MP8747 © 3M IPC 2000
-
 1
1 -
2
-
3
-
4
-
5
-
6
-
7
-
8
-
9
-
10
-
 11
11 -
 12
12 -
 13
13 -
 14
14 -
 15
15 -
 16
16 -
 17
17 -
 18
18 -
 19
19 -
 20
20 -
 21
21 -
22
-
23
-
24
-
25
-
26
-
27
-
28
-
29
-
30
-
31
-
32
-
33
-
34
-
35
-
36
-
37
-
38
-
39
-
40
-
41
-
42
-
43
-
44
 |
 |