3Ware 9690SA-4I4E-SGL Installation Guide - Page 24
Installing the Remote Battery, Save the screws; they will be used to secure the remote battery
 |
UPC - 693494500448
View all 3Ware 9690SA-4I4E-SGL manuals
Add to My Manuals
Save this manual to your list of manuals |
Page 24 highlights
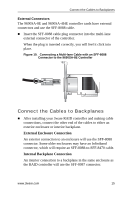
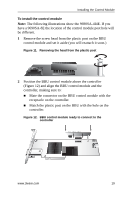
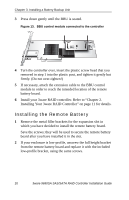
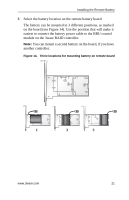
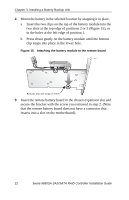
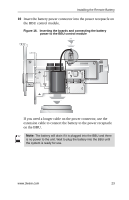
Chapter 3. Installing a Battery Backup Unit 3 Press down gently until the BBU is seated. Figure 13. BBU control module connected to the controller 4 Turn the controller over, insert the plastic screw head that you removed in step 1 into the plastic post, and tighten it gently but firmly. (Do not over-tighten!) 5 If necessary, attach the extension cable to the BBU control module in order to reach the intended location of the remote battery board. 6 Install your 3ware RAID controller. Refer to "Chapter 2. Installing Your 3ware RAID Controller" on page 11 for details. Installing the Remote Battery 1 Remove the metal filler brackets for the expansion slot in which you have decided to install the remote battery board. Save the screws; they will be used to secure the remote battery board after you have installed it in the slot. 2 If your enclosure is low-profile, unscrew the full height bracket from the remote battery board and replace it with the included low-profile bracket, using the same screws. 20 3ware 9690SA SAS/SATA RAID Controller Installation Guide
-
 1
1 -
2
-
3
-
4
-
5
-
6
-
7
-
8
-
9
-
10
-
11
-
12
-
13
-
14
-
15
-
16
-
17
-
18
-
 19
19 -
 20
20 -
 21
21 -
 22
22 -
 23
23 -
 24
24 -
 25
25 -
 26
26 -
 27
27 -
 28
28 -
 29
29 -
30
-
31
 |
 |
