AEG T65170AV Product Manual - Page 22
The Vent Hose, Installation
 |
View all AEG T65170AV manuals
Add to My Manuals
Save this manual to your list of manuals |
Page 22 highlights
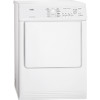
22 THE VENT HOSE INSTALLATION There are 3 vent outlets: on the left, right side and at the rear. 1. Pull the ring nut A from the vent outlet at the rear. 2. Screw on the ring nut to the hose and push it into position. Make sure that the vent hose length is less than 2 m, and that it contains no more than 2 bends. As to the outlet itself, if you have decided on a install wall/window grille, a good local builder's merchant can supply you with the necessary fittings and installation advice. WARNING! It is important not to connect the vent hose to, for example, a cooker hood, or a chimney or flue pipe designed to transmit the exhaust from a fuel burning appliance. 3. The not used vents must be sealed with supplied covers. If the hose is long and the room temperature low, the moisture might condense to water inside the hose. This is an usual occurrence. To prevent this water from the hose, it is recommend to drill a small hole (via. 3 mm) in the lowest point of the hose and to put a small container below it. (See picture, point B). Note that to prevent condensation problems, it is essential that the dryer be installed with the flexible hose to transmit its "exhaust" at least beyond the kitchen units; preferable outside the kitchen. In order to prevent the appliance from overheating, it is important
-
 1
1 -
2
-
3
-
4
-
5
-
6
-
7
-
8
-
9
-
10
-
11
-
12
-
13
-
14
-
15
-
16
-
 17
17 -
 18
18 -
 19
19 -
 20
20 -
 21
21 -
 22
22 -
 23
23 -
 24
24 -
 25
25 -
 26
26 -
 27
27 -
28
 |
 |
